Saturday, August 31, 2019

browserfruits 35.2019

10:08:00 PM

Ich hoffe, Ihr hattet einen schönen Urlaub. Vielleicht habt Ihr auf Eurer Reise auch einige Fotos gemacht? Wir freuen uns immer über Reiseberichte und Dokumentationen aus aller Welt. Bisherige Artikel findet Ihr auch auf unserer Landkarte. Vielleicht entdeckt Ihr dort ja auch Anregungen für Euren nächsten Urlaub?


Linktipps

• Vlad Moldovean beschreibt auf PetaPixel, wie man – ein passendes Smartphone vorausgesetzt – ziemlich günstig sogar mit dem Handy Infrarotfotografie betreiben kann. → ansehen

• Der französisch-venezulanische Fotograf Mathieu Asselin arbeitete fünf Jahre lang in den USA sowie in Vietnam, um sein mehrfach ausgezeichnetes Werk „Monsanto. A Photographic Investigation“ fertigzustellen. In seinem Shop gibt’s das Buch jetzt als kostenlosen digitalen Download. → ansehen

• Anlässlich einer Ausstellung in Newcastle zeigt Ankerherz einige Arbeiten von Chris Killip, der das Leben der Menschen in Werftarbeiterstädten im Norden Englands in den 1970er Jahren dokumentierte. → ansehen

• „404“ ist nicht nur der HTTP-Statuscode für einen defekten Link, sondern tatsächlich auch der Name einer chinesischen Stadt, in der Li Yang geboren wurde. Seit 2005 ist die Stadt verlassen – der Fotograf kehrte zurück und dokumentierte sie. → ansehen

• Alvin Baltrop fotografierte in den 70er Jahren das queere Leben in Manhattan. Nachdem seine Arbeit für fast 40 Jahre kaum Anerkennung erhielt, soll sich das nun mit einer Ausstellung ändern. → ansehen

• MyModernMet stellt die faszinierenden Schwarzweißfotos von Christian Vizl vor, der seit 30 Jahren die Unterwasserwelt fotografiert. Zur Bildstrecke gibt’s auch ein Interview. → ansehen

• Die tschechische Fotografin Markéta Luskačová besuchte in den späten 70er Jahren die raue Küstengegend Nordenglands und hielt das Leben und die Leute dort in Schwarzweißbildern fest, die nach 20 Jahren endlich wiederentdeckt werden. → ansehen

• „Du surfst ja wie ein Mädchen!“ – So hat sicherlich alles angefangen, aber Carolina Amell hat sich den Vorwurf ganz einfach angeeignet und gibt unter dem Titel „Surf Like a Girl“ nun ein Buch mit Profilen und tollen Fotos von 30 Surferinnen heraus. Creative Boom hat die Bildstrecke dazu. → ansehen

• Sean Lewis stellt in einem Beitrag auf SLR Lounge die beeindruckenden Sturmfotos von Elisabeth Brentano und Kelley DeLay vor – die übrigens mit viel Geduld entstehen und die beiden nur selten in echte Gefahr bringen. → ansehen

• VICE zeigt die Arbeiten von Jean-Michel Landon, der Sozialarbeiter ist und den Alltag am Pariser Stadtrand fotografiert, und kredenzt dazu auch ein ausführliches Interview mit dem Fotografen. → ansehen


Buchempfehlungen

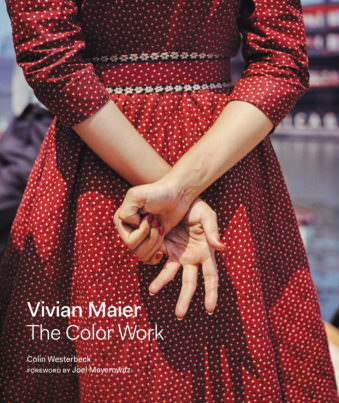
„Vivian Maier: The Color Work“ : Nach der Entdeckung des Archivs von Vivian Maier wurden vor allem ihre Schwarzweißaufnahmen bekannt. Dieses Buch ist die bislang größte Sammlung von Maiers Farbfotos. Erschienen ist es im Verlag Harper Design und kostet 48,99 €.

„Girls and Their Cats“ : Für die New Yorker Fotografin BriAnne Wills ist die „Crazy Cat Lady“ ein Mythos. Das Buch definiert das Klischee neu, indem es 50 starke, unabhängige und künstlerische Frauen vorstellt, die die Welt in Angriff nehmen und von ihren geliebten Katzen flankiert werden. Erschienen ist das Buch im Verlag Abrams & Chronicle Books und kostet 19,80 €.


Ausstellungen

GREENPEACE PHOTO AWARD
Zeit: 28. August – 3. November 2019
Ort: f³ – freiraum für fotografie, Waldemarstr. 17, 10179 Berlin

Das Meer
Zeit: 29. August – 6. Oktober 2019
Ort: GAF Galerie für Fotografie, Seilerstr. 15 D, 30169 Hannover

Jeffrey Ladd: The awful german language
Zeit: 30. August – 6. Oktober 2019
Ort: Fotoraum Köln, Herderstr. 88, 50935 Köln

Werner Bischof
Zeit: 30. August – 17. November 2019
Ort: Leica Galerie, Gerichtsgasse 9a, 78462 Konstanz


Drüben auf Instagram

@martyvazquez01 – Unsere heutige Empfehlung führt uns nach Mexiko, wo Marty Vazquez auf den Straßen fotografiert.


Videos

Jamie Windsor meint, man sollte Nostalgie in der Fotografie nicht mit tatsächlich emotionalen Inhalten verwechseln und daher lieber direkt vermeiden.


Tony Lucianis Mutter Elia zog wieder bei ihm ein, als sie wegen fortgeschittener Demenz nicht mehr allein leben konnte. Daraus hat sich ein gemeinsames Fotoprojekt entwickelt.


Das Titelbild kommt von Brooke Lark. Vielen Dank!


kwerfeldein – Magazin für Fotografie https://ift.tt/2ZDHLmZ

Sourced by Time Trap Photography sharing the best photography tips, news and tricks throughout the industry. Time Trap Photography is dedicated to freezing those special moments in life that can be revisited and admired for generations to come. - Shannon Bourque
Please visit our main site for booking availability and rates.


"Time


Receive valuable industry knowledge delivered free to your email each day.


"Time

31. August 2019

4:03:00 AM

Das Bild des Tages von: Geerd-Olaf Freyer


kwerfeldein – Magazin für Fotografie https://ift.tt/2HCl9wM

Sourced by Time Trap Photography sharing the best photography tips, news and tricks throughout the industry. Time Trap Photography is dedicated to freezing those special moments in life that can be revisited and admired for generations to come. - Shannon Bourque
Please visit our main site for booking availability and rates.


"Time


Receive valuable industry knowledge delivered free to your email each day.


"Time

Friday, August 30, 2019

How to Choose the Correct ISO Setting for Your Shot

8:02:00 AM

First published June 2010

Co-authored by Dahlia Ambrose

  • Claim Your Free Camera Craft Cheat Sheet

Print it out and keep it for when you really need it - when you're out shooting!

ISO can be confusing, especially to everyone just starting out in photography. To put it simply, the ISO setting in your camera affects how sensitive the sensor is to light.

If you love mathematics, you can immerse yourself in the technical information on Wikipedia – it is quite good.  But, we won't be delving into the maths here. In this article, we will focus more on choosing the right ISO setting for your specific shot. 

The correct ISO can make your photo; the wrong ISO can ruin it.

ISO on most cameras starts at 100, some cameras begin at 50, but the lower the number, the less sensitive to light, the higher the number, the more sensitive.  While that seems pretty straight forward, there is a price to pay as you go higher in the ISO settings, digital noise. 

Something to remember is that High ISO film has visible grain, and this may be somewhat desirable for photographers.  On the whole, digital noise, the equivalent to grain for digital photographers is not a welcome addition to photographs.


Unlike most settings in your camera, like shutter speed and aperture, changing the ISO probably won't be noticeable when you review images on the LCD.  The digital noise will show up when you view and edit your photos on a computer. Ideally, you want the lowest ISO setting possible for the least amount of noise, but in any given lighting situation that's not always an option.

What is ISO on a Camera?

ISO denotes film or an image sensor's ability to capture light and is a factor that helps with taking well-exposed images. It is a measure of the camera's ability to capture light, whether darker or brighter depending on the value you choose.

For example, you can check this on your camera – increasing or decreasing the ISO value, keeping other factors constant can make the image brighter or darker. It is one of the factors that affect exposure (besides aperture and shutter speed) in an image if you know and understand the exposure triangle. 

When it comes to film, ISO is an indication of the light sensitivity of the film. Film is coated in light-sensitive layers of silver halide crystals. The larger the crystals, the more light-sensitive and therefore quicker the film – but this, in turn, means more grain. Finer crystals mean lower sensitivity to light and, as such, less grain. A lower ISO film will have virtually unnoticeable grain. 

ISO is somewhat different in digital cameras; here, the light that falls on the sensor is converted into electrical signals for processing. So increasing the ISO value will amplify the signal. The lower the ISO, the less digital amplification which means, less boosting of the light leading to minimal digital noise. With an increase in ISO, the amplification increases and, as a result, this causes more noise that can, at higher values, degrade image quality.

So you should only increase the ISO in situations where you cannot increase the exposure via aperture and/or shutter speed.

What is the Purpose of ISO?

The purpose of ISO is to get the exposure right for sharp and creative photography.

For example, by increasing the ISO for a given scenario, you can:

  1. achieve faster shutter speeds to freeze motion,
  2. gain a larger or deeper depth of field to get more of the scene in focus,
  3. shoot handheld in lowlight conditions,

But, you may have to compromise on image quality when you choose higher ISO values such as:

  1. loss of dynamic range,
  2. increased noise 
  3. colour degradation

ISO decreases or increases the brightness of a photograph, depending on the value we choose.

How to Choose ISO?

ISO  is helpful when you are shooting at different lighting conditions more importantly in low light. Increasing the ISO will also introduce noise in your images – the higher the ISO, the higher the noise with a corresponding decrease in image quality.

Digital cameras perform well at low ISO values, produce accurate colours, smooth images and sharp details. Shooting at low ISO values is only possible if there is enough light to compensate or when you are taking long-exposure photographs. But, when you want to shoot wildlife, sports and other fast-moving subjects, or if you have low light conditions, you will need a faster shutter speed. This is when you will want to increase your ISO to have a faster shutter speed for correct exposure so you can eliminate blur due to movements. 

So how should you choose ISO values? Here are some suggestions for handheld shooting without a flash. Each camera performs differently at higher ISO values, so test your camera before using high ISO values.

  • When you are shooting in bright light, you have a lot of light available so choose lower or the lowest ISO value. Stay between 100 to a maximum of 200
  • When shooting landscapes or long exposures during the day, shoot at ISO 100 or below depending on the native ISO values available. You can choose a low ISO because you will have your camera on a tripod. The low ISO value will ensure that when you print your images, they will look great at any size. 
  • Even on a bright day, you may need to increase the ISO to about 200 to 400 sometimes to shoot with the correct shutter speed for sharp images. Scenarios would include shooting in the shade or shooting wildlife, especially birds and animals in shady areas of the trees
  • On cloudy or overcast days, you will have less light compared to bright sunny days. So choose a slightly higher ISO value. A maximum value of 400 should be more than enough, but then it also depends on the aperture value and shutter speed you will require.
  • When shooting indoors in natural light, you are again dealing with the available light. So depending on the intensity of the light source, you will need to think about your ISO value. If you are shooting in direct bright light, you can use between 100 to 400, but if it is indirect, diffused light, you may want to go up to 800. 
  • Low light conditions are a different beast. Lighting conditions such as indoors at night, events, outdoors at night, etc., will need a higher ISO. If you are using aperture values like f/1.8, you can start with ISO 800. Depending on light conditions, you may want to use about 1600, or even above, to get the exposure right. 
  • Setting higher ISO values should be considered as a last resort in situations where you want to capture the photo and need a higher ISO for that situation. 

The above suggestions can vary with the focal length and aperture used. Note that, each time you double the ISO, the camera only needs half the amount of light to make the same exposure. So for example, if you got a shot at ISO 100 and shutter speed 1/250s, then at ISO 200 you can shoot the same image at 1/500s provided that you do not change the aperture value.

When using a tripod, if your shooting scenario is good for long exposure, then go for the lowest ISO possible. When it comes to night sky photography, you may not be able to work with very low ISO values like 100 or 200 as you want to eliminate star trails. So based on your shutter speed, you will have to do test shots and choose the lowest ISO that will help you get correctly exposed images. Remember different cameras with different sensors, respond differently to ISO values.

So how high can you go with ISO values? 

Setting the correct ISO value is trial and error. Test which ISO values get you the shot you are after. Use higher ISO values when you want to freeze actions or avoid camera shake due to slow shutter speed when hand-holding the camera. But as much as possible, always use the lowest ISO for any situation. Wherever possible, keep your ISO lower or, if possible, use base ISO and shoot using a tripod.

What is Expandable ISO?

In recent years, digital cameras are being manufactured with a specification called expandable ISO. So, what is expandable ISO? 

A camera's sensor has a range of ISO values within which it will produce good to acceptable quality images – this is called the native ISO. But, there are times when photographers may want to go beyond the native range or extend/expand it – for example, requiring more light in very dimly lit situations. Some cameras come with an option to expand the native ISO by a stop or two, so the amount of light recorded by the sensor increases. For example, if the maximum native ISO value on a camera is 6400, the expanded ISO will be 12800 aiding with doubling the amount of light reaching the sensor. 

Note: Similar to extending beyond the highest native value, there are also options to go below the native ISO value of 100 or 200 in most cameras. This does not degrade the image quality by affecting the colours, or dynamic range like the higher ISO values do.

How Does Expandable ISO Work?

The camera digitally expands the native ISO value by metering the light for the highest native ISO value and then it amplifies that data for the expandable ISO value. This is done digitally via software and not hardware. There is a considerable trade-off to this feature, which is poor image quality with a lot of noise, inferior colours, and loss of dynamic range. So as much as possible, try to stay within the native range. But in case you need that important photo and need to expand the ISO, then make use of this feature – a noisy photo is better than no photo.

To understand the above concept even better – think of the native ISO and expandable ISO like optical zoom and digital zoom on a camera.

To Wrap It All Up

Sunny days, outside, ISO 100 will be wonderful. If you are noticing a lot of detail in the shadow area of your photos with your naked eye that you aren't seeing when you review files on the LCD on the back of the camera, bump the ISO up to 200 or even 400.

Indoor photography can be tricky, artificial light combined with natural light coming through the windows can result in constant monitoring and adjusting the ISO level.  What looks excellent at ISO 400 in one room might require ISO 800 in the next place.

If you're using a tripod, use the lowest ISO setting possible.  You can get away with a longer shutter speed because the tripod will stop all motion blur of the camera.

Using a flash can help keep the ISO low and your photos noise-free in a lot of situations.  Likewise, if the depth of field isn't a concern for you, opening up the aperture will allow more light in, giving a lower ISO option.

When shooting at particularly high ISO settings be mindful of proper exposure.  Post-production of high ISO shots that weren't properly exposed to the best of your ability start to fall apart.  Particularly when adjusting the exposure or contrast levels, digital noise is enhanced, often resulting in an unpleasing image.

Noise isn't always bad, though!  One of the most brilliant aspects of film noir styled photographs is the grain in them.  Low key black and white images with lots of grain can be a good thing if they are exposed well, and the subject matter holds up to it.

The key to choosing the correct ISO is determining what factors need to be appropriately emphasized.  Most people strive for little to no digital noise. So shooting at the lowest ISO is usually the best bet – unless a film noir style is more for your liking.   

Since no guide can give you exacting settings, I suggest you bracket shoot ISO in a number of scenarios. Then you can compare the photos in post-production so you can best see what happens with your particular camera.  ISO is one of the few things you can't correct in post-production because you shoot in RAW mode too. If you accidentally take photos on a sunny day at ISO 3200, you are going to have lots of digital noise. 

Further Reading:

Further Learning:

So you've got a new DSLR, but you aren't getting the most out of it? Take a look at the DSLR Crash Course. This is a course where you will be taken by the hand and led step-by-step in discovering photography skills using your DSLR.

In the DSLR Crash Course you will learn:

  • How you can get the correct exposure in any situation.
  • A practical in-depth breakdown of ISO, Aperture and Shutter speed.
  • Handling difficult backlighting
  • Discover what metering modes are and how you can effectively use them to create the images you want, every time.
  • The Focus, Lock, and Recompose Method
  • Choosing The “Correct” Auto-focusing Mode
  • How to effectively Control Shutter Speed using Aperture Priority
  • Understanding Depth of field, so you can create those highly desirable images with amazing background blur.
  • And much more…

GET THE DSLR CRASH COURSE HERE

Let's block ads! (Why?)


Light Stalking https://ift.tt/2lpMzgp

Sourced by Time Trap Photography sharing the best photography tips, news and tricks throughout the industry. Time Trap Photography is dedicated to freezing those special moments in life that can be revisited and admired for generations to come. - Shannon Bourque
Please visit our main site for booking availability and rates.


"Time


Receive valuable industry knowledge delivered free to your email each day.


"Time

30. August 2019

4:02:00 AM

Das Bild des Tages von: Sunny Herzinger


kwerfeldein – Magazin für Fotografie https://ift.tt/2zvx9Md

Sourced by Time Trap Photography sharing the best photography tips, news and tricks throughout the industry. Time Trap Photography is dedicated to freezing those special moments in life that can be revisited and admired for generations to come. - Shannon Bourque
Please visit our main site for booking availability and rates.


"Time


Receive valuable industry knowledge delivered free to your email each day.


"Time

Photoshop Curves Adjustment for Nature Photography

3:53:00 AM

The Photoshop curves adjustment tool is one of the most important tools in post-processing arsenal for nature photography. When you understand how to use the power of the curves adjustment, you can make selective changes to the color, luminosity, and contrast of your nature photos in a non-destructive way. There is also a curves adjustment available in Lightroom, but using it in Photoshop allows you to use the power of layers and layer masks to very selectively alter your image and therefore, it’s my preferred way of using curves adjustment.

The curves graph is essentially a representation of all the tonal ranges in the image, from black to white. It can be thought of as a histogram with a diagonal line drawn through it, allowing you to change output values as you wish.

Using the Curves Adjustment in Photoshop

There are two ways to access the Photoshop curves adjustment tool in Photoshop: Image-Adjustment-Curves or as a Curves Adjustment layer (either in the top menu or below the layers panel.) You are better served using the Curves Adjustment layer because it puts the changes you make on their own layer with a layer mask already applied, setting you up for an easy and non-destructive way to delicately edit your image.

Let’s take a look at an image in Photoshop with a curves adjustment layer added but not altered.

Histogram and curves adjustment tool of an under exposed nature photo by Jane Palmer

Original Image, Histogram, and curves adjustment tool by Jane Palmer

Because the histogram clearly shows that this image is underexposed, we can set a white point using curves to brighten up the image. Simply move the right top part of the diagonal line until it reaches the edge of the curve showing where the brightest pixels are. There is no need to adjust the black point because the edge of the histogram already reaches the left side of the graph.

  • Curves adjustment in Photoshop showing how to brighten the image by moving the white point by Jane Palmer

    Curves adjustment in Photoshop showing how to brighten the image by moving the white point by Jane Palmer

  • Nature photo after white point adjustment using Photoshop curves adjustment

    Nature photo after white point adjustment using Photoshop curves adjustment

Note that the brightening of the image was done on the RGB curve. This is where you can do global adjustments to your image. Brighten or darken it, or increase contrast by creating a classic s-shaped curve. Points can be added along the line to allow you to change various places along the curve while maintaining the position of the other points.

Photoshop curves adjustment tool with white point adjustment and an s-curve adjustment for nature photography.

Photoshop curves adjustment tool with white point adjustment and an s-curve adjustment to brighten up your photo.

Adjusting Individual Color Channels

So far the adjustment we have made have all been to the RGB curve. But realize that Photoshop curves tool also can manipulate individual color channels of red, green, and blue. This allows you to modify the amount of these colors in the image. For instance, if you raise the curve in the red channel, the entire image becomes warmer. The red channel controls red and cyan, the green channel controls green and magenta, and the blue channel controls blue and yellow. The power of these adjustments resides in their use as selective adjustments using Photoshop Layers & Masks.

For instance, if you want to increase the red in a single tree in an autumn image, do the following:

  1. Add a curves adjustment layer.
  2. Choose the red channel.
  3. Raise the curve up to add red to the entire image.
  4. Because we only want the color on tiny parts of the image, invert the mask with Cmd/Cntrl I. This makes the mask black and hides the adjustment.
  5. Simply paint on the adjustment where you desire.
    I usually use a very low opacity brush, soft-edged and with low flow, building up the effect slowly so that I can get just the effect I want. If I make an error, I can just paint in black and remove the effect from the area where I don’t wish it to be. Pulling down on the red curve increases the amount of cyan in the photograph.
  • Photoshop Curves Adjustment Layer with selective masking

    Photoshop Curves Adjustment Layer with selective masking

  • Photoshop curves tool showing red channel adjustment for nature photography by Jane Palmer

    Photoshop curves tool showing red channel adjustment for nature photography by Jane Palmer

  • Nature photography example after red channel adjustment in Photoshop Curves tool.

    Final image after red channel adjustment in Photoshop Curves tool.

By raising the curve in the red channel, I was able to enhance the color of the trees and the reddish brown rocks so that this end result more closely resembled the scene as I remember it.

It is important to realize that Photoshop curves adjustment tool lets you make multiple adjustment at the same time. This allows you to make overall tonal adjustment as well as color adjustment in single step. You can then combine this with layer masks and selectively apply these adjustment to your nature photos.

The power of curves lies in their non-destructive way to add subtle changes to the image. You can fine-tune tiny parts of the photograph as well as add global changes until the final photograph tells your story. Explore using curves in your post-processing without fear because they can always be changed with the mask, opacity, or even deleted until you are happy with the end result. For me, I use curves on almost every image that I process.

About Author Jane Palmer

Jane Palmer divides her time between being a Nurse Anesthetist and a landscape and underwater photographer. A lifelong passion for nature and animals led her to spend more time outdoors with her camera, observing animal behavior and photographing them in action. She has been an avid underwater photographer for 10 years and recently began teaching photography. She often leads dive trips to exotic locations and assists divers who want to learn more about underwater photography. Jane currently lives in St. Louis MO with her husband, who loves scuba diving as well. Jane’s strong background in Lightroom and Photoshop allows her to help her underwater students get the most out of their images. So whether she is hiking in the Smokies or scuba diving in the Philippines, you can be sure Jane has her camera in hand to capture the beauty that nature provides for us.

Let's block ads! (Why?)


Visual Wilderness https://ift.tt/32hvCWt

Sourced by Time Trap Photography sharing the best photography tips, news and tricks throughout the industry. Time Trap Photography is dedicated to freezing those special moments in life that can be revisited and admired for generations to come. - Shannon Bourque
Please visit our main site for booking availability and rates.


"Time


Receive valuable industry knowledge delivered free to your email each day.


"Time

Thursday, August 29, 2019

#instakwer #66

10:04:00 PM

Baum

Nachdem ich diese Wald- und Wiesenansichten von zumeist etwas wilder Natur, die sich direkt neben unseren menschengemachten Kulturlandschaften ausbreitet, zusammengestellt hatte, fiel mir auf, dass sich bei den meisten der Fotos gar nicht sagen lässt, wo sie aufgenommen wurden – oder wo nicht.

Manche der Aufnahmen haben ein gewisses je ne sais quoi, das sie leicht exotisch wirken lässt, sodass ich annehme, dass sie eher weiter weg von Mitteleuropa aufgenommen wurden. Aber genauer festmachen kann ich es gar nicht – und möglicherweise ist es tatsächlich nur dem gewählten Bearbeitungsstil geschuldet.

So wird die Natur, wie Ihr sie hier sehen könnt, zu einer Art Zufluchtsort, den ich überall auf der Welt finden und aufsuchen kann. Wälder, Wiesen und Gestrüpp sind also überall ein kleines bisschen anders – manchmal sehne ich mich nach dem Geruch der sandigen brandenburger Kiefernwälder – und doch überall eine Art Zuhause.

Baumstämme

© @emqi2

Ihr möchtet selbst ein Bild einreichen? Dann nutzt auf Instagram den Hashtag #instakwer und vielleicht seid Ihr schon beim nächsten Mal mit dabei.


kwerfeldein – Magazin für Fotografie https://ift.tt/2L8IdWj

Sourced by Time Trap Photography sharing the best photography tips, news and tricks throughout the industry. Time Trap Photography is dedicated to freezing those special moments in life that can be revisited and admired for generations to come. - Shannon Bourque
Please visit our main site for booking availability and rates.


"Time


Receive valuable industry knowledge delivered free to your email each day.


"Time

29. August 2019

4:04:00 AM

Das Bild des Tages von: Danny Hahn


kwerfeldein – Magazin für Fotografie https://ift.tt/30JZY3A

Sourced by Time Trap Photography sharing the best photography tips, news and tricks throughout the industry. Time Trap Photography is dedicated to freezing those special moments in life that can be revisited and admired for generations to come. - Shannon Bourque
Please visit our main site for booking availability and rates.


"Time


Receive valuable industry knowledge delivered free to your email each day.


"Time

Wednesday, August 28, 2019

Wo kann man in Deutschland Sterne fotografieren?

10:01:00 PM

Könnt Ihr Euch erinnern, wo und wann Ihr das letzte Mal die Milchstraße gesehen habt? Mein Erlebnis ist schon Jahre her, denn in Nordrhein-Westfalen ist es fast unmöglich, einen Blick auf den klaren, sternenbedeckten Nachthimmel zu bekommen. Doch es gibt sie noch, die dunklen Flecken auf der Karte, an denen man beim Blick nach oben ins Staunen gerät.

Rund 3.000 Sterne könnte man mit bloßem Auge sehen, wenn man einen Ort findet, der nicht von Lichtverschmutzung betroffen ist. Die acht Standorte, von denen aus man in Deutschland am besten Sterne beobachten und fotografieren kann, findet Ihr hier:

DeutschlandkarteDeutschlandkarte

links: Lichtverschmutzung in Deutschland; rechts: ideale Orte für Sternenfotografie

1: Sternenpark Winklmoos-Alm

In den Chiemgauer Alpen in Bayern liegt der Sternenpark Winklmoos-Alm, der 2018 von der International Dark-Sky Association (IDA) offiziell zum „International Dark-Sky-Park“ ernannt wurde. Die Organisation hat es sich zur Aufgabe gemacht, die wenigen dunklen Gebiete, die es auf diesem Planeten noch gibt, zu schützen und zu bewahren. Nicht nur, weil der Sternenhimmel so schön anzusehen ist, sondern auch, da durch den inflationären Einsatz von Kunstlicht immer mehr Insekten sterben und ganze Ökosysteme in Gefahr geraten.

2: Sternenpark Westhavelland

1.380 km² ist das Areal groß und wurde bereits 2014 als erster Sternenpark Deutschlands ausgezeichnet. Es umfasst das Gebiet des Naturparks Westhavelland sowie die Gemeinde Schollene. Wie in vielen anderen Parks ist das Gebiet frei zugänglich und der Aufenthalt kostenfrei. Im gesamten Gebiet verteilt gibt es Informationskarten und es sind verschiedene ideale Beobachtungspunkte ausgeschrieben.

3: Sternenpark Rhön

Besonders dünnbesiedelte Gebiete, wie die Rhön (86 Einwohner*innen/km²) bieten ideale Bedingungen für Sternparks. Es geht jedoch bei der Erschaffung solcher lichtgeschützter Orte nicht darum, gänzlich auf Licht zu verzichten, sondern es vor allem zu optimieren. Der Park gibt auch einige Tipps, wie Ihr sparsamer und gezielter zum Beispiel mit Garten- und Wegbeleuchtung umgehen könnt.

4: Nationalpark Eifel

Der Nationalpark Eifel bietet nicht nur tagsüber wunderschöne Motive. Seit 2014 ist er als Sternenpark ausgewiesen und soll im nächsten Schritt sogar zu einem Sternenreservat weiterentwickelt werden. Eine Sternenwarte befindet sich auf dem Internationalen Platz Vogelsang, unweit der Bundesstraße 266.

Milchstraße

© Christian Nielsen

5: Nationalpark Harz

Die Sternwarte Sankt Andreasberg im Nationalpark Harz kämpft aktuell noch um die Anerkennung als Sternenpark. Laut Bundesamt für Naturschutz zählt der Standort mitten im Nationalpark zu den dunkelsten Regionen in Deutschland. An vielen Tagen im Jahr sind die Milchstraße oder sogar die Andromedagalaxie mit bloßem Auge deutlich zu sehen.

6: Projekt Sternenpark Schwäbische Alb

Der Sternenpark ist noch nicht offiziell anerkannt. Eine ehrenamtliche und unabhängige Initiative setzt sich hier für den Erhalt des natürlichen Nachthimmels ein. Auf der Schwäbischen Alb kann man noch an vielen Orten einen dunklen Sternenhimmel sehen. Einige dieser Gebiete könnten Basis für die Entwicklung eines international anerkannten Dark-Sky-Parks sein, für die der Verein aktuell kämpft. Wohnt Ihr in einer der Gemeinden der schwäbischen Alb, könnt Ihr mit Eurer Beleuchtung aktiv mithelfen, das Ziel zu erreichen.

7: Naturpark Nossentiner/Schwinzer Heide

Der Naturpark Nossentiner/Schwinzer Heide erstreckt sich auf einer Fläche von 365 km². Mit 60 Seen, Mooren und viel Natur bietet er eine wunderschöne Umgebung. Da er fern von Städten liegt, gibt es auch hier gute Voraussetzungen für schöne Aufnahmen des nächtlichen Sternenhimmels.

8: Stadt Fulda

Eine Stadt als Sternenort? 2019 wurde die Stadt Fulda von der IDA mit dem Titel „Provisional International Dark Sky Community“ ausgezeichnet und ist damit die erste Sternenstadt Deutschlands. Die in der Nähe des Sternenparks Rhön gelegene Stadt hat dafür eine Beleuchtungsrichtlinie aufgestellt und mit der Annahme des Preises versprochen, sich in den nächsten Jahren für einen verantwortungsvollen Umgang mit künstlichem Licht und für den Schutz der Nacht einzusetzen.

Milchstraße

© Martin Sattler

Habt Ihr jetzt auch Lust bekommen, mit der Kamera die Nacht zu erkunden? Dann ist der aktuelle Zeitpunkt ideal. Die Milchstraße lässt sich von Mitte März bis Mitte Oktober betrachten, am besten geht es jedoch von Juni bis August. In diesem Zeitraum ist sie fast die ganze Nacht lang sichtbar. Meteorschauer, wie beispielsweise die Perseiden, sind im geografischen Raum Deutschlands im Spätsommer sichtbar.

Quelle und Tipps zur Vorbereitung eines Ausflugs zum Sternegucken: Lenstore


kwerfeldein – Magazin für Fotografie https://ift.tt/2PmpNWf

Sourced by Time Trap Photography sharing the best photography tips, news and tricks throughout the industry. Time Trap Photography is dedicated to freezing those special moments in life that can be revisited and admired for generations to come. - Shannon Bourque
Please visit our main site for booking availability and rates.


"Time


Receive valuable industry knowledge delivered free to your email each day.


"Time

Panasonic S1H Preview

4:02:00 PM

The Finest Video-Centric Mirrorless Camera from Panny Yet!

​The new Panasonic S1H is the company's latest mirrorless camera and it is heavily geared towards film-makers. It comes with segmented 6K 24P recording, simultaneous C4K 10-bit 60p recording, dual SD card slots, dual native ISO, 5-axis, in-body image stabilisation, fully articulating screen and unlimited recording times! What's not to like?

Panasonic Lumix S1H
Quick Navigation

Panasonic Lumix DC-S1H Early Preview

​Features

​It has to be said that the features on the Panasonic S1H are outstanding for filmmakers. However, stills shooters should still take a good look!

​Usability

​As a filmmaker myself, the usability of this camera looks superb. Panasonic seemed to have really listened to feedback and produced the goods this time.

​Price

​I have knocked half a mark off for price because I think all cameras are being slightly over-priced right now. Saying that, I'd still buy one!

Overall rating :  4.9 / 5

​Lately, not many mirrorless cameras have been catching my eye but this latest offering from Panasonic certainly has. At this stage, and without using one, it is difficult to find anything bad from the specs so far. If this can produce the goods ​and the quality that it promises then it will almost certainly replace my ageing GH5 at some point!

​Main Features

  • ​6K (5952 x 3968) 3:2, 5.9K (5888 x 3312), 5.4K (5376 x 3580) 3:2
  • ​Full Frame & Super 35mm / Pixel by Pixel recording
  • 4K DCI and UHD up to 60p (with​ dual recording to internal card and external monitor)
  • ​Full HD up to 180fps ​using VFR (variable frame rates)​​​
  • Dual SD card Slots (compatible with ​high-speed, high-capacity UHS-II and Class V90 cards)
  • ​Highly flexible, tilt and rotatable flip screen
  • ​Dual Native ISO of 640 and 4000
  • ​Unlimited recording times in all modes
  • ​5-axis in-body stabilization (reported 6.5 stops)
  • ​V-Log/V-Gamut built in (no pesky after sales)
  • Extensively weather sealed for dust, splash and freeze resistant (down to -10°c (14°f)
  • ​HDR content in Hybrid Log Gamma (HLG)
  • 14-bit RAW stills (at up to 6fps with continuous AF or 9fps with AF locked)
  • ​Eye Autofocus and Advanced AI Technology 
  • ​6K photo mode ​allowing you to shoot at up to 30fps
  • ​High-resolution photo mode can use the camera’s IBIS to produce 96MP stills

My Thoughts

​Ok, so as a filmmaker and stills photographer, what do I think? I have used Nikon film cameras, Canon DSLR's and Panasonic mirrorless cameras. I am quite picky so I tend to research a lot before spending out thousands on a camera (or any kit come to that).

The Canon 5D Mark IV was a stills purchase for me. Having owned the Mark 1 and 2 previously, I knew I would always buy the Mark IV. However, for filmmakers, it isn't the best. Image quality is superb but the features are seriously lacking for pro video use.

My Panasonic GH4 and GH5 mirrorless cameras are still being used all the time. I really haven't felt the need to upgrade as yet despite the Panasonic S1 and S1R looking so tasty. I must say, I am still waiting (along with millions of other people no doubt) to see if there will ever be a Sony A7S Mark III).

So, let's go through a few features in a little more detail...

24.2mp Sensor/Full Frame 6K/24p Recording

​I guess the first thing to mention is the fact that the S​1H can record in 6K at 24 frames per second. For true filmmakers, the 24p limit isn't a deal-breaker but the 6K means a hell of a lot of lovely cropping options. Especially if outputting to 1080p!

The full frame mirrorless sensor ​should also please stills shooters​ ​with its 24.2mp, full frame (35mm equivalent) CMOS sensor. Sadly, for me though, it has an OLPF (optical low pass filter) to reduce moire which in my experience also softens the images a touch.

Panasonic S1H Front and Full Frame Sensor

Dual UHS-II SD Cards​ and Dual Output

​Rather than having one SD card slot and one XQD slot like the S1 and S1R, the S1H simply has two SD card slots. This gives you the choice of:

  1. 1

    ​Relay Recording
  2. 2

    ​Back Up Recording
  3. 3

    ​Allocation Recording

The slots are also hot-swappable so you can record until the cows come home (or battery dies).

There is also another trick up the S1H's sleeve, and a very welcome and powerful one too. It will allow you to record to an internal SD card AND an external recorder such as the Atomos series. However, doing this means you can only record internally at 4:2:0 8bit.

Panasonic S1H Top

​Dual Native ISO

​This is still relatively new to mirrorless and DSLR cameras. However, it is still something to consider when upgrading as it is ​incredibly useful for low light video especially!

The dual native ISO's on the Panasonic S1​H are​:

  • ​With regular photo styles - 100 and 640
  • ​When V-Log is set - 640 and 4000 (maximum ISO 51,200-204,800)
  • ​In HLG - 400 and 2500

​...but what does this mean? Well, typically, digital noise or grain is introduced when increasing ISO's on any camera, especially the higher you go.

However, the new full frame sensor on the S1​H claims to minimise noise by first choosing the optimum circuit to use before processing any gain. Of course, this depends on the ISO that is set.

​Basically, each pixel is split into two analogue circuits before reaching the gain amplifier. This then gives you the choice of a low ISO circuit or a high ISO/low noise circuit.

​In a nutshell, this means that the noise levels at 100 and 640 should be the same. The same goes for 640 and 4000 (amazing) and 400 and 2500. Wedding videographers can shoot ISO in a church at ISO 4000 and get the same image quality as that shot at 640...lovely!

​Unlimited Recording Times

​In the not so distant past, most cameras with video functionality were restricted to just under 30 minutes continuous filming. This was due to both EU regulations (tax in Europe) and the fact that cameras overheated after too long.

The beauty with the Panasonic S1​H is that you can film as long as you like using the hot-swappable SD cards or external recorder. However, to combat the issue with heat dissipation, the S1​H has its own internal fan which you can see on both sides at the rear of the camera body!

Panasonic S1​H Fan

Panasonic S1H Fan

​​You can operate the fan speed from the menu system and ​choose between "​normal" and "slow". There are also two auto modes:

  1. 1

    ​Auto 1 - Switches between normal and slow depending on the temperature of the camera
  2. 2

    ​Auto 2 - Does the same but tries to limit the fan use as much as possible for quieter filming

Unless you have a microphone right next to the in/out vents, you won't hear any noise in your audio. With a mic placed in any normal position on the camera, you won't hear a thing.

​Fully Articulating Rear Screen

​I absolutely love the look of this screen. It takes the screen from cameras such as the GH5 series and adds to it. Not only does it pull out and twist around like the GH5, the main "placeholder" for the screen will also tilt downwards.

Panasonic S1H Rear Screen

​This not only gives the user way more flexibility, it also prevents cables being snagged when using the screen pulled out. This happens to me all the time with the GH4/GH5.

​Panasonic S​1H Pros and Cons

​With its hefty price tag, are the specs enough for you to upgrade/buy one?

  • ​6K Video @ 24fps
  • ​Internal fan for heat management
  • ​Full frame pixel x pixel ​video
  • ​V-log included
  • ​Dual SD cards
  • ​Dual native ISO
  • ​Impressive ​rear screen
  • ​Tally lights front and back
  • ​LED top screen
  • ​Price​
  • ​Expensive lenses
  • ​Errrm...

Conclusion:

Top all of the features outlined above with the usual slow motion frame rates, 5-axis in body stabilisation, inclusive V-log, excellent weather sealing, 14bit RAW stills​, eye focus and a raft of other options and you have ​one incredible camera!

As I said before, there's not much to dislike (on paper anyway) and the Panasonic S1​H looks to take top spot in the mirrorless market aimed at filmmakers.

Buy the Panasonic S1​H at B&H

​On sale now for $​3997.99 (body only)

Panasonic S1H for Film Makers

Inatek Bluetooth Speaker Review

Let's block ads! (Why?)


Blog – Photo, Video, Gadgets and Business https://ift.tt/324taT0

Sourced by Time Trap Photography sharing the best photography tips, news and tricks throughout the industry. Time Trap Photography is dedicated to freezing those special moments in life that can be revisited and admired for generations to come. - Shannon Bourque
Please visit our main site for booking availability and rates.


"Time


Receive valuable industry knowledge delivered free to your email each day.


"Time

About Us

Time Trap Photography is dedicated to freezing those special moments in life that can be revisited and admired for generations to come. - Shannon Bourque

The lens in focus

“Life is like a camera. Just focus on what’s important and capture the good times, develop from the negatives and if things don’t work out, just take another shot.” — Unknown

TIME TRAP PHOTOGRAPHY COPYRIGHT 2016