Monday, April 30, 2018

5 Ideas for a Better Mobile Photography Website

8:21:00 AM

In the last article we explored how to make your photography website mobile-friendly. However, it is important to realize that the customer experience on your website goes beyond look and feel. This is specially true if you are doing business or selling products on your site.

Visual Wilderness Home Page

Here are a few things we have done to improve customer experience on Visual Wilderness.

Improved Navigation Experience

Bottom App Like Navigation: Visual Wilderness Home Page

Traditional websites rely on the menus for navigation. For mobile websites, these menus collapse into a single button. This means that users must click multiple buttons to navigate to a particular page or topic. Visual Wilderness provides a quick single-click navigation menu on the most popular pages making the navigation to our website incredibly easy.

Mobile Friendly Product Offerings

Streaming & Download Options for Video Courses

As the trend towards mobile devices continues to grow, we are getting more requests from our customers to consume our educational content on their mobile devices. To make our products mobile-friendly, we offer both download and streaming options for all of our video courses. This streaming option provides access to ALL video courses on Visual Wilderness on any device (smart phones, tablets, laptops, and desktops) without having to download several gigabytes of files.

Full HTTPS Photography Website

HTTPS is the secure version of HTTP protocol. The S at the end of HTTPS stands for Secure which means that communications between your browser and the website are encrypted. Google gives priority to the secure website over non-secure websites in search rankings. HTTPS sites are also used for credit card payments which makes it dramatically easier for mobile users to purchase products from our website.

Send Out Web Push Notifications

Web push notifications are emerging technology that allows website like Visual Wilderness to send out push notifications to subscribers using web browsers.

Web Push Notifications

This technology prompts users to subscribe to notifications automatically when they visit the website. These notifications go directly to users mobile and desktop devices. Using this technology, we are able to send notifications for new blog posts as well as for any promotion we are running. One major advantage of this technology is that we can reach mobile users directly without having to open an email client or being hindered by algorithm changes on social media.

Accept Payments via Apple Pay and Google Pay

It is hard to fill out all the checkout fields to complete an order on your mobile phone… and even on your tablet. By accepting Apple and Google Pay, our customers are able to complete the purchase with a single click. This is an emerging technology which does not support all configurations. But it is a technology that is likely to accelerate our mobile orders.

Have you implemented any of these or other technologies on our websites to improve the customer experience? Feel free to share you ideas in the comments below.

About Author Jay Patel

I could startoff like this – “Seeds of Jay Patel’s appreciation for beautiful places were planted early in his childhood….” but it would get boring really fast. I will just sum it up and say that I am a Landscape and Wilderness Photographer who loves to capture dramatic light. My photographs have been published in various magazines, calendars and advertising materials throughout the world.
Patience is a virtue...unless you are chasing your dreams

Let's block ads! (Why?)


Visual Wilderness https://ift.tt/2JFDBTI

Sourced by Time Trap Photography sharing the best photography tips, news and tricks throughout the industry. Time Trap Photography is dedicated to freezing those special moments in life that can be revisited and admired for generations to come. - Shannon Bourque
Please visit our main site for booking availability and rates.


"Time


Receive valuable industry knowledge delivered free to your email each day.


"Time

Mastering Low Light Portraits

6:13:00 AM

Even though the word photography means ’’writing with light’’, it turns out that the lack of light can be a rather inspiring obstacle for those who don’t like it simple and easy.

Portraiture and low light conditions can go hand in hand very well, provided that a photographer has both solid technical knowledge and some extraordinary ideas.

The versatility of low key portraits is astounding because the puzzling atmosphere they possess can oscillate between dreamlike intimacy and raw directness, depending on the source of natural or artificial light that breaks through the darkness.

Strikingly beautiful low light images can be found in any genre of portraiture – fashion, editorial, documentary, even wedding, engagement, and maternity photography.

The key to successful ’’dark portraits’’ is the ability to understand what kind of environments and models have the best potential to rise and shine in less than ideal light conditions. The following tips can help you recognize some patterns and clues that lead to great low key images.

Natural Light And A Tripod Are Often All You Need

The majority of reputable DSLR cameras made in the last 5 years behave well in low light, even at moderately high ISO.

This means you don’t need any seriously expensive gear in order to make great looking portraits after dark. However, a tripod is a must!

The only way to avoid blurriness at longer exposures (except if you have a wonderful gift of exceptionally steady hands) is using a tripod or monopod. The slowest shutter speed for a handheld camera is not a universal number, but it’s usually between 1/60s and 1/30s, which is good to have in mind when shooting low light portraits.

Even though you can use any lens for this type of portrait sessions, it’s really helpful to have a fast lens such as a 35mm or 50mm, f/1.8. These lenses can save your time and nerves because they allow you to shoot even in quite dark environments.

Photo by Jasenka Grujin

Experiment With Multiple Light Sources

Of course, if you like playing with various light sources (flashes, LED lamps, studio lights or even some kind of homemade experimental lamps), you don’t have to be minimalist and stick strictly to natural light.

Having an additional light source means you probably won’t have to use a tripod all the time and this gives you a certain freedom of creativity.

If you’re shooting outdoors, interesting results can be obtained by combining street lighting (illuminating the top of your model’s head) with a flash or a small LED lamp you can position anywhere you want.

Another great option would be to combine candlelight with some subtle artificial light if shooting indoors; candles are often too weak to light up the entire room and they can use some help from another light source.

Photo by Jasenka Grujin

Using Light-Reflecting Surfaces Can Alter The Atmosphere

Mirrors, glasses, polished metal surfaces or a body of water – they can be your best friends while shooting in the dark! They help you multiply or alter the effects of your light source and they also create the illusion of more space.

Depending on the purpose of your photo shoot, you can create eerie effects when using candles and mirrors, elegant yet ominous atmosphere when working with water and candles or a sci-fi appeal when combining a cold, bluish shade of artificial light with metal surfaces.

Either way, the fun is guaranteed and you will certainly learn something new about the nature of light and how to tame it.

Photo by Jasenka Grujin

Unusual Or Contrasting Patterns And Shapes Can Enrich Dimly-Lit Portraits

When you run out of your photographic ideas, try to think like a graphic designer and incorporate some abstract shapes and interesting color combinations into your low light portraiture.

Photographs that are very dark, even if executed gorgeously, often lack a pinch of something special and it’s vital to spice up your work in order to make it stand out.

For instance, if you’re shooting your model outdoors, try to find some ’’errors in pattern’’, such as unusually stained walls or plants with vibrant flowers in the middle of the urban jungle. These details truly matter!

Photo by Jasenka Grujin

Not Every Model Looks Fantastic In Low Light – It’s Ok To Be Picky

Take this with a grain of salt, but it seems that not everybody has the necessary appeal to ’’glow’’ in the dark.

Some people simply make better daylight models, while others show the full complexity of their beauty when the lights are low.

The best way to discover what works for your models is to take time to shoot them both during the day and at night. Also, some specific features, such as light blond hair, red hair or very pale complexion can look particularly bold and expressive in low light conditions.

If you’re interested in making the most out of your portrait sessions, it’s great to hire a good make-up artist who can help you transform your models.

Photo by Jasenka Grujin

Compared with daytime portraiture, low light sessions tend to be more demanding and more technical; there are usually more parameters and possible limitations you have to take into account.

At the same time, working with models in such challenging conditions can bring your creativity to a whole new level; isn’t it truly exciting to stand in the middle of a deep forest right after the sunset, with your camera, tripod, and models, trying to make something otherworldly beautiful?

Let's block ads! (Why?)


Light Stalking https://ift.tt/2KoDWLX

Sourced by Time Trap Photography sharing the best photography tips, news and tricks throughout the industry. Time Trap Photography is dedicated to freezing those special moments in life that can be revisited and admired for generations to come. - Shannon Bourque
Please visit our main site for booking availability and rates.


"Time


Receive valuable industry knowledge delivered free to your email each day.


"Time

30. April 2018

4:09:00 AM

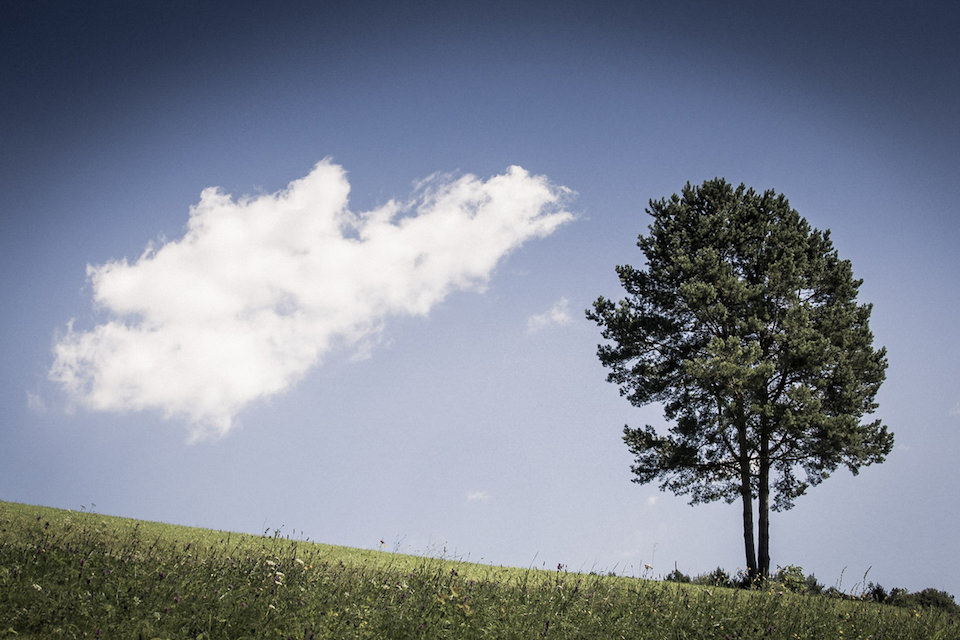
Das Bild des Tages von: Calabrones


kwerfeldein – Magazin für Fotografie https://ift.tt/2w0Pody

Sourced by Time Trap Photography sharing the best photography tips, news and tricks throughout the industry. Time Trap Photography is dedicated to freezing those special moments in life that can be revisited and admired for generations to come. - Shannon Bourque
Please visit our main site for booking availability and rates.


"Time


Receive valuable industry knowledge delivered free to your email each day.


"Time

Sunday, April 29, 2018

The Long and Winding Nik Collection Saga

4:08:00 PM

The Long and Winding Nik Collection Saga

The Nik Collection plug-ins have been a popular choice of digital photographers for years. But ever since Google purchased the company in 2012, loyal users have been subjected to a rollercoaster of hope and dread over the future of their beloved Nik. Last year, we learned that DxO acquired the Nik Collection assets from Google and would resume development. But that news was so last year.

By way of putting recent developments into context, allow me to briefly recap how we got here. Nik has truly been on a long and winding journey. Starting back in the mid-1990's, Nik Software (back then known as Nik Multimedia) made sophisticated plug-ins for Adobe Photoshop. The effects possible with Nik plug-ins were at least in part targeted to digital photographers making the move to the world of software. As time went on, they broadened their line to include tools for sharpening, black and white conversion, and so forth. While each of these could be purchased separately, they were also sold as a bundle known as the Nik Collection. Things were looking up as Nik appeared to be taking a fairly traditional upward trajectory of a successful company.

A number of competitors released plug-ins that attempted give Nik a run for their money, and Nik occasionally did have to take a back seat to other companies in the news. But as they came went, Nik persisted, and seemingly prospered. The first truly newsworthy development was when Nikon partnered with Nik to produce a new generation of software for Nikon. As a longtime Nikon user, I was thrilled given that Nikon themselves have always been a horrible software company. They make great digital cameras and such. But the weak link in Nikon's digital darkroom offerings have always been in terms of software. In fairness, Nikon software has always been capable of excellent results, but it was also always a pain to use. My only consolation had long been that Canon isn't that much better at software development, so everyone was more or less in the same boat. But at least at first, this new Nikon / Nik partnership seemed promising.

The first version of Nikon Capture NX to feature technology licensed from Nik Software debuted in September 2006. It took a bit of getting used to but worked pretty well once you did. My dilemma at the time was that I was already heavily committed to a Photoshop-centric workflow, a workflow that made use of plug-ins from Nik Software. By 2014, Nikon and Nik had parted ways. That was the end of Nik proprietary technology in Nikon software.

Two years before this, Nik Software was purchased by Google. Rumor has it that all Google really wanted was Nik's Snapseed, a competitor to Instagram. Long story short, the whole reason why Google wanted Snapseed turned out to be a bust, and for a while at least it seemed that one of the casualties would be the range of professional software known as the Nik Collection. Yes, that Nik Collection. Google seemed to stop development, but no one was really sure if it was dead or just slowed down. Then came the day Google offered the entire Nik Collection as a free download. And lest anyone still have doubts that the future of Nik looked bleak, Google later made it official last year by announcing that they were ceasing development of the Nik Collection.

But to qualify as a long and winding road, we need a few more surprise twists in the plot, and surprise twists did we get.

Late last year, it was announced that DxO, longtime makers of the DxO Optics Pro raw conversion software, had acquired the Nik Collection from Google and would be resuming development. I've had a love/hate relationship with DxO software for years now. It can produce impressive results but was hard to justify when compared to what each new generation of Adobe Camera Raw and Lightroom could do. But more to the theme of this article, DxO software had a notoriously quirky user interface and was hard to use. If I didn't know better, I'd think that Nikon and DxO must have learned to build user interfaces from the same mail-order software design school they learned about from an ad on the back of a match book. If you can draw a picture of Tippy the Turtle, you may qualify to be a software interface designer. Or something like that.

Anyway, Nik had reasonably intuitive (and proprietary) user interface concept known generally as "control points." While their partnership lasted, it made Capture NX a good deal better than the pre-NX Nikon Capture that preceded it, and a lot better than the Capture NX-D that came after. I was curious to see what the Nik acquisition would do to the usability of DxO Optics Pro (recently renamed to DxO PhotoLab).

Then just last week, we learned that DxO Labs (based in France) was in receivership and that the company was bankrupt. That surely would complicate both the future of any new DxO PhotoLab development as well as the future of the beloved Nik Collection. Nik had recently launched their DxO One camera attachment for Apple iPhone that sounded great on paper. I remember being jealous that us Android users were being left out (DxO did announce in December they were planning an Android version some time during 2018). But the product has received mixed reviews since it debuted, and sales have been underwhelming. I have no way of knowing whether DxO One had any bearing on the bankruptcy, but the conclusion does seem plausible.

But wait! There's more.

It turns out, this bankruptcy thing may not be as much as it initially sounded like it would be. Perhaps its just my American projection overlaid atop French jurisprudence, but according to the company "We are very confident that this procedure, which should not last for more than a few more weeks, will not affect our customers in any way." They go on to announce that they will be releasing a new version of the Nik Collection in June as well as an update to DxO PhotoLab. Lest there be any confusion, the new version apparently "will include improved local correction features," and Nik control points are all about local correction features. So, things may indeed be looking up for Nik (and DxO) after all.

See, I did say it was a long and winding road.

By the way, if you're not a fan of Adobe's subscription licensing model for the Creative Cloud and are looking around for an alternative to Lightroom, you might want to check out DxO PhotoLab. I've heard it referred to as a Lightroom killer. I'm not sure that's true just yet, but the company clearly is aiming for that target. That same DxO announcement slyly mentions that "this release will also be an opportunity for us to reiterate our commitment to the "perpetual license" model (as opposed to a subscription model) that allows our customers to update their products according to their needs, rather than in a constrained manner." Take that, Adobe.

Let's block ads! (Why?)


Earthbound Light Photography Tips https://ift.tt/2vWRrPB

Sourced by Time Trap Photography sharing the best photography tips, news and tricks throughout the industry. Time Trap Photography is dedicated to freezing those special moments in life that can be revisited and admired for generations to come. - Shannon Bourque
Please visit our main site for booking availability and rates.


"Time


Receive valuable industry knowledge delivered free to your email each day.


"Time

Time Trap Portrait Instagram Photo - April 29, 2018 at 11:08AM

11:08:00 AM


Shared by Time Trap Photography Instagram page. I'm dedicated to freezing those special moments in life that can be revisited and admired for generations to come. - Shannon Bourque
Please visit our main site by clicking on the logo below for booking, availability, and rates.  


"Time


Receive valuable industry knowledge delivered free to your email each day.
"Time

5 Mistakes Even Experienced Photographers Make

6:08:00 AM

You never stop learning and that’s a good thing. It's something that is particularly appropriate to photography.

Think about it, the actual process of taking a good photo relies on a whole chain of events to be done right. In that chain are numerous steps. If one of those is omitted it could be the difference between a great photo and no photo at all.

The problem that arises is that, as we become more experienced in photography, so some of those steps tend to end up on autopilot. When that happens we are in danger of making a mistake. Let’s take a look at some of the most common errors.

1. Leaving On Auto ISO

Auto ISO can be a powerful tool for a photographer. It can also be the source of poor images. This is particularly true if you are shooting at the end of the day and during the golden and blue hours.

Leaving the Auto ISO will cause film speed to gradually bump up as the light fades. This leads to a degradation of the image quality. You might not notice it at first, but as the light fades your shutter speeds should be getting slower. If this is not the case, there is a good chance you left Auto ISO on.

It's very easy to leave on Auto ISO leading to noise. By vianne.britten

2. Not Downloading Cards

This is an elementary mistake that a photographer of any experience can make.

You return home after a long day’s shoot and all you want is to rest and drink some tea. You will plan to download the photos from the cards later in the evening.

Except, life happens and you forget. Up bright and early to catch the dawn next morning, you realise that you have just run out of memory space. You check and you realise the great shots you have from yesterday are still on the card!

Try to be meticulous with your card downloading, do it as soon as you get home. Its also worth carrying extra cards just in case the inevitable happens.

Forgetting to download cards can be a bugbear. By Alejandro Gómez

3. Not Charging Batteries

Again this is something that is very easy to do and pretty much for the same reasons as above. Another factor that also come into play here is assuming you have enough charge in your battery to get your though the shoot.

Its an assumption that should never be made. Battery drain is an imprecise science that can vary according to many factors. Type of shot, file type and temperature can all effect how quickly a battery drains. Always fully charge your batteries before going on a shoot and if you can afford it carry several spares.

4. Selecting Too Much Or The Wrong Gear

This is a mistake that newcomers and experienced photographers alike can make. The first is to take more equipment than you actually need. The effect of this is to slow you down both physically and creatively. Think ahead about what you plan to shoot. Will you need that 300mm f2.8? If not save the weight. 

The other side to this coin is taking the wrong gear. There is little need for a wide angle of your are going to do some head and shoulders portrait shots. Select your gear according to what the shoot is going to involve.

Try not to take too much gear. By Tambako The Jaguar

5. Shooting And Not Looking

Sometimes a location is so beautiful that it just begs us to be photographed. The problem is that we get utterly engrossed in shooting the scene that we forget to drop the camera from our eyes and just look. There are several benefits of just looking.

The one is just to savour the moment. Another is that it will actually improve our creativity leading to better shots. By stepping back from a scene, we can start to look at it in depth, seeing new angles and perspectives.

When we shoot with the camera continuously at our eye, we often forget the simple task of turning around to see what’s behind us, we become blinkered. Taking five minutes away from shooting every so often is a great way to reduce that issue.

Don't forget to just look at a scene. By Julien Chalendard

These five errors might seem elementary but that’s the point. Because they are basic procedures they tend to become automatic and hence more likely to become a future mistake.

Every time you prepare to shoot or come home from a shoot its a great idea to run through a mental checklist of things you need to do in order to avoid problems.

Write it down at first and you will soon memorise it, helping eliminate future issues.

Let's block ads! (Why?)


Light Stalking https://ift.tt/2HXvu85

Sourced by Time Trap Photography sharing the best photography tips, news and tricks throughout the industry. Time Trap Photography is dedicated to freezing those special moments in life that can be revisited and admired for generations to come. - Shannon Bourque
Please visit our main site for booking availability and rates.


"Time


Receive valuable industry knowledge delivered free to your email each day.


"Time

29. April 2018

4:06:00 AM

Das Bild des Tages von: bildausschnitte.at


kwerfeldein – Magazin für Fotografie https://ift.tt/2r7bNAd

Sourced by Time Trap Photography sharing the best photography tips, news and tricks throughout the industry. Time Trap Photography is dedicated to freezing those special moments in life that can be revisited and admired for generations to come. - Shannon Bourque
Please visit our main site for booking availability and rates.


"Time


Receive valuable industry knowledge delivered free to your email each day.


"Time

browserfruits 17.2018

12:06:00 AM

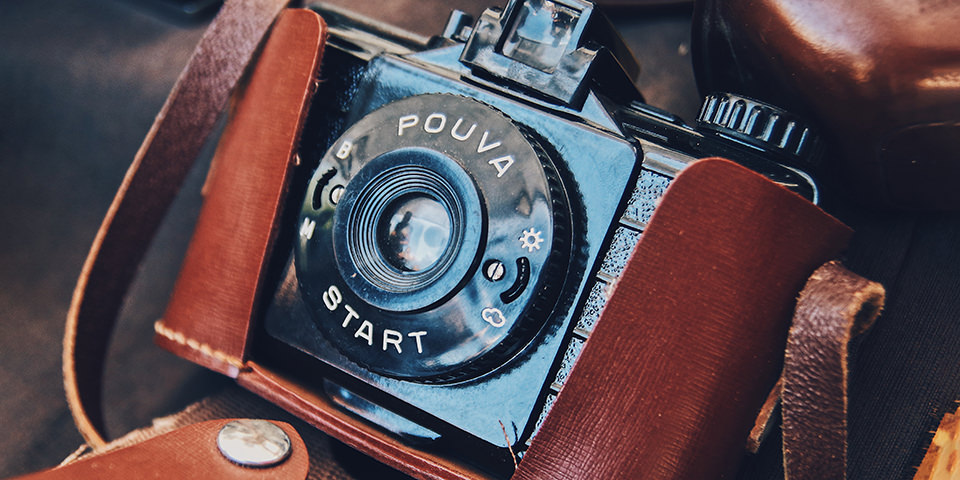
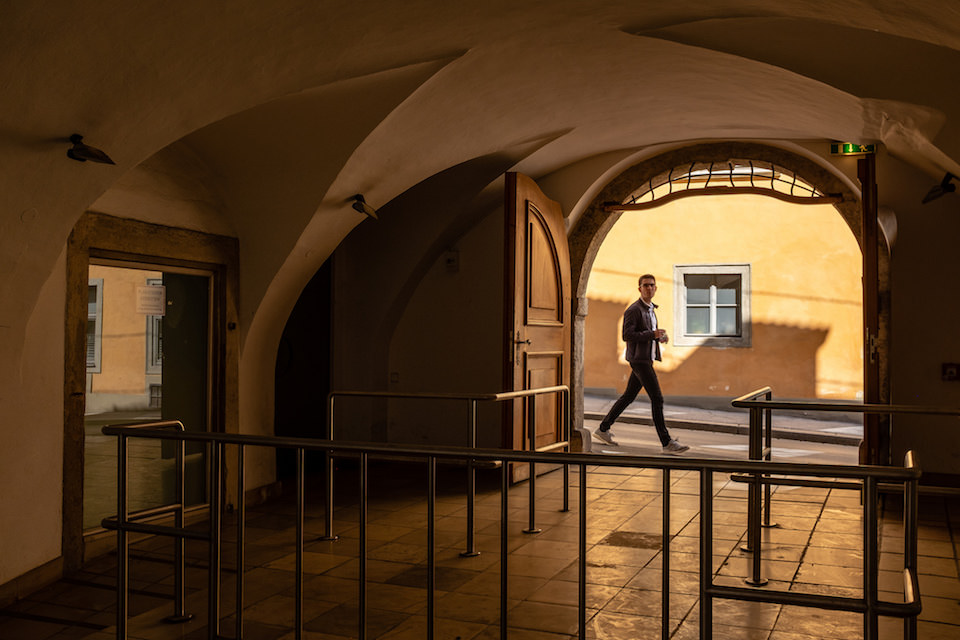
Heute ist Worldwide Pinhole Photography Day! Die Lochkamera ist wohl eine der wichtigsten Erfindungen in der Fotogeschichte und deshalb wollen wir sie feiern. Schnappt Euch eine Lochkamera oder baut schnell eine und macht heute ein Lochkamerafoto. Ein paar weitere Tipps rund um die Lochkamera haben wir auch in die browserfruits aufgenommen. Und auf Instagram haben wir auch eine kleine Verlosung für Euch.


Linktipps

• Lorraine Healy berichtet auf Lomography von ihrer Obsession – den Lochkameras – und zeigt viele tolle Ergebnisse. → ansehen

• Das Siegerbild des Awards Wildlife Photographer of the Year wurde disqualifiziert, nachdem es Hinweise darauf gab, dass der Ameisenbär auf dem Bild ausgestopft ist. → ansehen

• My Modern Met hat ein Interview mit Luc Kordas, der am liebsten in der New Yorker U-Bahn fotografiert. → ansehen

• Straßenfotograf Julian Mittelstädt „zensiert“ die Gesichter auf seinen Aufnahmen mit Hilfe von Schatten schon bei der Aufnahme. → ansehen

• Die Neue Züricher Zeitung erinnert an den verstorbenen iranischen Magnum-Fotografen Abbas. → ansehen

• Wie stellt sich die Situation für Frauen heute in Ägypten dar? Nach der Revolution? Die Fotografin Amélie Losier hat sich aufgemacht, ägyptische Frauen in ihrem Umfeld zu portraitieren – fernab westlicher Klischees der arabischen Frau. → ansehen

• Wer die letzte kwerbox hatte, kennt Frank Kunert schon. Die Deutsche Welle hat einen aktuellen Videobeitrag über den Künstler. → ansehen

• Romain Thiery fotografiert alte Pianos in verlassenen Gebäuden. → ansehen

• Der Amerikaner Dane Strom lebt in Mexiko und fotografiert die knallbunten Feste und die harte Realität der dort lebenden Menschen. → ansehen

• Wie Ihr die neuen Polaroid-I-Type-Filme mit etwas Bastelarbeit in Euren alten Polaroid 600er Kameras nutzen könnt, erfahrt Ihr hier. → ansehen


Buchempfehlungen

„Retro-Kameras“ : Der Foto-Spezialist John Wade stellt nicht nur die 100 wichtigsten analogen Kameramodelle mit ihren technischen Details vor, sondern offeriert auch eine Fülle Tricks und Kniffe, um damit ganz besondere Fotos zu kreieren. Das Buch ist im Verlag Prestel erschienen und kostet 28 €.

„Sturmjäger“ : Was Versicherer erschaudern lässt, ist Kulisse für den Sturmjäger Bastian Werner. Wetterphänomene und Meteorologie sind seine Passion. Der Bildband präsentiert spektakuläre Fotografien: von Blauer Stunde über Gewitterzellen bis zu leuchtenden Nachtwolken. Das Buch ist im Verlag Frederking & Thaler erschienen und kostet 39,99 €.


Ausstellungen

Inge Morath 1923–2002
Zeit: 26. April – 26. August 2018
Ort: Das Verborgene Museum, Schlüterstr. 70, 10625 Berlin

The Heavens – Annual Report
Zeit: 12. April – 17. Juni 2018
Ort: f3 – freiraum für fotografie, Waldemarstraße 17, 10179 Berlin

Stephen Gill. Vom Dokument zum Experiment
Zeit: 28. April – 24. Juni 2018
Ort: Museum für Photographie Braunschweig e. V., Helmstedter Straße 1, 38102 Braunschweig

Alexander Beck | China Matrix
Zeit: 26. April – 15. Juni 2018
Ort: vhs-photogalerie, 3. + 4. OG, Rotebühlplatz 28, 70173 Stuttgart


Drüben auf Instagram

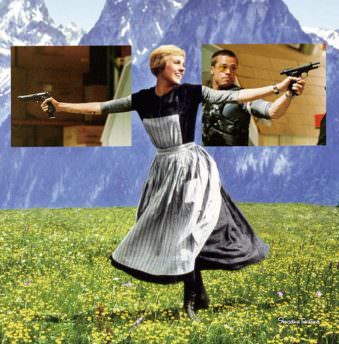
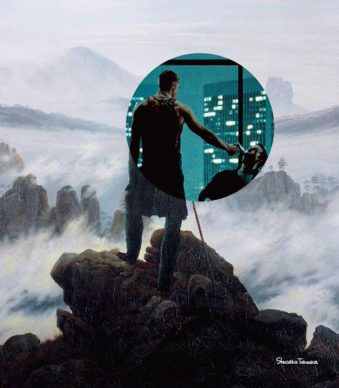
@shusaku1977 – Shusaku Takaoka verbindet mit viel Humor verschiedene Bilder der Popkultur zu neuen Werken.


Videos

NVIDIA stellt künstliche Intelligenz zur Bildrekonstruktion vor.


Adorama stellt den Fotografen David Creedon vor.


Das Titelbild stammt von Marc Müller. Vielen Dank!


kwerfeldein – Magazin für Fotografie https://ift.tt/2r9O9CW

Sourced by Time Trap Photography sharing the best photography tips, news and tricks throughout the industry. Time Trap Photography is dedicated to freezing those special moments in life that can be revisited and admired for generations to come. - Shannon Bourque
Please visit our main site for booking availability and rates.


"Time


Receive valuable industry knowledge delivered free to your email each day.


"Time

Saturday, April 28, 2018

5 Creative Photography Projects For a Rainy Day

6:03:00 AM

Rain and photography can get along well, as long as our gear remains dry and safe. As of a couple of years ago, weatherproof cameras and lenses have become more and more accessible to the general public, although they are a bit pricey.

Therefore, not all photographers can invest in one of these new cameras. When it comes to rain, there are two types of photographers – the ones who hide their gear when they see a slight drizzle; and those who manage to take pictures without putting their gear at risk.

Photo by Federico Alegría

You can always use a fancy waterproof case, of course…but there are less elegant, yet functional solutions out there – like these plastic rain covers or the trusty umbrella.

The idea is to never let yourself become frustrated by a bit of water. That said, while these solutions work just fine for a light rain, you should consider more reliable solutions for heavy rain like the ones experienced in the world’s tropical regions.


Today we’re going to talk about some easy-to-perform projects that can keep your camera dry when the rain is falling – and help you never miss a beautiful moment because you were being cautious with your beloved gear.

1. Reflections In Puddles

Puddles by themselves aren't thrilling to photograph; the marvelous thing about them is the vast array of possibilities they offer for playing around with reflections.

After any rain, regardless of its intensity, there will be puddles everywhere for you to experiment with. This project isn't for the average lazy photographer who just wants to take pictures from eye level.

No, photographing reflections on puddles requires you to crouch on the ground and play with different compositions, frames, and points of view.

Capturing reflections on a puddle is just like seeing the world through an oddly shaped window; and for the trick to work out every time you need to be aware that ponds have their own identities.

If you focus only on the reflection, leaving the body of water behind, you'll end up with a flat photograph, as if you were shooting through a window.

The beautiful thing about puddles is that they are unpredictable; you never know exactly how things will work out, thanks to the juxtaposition of the regular scene and the inclusion of the reflecting puddle in the frame.

Also, you can play with the resulting reflections by rotating the image. You’ll get some pretty wicked results.

2. Umbrellas

Some people find umbrellas to be cheesy and clichéd, but for many of us, they are still interesting – and why not say so? – attractive to photograph.

Think of crowds protected by their easy-to-carry protective domes of fabric, or a simple umbrella lying in the middle of a wet street or pub entrance.

Umbrellas possess something that makes them irresistible to capture, and you should give them a try. Also important for you to remember: umbrellas make a great companion for photographers wandering the streets since they offer a practical and massive, yet inconspicuous camera protection when used.

3. Through Glass

If the rain is extremely harsh, you can always cover yourself up inside a car, a bus or a cozy coffee shop to keep you toasty and your camera dry.

By photographing through a window, you'll get a different perspective of the outside, from glazed windows to tiny droplets running down the glass. Everything looks beautiful when shot through a window when it’s pouring outside.

If you want to reduce the window effect, place the front of the lens right on the window to reduce undesired glare, flare and light leaks in your images.

4. People Walking In The Rain

Some photographers (like myself) love to include the human element in their photographs, and showing people walking in the rain is one of the best ways to achieve beautiful results.

People always wear an odd expression when they walk in the rain, and it’s worth capturing. Just keep in mind that the pictures shouldn't be embarrassing, but aesthetic.

This can be achieved by combining photographs taken from the inside of a building or a car, and also by going outside and taking pictures of people while all of you are getting soaked.

Always make sure to keep your camera safe and dry, of course.

5. Plants Adorned With Droplets

Many photographers love botany and nature, and these always offer great opportunities to capture greenery with a twist.

After every rainfall, plants get beautifully glazed by tiny drops of water that can produce some pretty interesting effects.

Try using a macro lens to capture astonishing mages of those tiny drops of water and see the world from a whole new perspective.

Sources Of Inspiration

Many photographers have delighted themselves with rain, and perhaps the best examples for you to look at are Brassaï and Saul Leiter. These two had a thing for rain, and they captured the city from a unique perspective due to their bold approaches to cities and rain.

Light behaves quite gently on overcast and rainy days, giving natural light a soft appeal and softening the natural saturation of surrounding colors on the city.

During the day, after rain, there is always a unique light that deserves the attention and keen eye of a passionate photographer – so get out there! As long as you keep your camera dry and safely shooting while the rain is pouring down, you'll never regret it.

We give you our word on this. Please share your images with us at the Tank!

Let's block ads! (Why?)


Light Stalking https://ift.tt/2vU5421

Sourced by Time Trap Photography sharing the best photography tips, news and tricks throughout the industry. Time Trap Photography is dedicated to freezing those special moments in life that can be revisited and admired for generations to come. - Shannon Bourque
Please visit our main site for booking availability and rates.


"Time


Receive valuable industry knowledge delivered free to your email each day.


"Time

28. April 2018

4:06:00 AM

Das Bild des Tages von: ::ErWin


kwerfeldein – Magazin für Fotografie https://ift.tt/2FoQWgM

Sourced by Time Trap Photography sharing the best photography tips, news and tricks throughout the industry. Time Trap Photography is dedicated to freezing those special moments in life that can be revisited and admired for generations to come. - Shannon Bourque
Please visit our main site for booking availability and rates.


"Time


Receive valuable industry knowledge delivered free to your email each day.


"Time

Ich bin von der Lochkamera wie besessen

12:06:00 AM

Ein Beitrag von: Moni Smith

Morgen ist es wieder soweit, am letzten Sonntag im April wird der 18. Worldwide Pinhole Photography Day (WPPD) (zu Deutsch: Weltweiter Tag der Lochkamera-Fotografie) ausgerufen. Eine gute Gelegenheit, dem Thema etwas mehr Beachtung zu schenken. Als kleine Inspiration hat sich das Bildrechtsportal Copytrack mit Moni Smith über Lochkamerafotografie unterhalten.

Lochkamerafotografie ist eine herausfordernde, aber auch aufregende Technik. Sie wird bereits seit über 100 Jahren praktiziert und ist ziemlich genau das, wonach es klingt. Für einen besseren Einblick in diese unkonventionelle Art von Fotografie hat Copytrack mit der Lochkamerafotografin Moni Smith gesprochen:

Die Fotografie begleitet Dich schon eine ganze Weile. Wie bist Du das erste Mal mit der Lochkamerafotografie in Berührung gekommen und was hat Dich dazu gebracht?

Vor zirka zehn Jahren hat ein Freund von mir einige seiner Lochkamerafotografien auf Flickr veröffentlicht und ich war davon total fasziniert. Die Bilder hatten eine sehr verträumte Wirkung und zogen mich sofort in ihren Bann. Bis vor fünf Jahren habe dann jedoch nicht mehr an Lochkamerafotografie gedacht.

Zu diesem Zeitpunkt wechselte ich von digitaler Fotografie zur analogen Herangehensweise und freundete mich mit vielen Filmfotograf*innen auf der ganzen Welt an, deren Blogs und Social-Media-Kanäle ich verfolgte. Ein paar von ihnen veröffentlichten Lochkamerabilder und ich erinnerte mich an die Fotos, die ich vor zehn Jahren gesehen hatte.

Ich wollte mehr über die Technik erfahren, also habe ich einen Kurs bei Zeb Andrews besucht, einem bekannten und sehr talentierten Lochkamera-Fotografen hier in Portland, Oregon. Seitdem bin ich wie besessen von der Lochkamera-Fotografie.

Ausstellung

Kannst Du uns erklären, was Lochkamerafotografie überhaupt ist und welchen Einfluss die Technik auf das Ergebnis hat?

Eine Lochkamera ist im Wesentlichen eine Schachtel mit einem Loch drin. Einige Menschen kennen vielleicht Pinhole-Viewer, die bei totalen Sonnenfinsternissen verwendet werden. Eine Lochkamera funktioniert auf die genau gleiche Weise. Auf einer Seite der Schachtel befindet sich ein nadelgroßes Loch und auf der anderen Seite etwas, um das Bild einzufangen (Film oder Fotopapier).

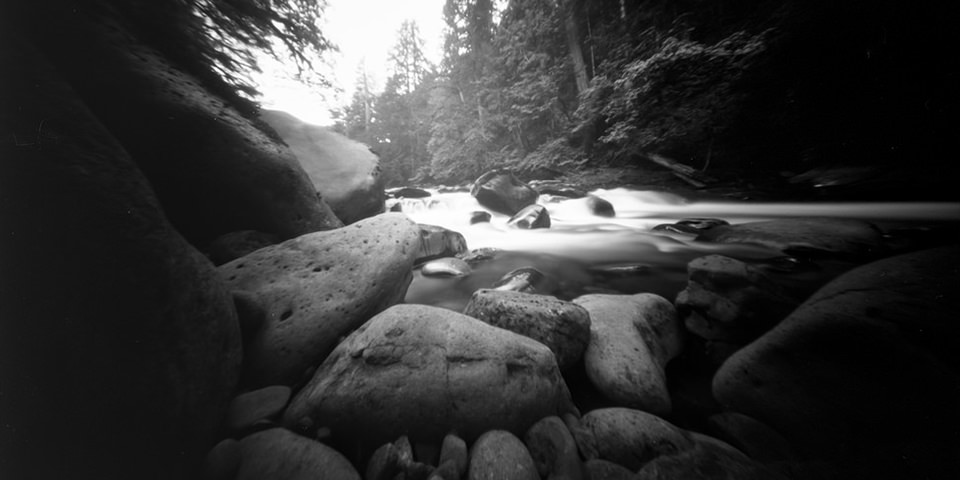
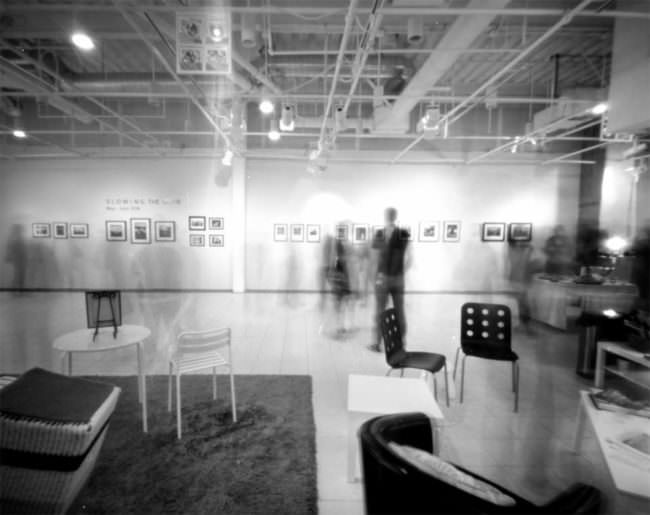
Die Lochblende hat eine sehr kleine Öffnung. Die meisten meiner Kameras haben Blenden, die etwa f/135 groß sind. Um die kleine Blende auszugleichen, muss man längere Belichtungszeiten einplanen. Mit diesem Aspekt lässt sich viel herumspielen, was wirklich Spaß macht. Man könnte am helllichten Tag eine Szene aufnehmen, die über fünf Sekunden lang ist und dabei etwa die Bewegung einer Menschenmenge oder die Unschärfe der Äste eines Baumes aufzeichnen, wenn der Wind durch sie bläst.

Es ist wirklich toll, ein Foto vorzubereiten und nicht genau zu wissen, was letztendlich dabei herauskommt. Eine weitere wirklich interessante Sache bei kleineren Blenden ist, dass eine sehr tiefe Schärfentiefe erzeugt wird, sodass alles innerhalb des Bildes extrem scharf zu sehen ist.

Was sind Deiner Meinung nach die größten Vorteile der Lochkamerafotografie?

Ich liebe es, dass die Technik sehr einschränkend ist. Man muss sich lediglich für einen Film entscheiden, den man verwenden will. Doch sobald der Film erst einmal in der Kamera ist, muss man mit dner Entscheidung leben. Das ganze Tüfteln an der Szene fällt weg, nichts soll von der Komposition der Einstellung ablenken.

Das Einzige, worum man sich kümmern muss, ist die Komposition. Ich habe das Gefühl, dass ich so mehr darauf achten kann, wovon ich hier überhaupt mein Foto mache. Die starke Einschränkung bringt mich irgendwie dazu, kreativer zu sein. So ähnlich, wie ein Dichter auf ein bestimmtes Format seiner Gedichte beschränkt ist, wie ein Sonette oder ein Haiku.

Außerdem liebe ich, dass es mich runterbringt. Die notwendigen Belichtungszeiten an den Orten, die ich gern fotografiere (vor allem im Wald), können recht lang sein – aber ich genieße die Wartezeit!

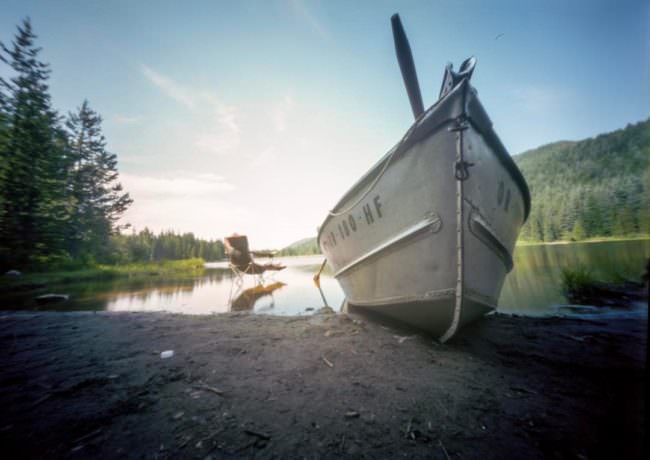
Boot an einem See

Hast Du ein Lieblingsmotiv?

Ich liebe es, Menschenmengen zu fotografieren. Es macht einfach Spaß, die Unschärfe, die durch die Bewegung der Leute entsteht, einzufangen. Außerdem liebe ich das Fotografieren im Wald, weil ich hier den Großteil meiner Freizeit verbringe.

Wo siehst Du die größten Herausforderungen in der Lochkamerafotografie?

Meines Erachtens ist die größte Herausforderung, dass man mit Film arbeiten muss. Das kann eine Herausforderung sein, wenn man an sofortige Befriedigung gewöhnt ist. Außerdem entstehen dadurch einige Kosten: Der Film muss gekauft und entwickelt werden; wenn man selbst zu Hause entwickelt, muss man viel Zeit einplanen. Zu lernen, wie man all diese Dinge tut, ist eine Herausforderung – doch es lohnt sich!

Überdies ist die Lochkamerafotografie eine ganz andere Art zu fotografieren als die digitale Fotografie und auch das Ergebnis ist ein ganz anderes. Man muss lernen, etwas Kontrolle über den ganzen Prozess abzugeben. Die Ergebnisse sind nicht immer die, die man sich erwartet. Das kann auch eine große Herausforderung darstellen.

Surreales Bild

Welchen Rat würdest Du jemandem geben, der darüber nachdenkt, sich näher mit der Lochkamerafotografie zu beschäftigen?

Für den Einstieg würde ich eine Kamera mit Mittelformatfilm empfehlen. Hier ist die Auflösung höher als beim Kleinbildfilm, was zu schöneren Ergebnissen führt. Dies wird Dir zu Beginn helfen, denn wie bereits erwähnt ist die Lochbildkamerafotografie mit der Digitalfotografie nicht zu vergleichen. Die Ergebnisse werden Dir auf den ersten Blick merkwürdig erscheinen, weil sie komplett anders sind, als das, was wir gewohnt sind.

Wenn Du gleich mit einer Kamera mit Kleinbildfilm beginnst, wird die Bildqualität nicht so gut sein, was das Bild dann noch seltsamer erscheinen lässt und Dich womöglich frustrieren wird.

Dasselbe gilt für die Digitaltechnik. Es ist möglich, Lochbildkamerabilder mit einer Digitalkamera unter Verwendung eines Objektivdeckels zu erstellen. Das würde ich jedoch nicht empfehlen, da die Qualität der Bilder hier meistens grauenhaft ist. Sobald Du die Kamera hast und bereit bist, schieß einfach los und hab Spaß dabei! Habe keine großen Erwartungen, genieße den Prozess und die unerwarteten Ergebnisse.

Magst Du uns noch verraten, woran Du gerade arbeitest?

Derzeit stelle ich ein Projekt auf die Beine, bei dem eine Lochbildkamera um die Welt geht: Der große internationale Terrapin-Tausch. Mein Freund Todd Schlemmer besitzt einen 3D-Drucker und hat für unser Projekt eine Lochbildkamera gedruckt.

Die Kamera geht dabei zunächst an eine Person, die eine ganze Filmrolle aufnehmen wird und sie anschließend zum ersten Bild zurückspult. Dann leitet diese Person die Kamera zur nächsten Person weiter, die die Rolle dann doppelt belichtet. Dann schießt diese Person eine Rolle, spult zurück und schickt sie an eine andere Person. Die Ergebnisse werden auf der Webseite des Projekts veröffentlicht.

Dieser Artikel erschien erstmalig auf Copytrack. Wir veröffentlichen ihn mit freundlicher Genehmigung.


kwerfeldein – Magazin für Fotografie https://ift.tt/2JzPKdb

Sourced by Time Trap Photography sharing the best photography tips, news and tricks throughout the industry. Time Trap Photography is dedicated to freezing those special moments in life that can be revisited and admired for generations to come. - Shannon Bourque
Please visit our main site for booking availability and rates.


"Time


Receive valuable industry knowledge delivered free to your email each day.


"Time

Friday, April 27, 2018

Time Trap Portrait Instagram Photo - April 27, 2018 at 08:13AM

8:13:00 AM


Shared by Time Trap Photography Instagram page. I'm dedicated to freezing those special moments in life that can be revisited and admired for generations to come. - Shannon Bourque
Please visit our main site by clicking on the logo below for booking, availability, and rates.  


"Time


Receive valuable industry knowledge delivered free to your email each day.
"Time

The 5 Keys to Great Band Photographs

6:02:00 AM

When we have true artists on both sides of the lens, amazing things can happen – just recall all those legendary photographs of rock icons that are still admired, printed and framed just like a few decades ago!

If done properly, band promotional photo shoots should represent artistic collaborations between photographers and musicians, based on shared concepts and aesthetic values.

The similar approach is true for live band photography as well, only in this case a photographer has to have a real knack for choosing the right moment to hit the shutter button. This is not easy at all – there are so many things going on simultaneously on stage!

However, in both cases (promotional and live shoots), the following 5 tips and tricks can help you use your photo gear and visualize your ideas in the most effective manner.

1. Develop A Concept

So make sure you have a concept you can translate into photographic compositions

The worst thing that can happen to a band photographer is not knowing what to do with a group of impatient musicians who expect rainbows and unicorns.

In order to avoid this painful scenario, it’s helpful to have at least 5 well-prepared creative concepts that include different positioning of people and props in space. Sometimes, drawing a sketch of your concept can save you a lot of time.

While it’s not necessary to follow any traditional rule of composition when shooting a band, these rules can still bring a certain visual quality. For example, if you have no idea where to position your subjects within a certain frame, why not start with the rule of thirds and customize it later on.

Also, it’s worth mentioning that musicians are rarely thrilled by clichés and it’s good to offer them something more daring than taking them to an abandoned railway and asking them to look cool.

It can be much more interesting to organize a shoot in the midst of a busy downtown, in some unconventional modern museum, or perhaps on a mountaintop or by the river.

Photo by Jasenka Grujin

2. Use Colors Wisely

Never underestimate the power of colors and their direct as well as subliminal visual language.

When shooting bands, it is of crucial importance that various colors (of clothing, backdrops, walls, studio lights, gel filters, etc) complement the genre of music and the overall atmosphere of a certain group of performers.

For instance, psychedelic rock performers would cherish some unusual or vibrant color patterns to go in line with trippy sound effects in their music. On the other hand, a group of jazz musicians would probably opt for calm, subdued colors and classy atmosphere with a bit of a golden haze or maybe everything in black and white.

When in doubt, ask your clients to show you a couple of famous band photographs that match their expectations.

Photo by Jasenka Grujin

3. Look For The Magic Moments

This is especially true when shooting bands on stage.

The only way to make your photographs better than average concert images is to become a keen observer of human emotions and body language.

Musicians, especially frontmen, are usually very expressive when it comes to their stage persona so it might take some time to get accustomed to the whole array of facial expressions of a certain performer and frame the most alluring of these emotions.

Another thing to look for when shooting on stage is the interaction between the band members themselves or between the band and their audience. Be aware of things like sudden bursts of emotions, tears, secret hugs, performers getting off the stage to greet the crowd and so on.

It’s important that your work captures a certain level of emotional intimacy in addition to depicting the concert craze.

Photo by Jasenka Grujin

4. Aim To Capture A Variety Of Scenes

When it comes to band photography, there are countless options in terms of gear and camera settings, just like in regular portraiture.

It’s fun to alternate between prime lenses (like 35mm and 85mm) and mid-range zoom lenses (such as 24-70mm or 18-105mm) because they can offer versatile interpretations of foreground and background and you surely want some variety in your work.

Prime lenses are typically sharper, faster and work well in low light, while zoom lenses offer the ability to quickly change perspective, which can be important in concert photography. Also, it’s advisable that your band photographs include different field sizes, such as long shots, full shots, medium shots and close-ups, as well as more creative camera angles – bird’s eye shot, low-angle shot or tilt shot.

The variety of compositions can greatly contribute to narrative qualities of your work.

Photo by Jasenka Grujin

5. Be Mindful Of Post-Processing

Ensure you know the difference between adequate and excessive post-processing

It’s easy to fall into the trap of shooting mediocre band photos in high hopes that they can be dramatically improved in Lightroom and Photoshop.

The best approach is to learn what are the main advantages and drawbacks of your photo gear and then shoot accordingly. For instance, if you’re shooting a concert at night and you know your camera produces overly grainy images at a high ISO, you might want to use prime lenses at their widest aperture in order to avoid raising ISO too much and reducing noise in post-processing.

Yet, skillful editing can make a great photo stand out even more and this is true especially in the case of promotional band photographs.

While concert pictures are closer to documentary genre and look better when edited lightly, off-stage portraits of musicians allow for much more creativity in editing.

This can be achieved by using more than basic color and tonal corrections; for instance, blending layers and creating multiple exposure effects can produce truly powerful band images.

Photo by Jasenka Grujin

In a nutshell, all band photography has a very straightforward function – to make performers and their work equally appealing musically and visually.

In order to achieve this, a photographer should collaborate with musicians both on and off-stage and create a well-rounded portfolio that can tell a complete story about a certain band.

In the best case scenario, the visual identity of a band should become inseparable from their music, which is an ambitious yet appealing task for any photographer.

Let's block ads! (Why?)


Light Stalking https://ift.tt/2r3OE1v

Sourced by Time Trap Photography sharing the best photography tips, news and tricks throughout the industry. Time Trap Photography is dedicated to freezing those special moments in life that can be revisited and admired for generations to come. - Shannon Bourque
Please visit our main site for booking availability and rates.


"Time


Receive valuable industry knowledge delivered free to your email each day.


"Time

Elements of a Mobile Friendly Photography Website

4:28:00 AM

Way back in 2012, we saw a dramatic increase in mobile traffic to our web sites. Today, more then 2/3 of the Visual Wilderness traffic comes from smart phones and tablets. It comes as no surprise that Google decided to include Mobile Friendliness in its list of web page rankings.

Visual Wilderness Visitor Trend

It is more important then every to make sure that your website can be accessed using a mobile device. Here are few things to consider when you are designing your site to be mobile-friendly.

Fully Responsive Theme

We use WordPress as a Content Management System (CMS) for our site. With this, we had a couple of options. We could convert our sites to a fully responsive theme that automatically adjusts to various screen sizes – or we could use a plug-in like WP-Touch to provide a better look and feel for our existing non-responsive theme. After much research, we decide to go with a fully-responsive theme. Why? Using a fully-responsive theme means that we didn’t have to deal with incompatibilities between the plugins and the themes we chose to use. It also meant that our maintenance was streamlined. Instead of dealing one at a time with individual components of each site, we could configure the responsive theme itself. The choices we made during the configuration process would carry over to all elements within the site.

Readable Blog

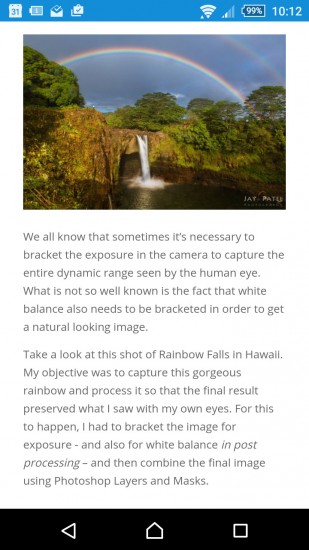
VW Blog

The most important content on our websites is the blog. We put up blog posts on a regular basis. These posts provide educational content for our viewers and provide information and announcements for our e-books, workshops, webinars, and events. So readability is critical – and we want our blog to be easy to read no matter what device you are using. Our new blog design is readable on any device – from a small mobile phone screen to a 30” monitor.

Responsive Blog and Galleries

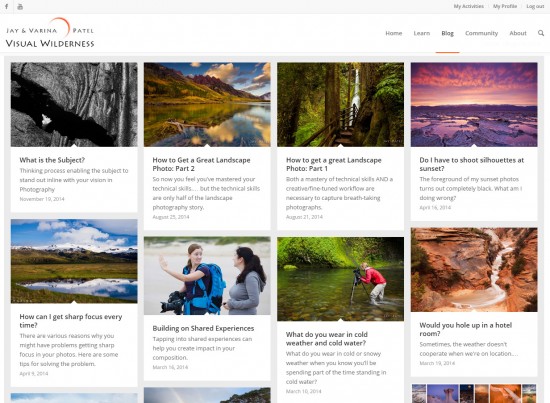
VW Blog Categories

This was our biggest challenge in dealing with the responsive theme back in 2012. At that time, gallery plugins on the market were responsive but could leave a lot of white space as the screen size changes. We looked for inspiration from social media sites like Google+ and Pinterest and decided to design our own blog layout engine. We wanted a responsive and scaleable layout design that would shift and change to fit any screen size, use very little white space, work across multiple browsers, and show thumbnails without cropping. Pretty cool, right?! We use this design to display our blog article and showcase our image in galleries.

Mobile Friendly Lightbox

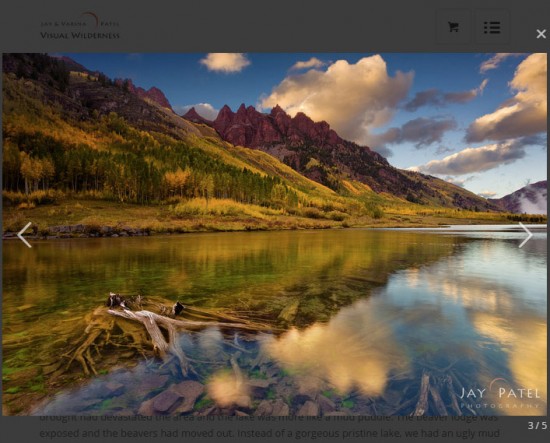
VW-Lightbox

Although many light box and slideshow plugins work well enough on mobile devices, not all support the touch functionality that makes touch-based mobile devices user-friendly. We chose a light box and slideshow that was touch-friendly, worked on both desktop computers and mobile devices, and was compatible with our gallery layout.

With the responsive theme, our site is scaleable to any screen size. How can you tell if your website is mobile-friendly? You can use this tool to determine the mobile-friendliness of your site:  Mobile Friendly Site Test

About Author Jay Patel

I could startoff like this – “Seeds of Jay Patel’s appreciation for beautiful places were planted early in his childhood….” but it would get boring really fast. I will just sum it up and say that I am a Landscape and Wilderness Photographer who loves to capture dramatic light. My photographs have been published in various magazines, calendars and advertising materials throughout the world.
Patience is a virtue...unless you are chasing your dreams

Let's block ads! (Why?)


Visual Wilderness https://ift.tt/2vTIGGh

Sourced by Time Trap Photography sharing the best photography tips, news and tricks throughout the industry. Time Trap Photography is dedicated to freezing those special moments in life that can be revisited and admired for generations to come. - Shannon Bourque
Please visit our main site for booking availability and rates.


"Time


Receive valuable industry knowledge delivered free to your email each day.


"Time

About Us

Time Trap Photography is dedicated to freezing those special moments in life that can be revisited and admired for generations to come. - Shannon Bourque

The lens in focus

“Life is like a camera. Just focus on what’s important and capture the good times, develop from the negatives and if things don’t work out, just take another shot.” — Unknown

TIME TRAP PHOTOGRAPHY COPYRIGHT 2016