Friday, July 31, 2020

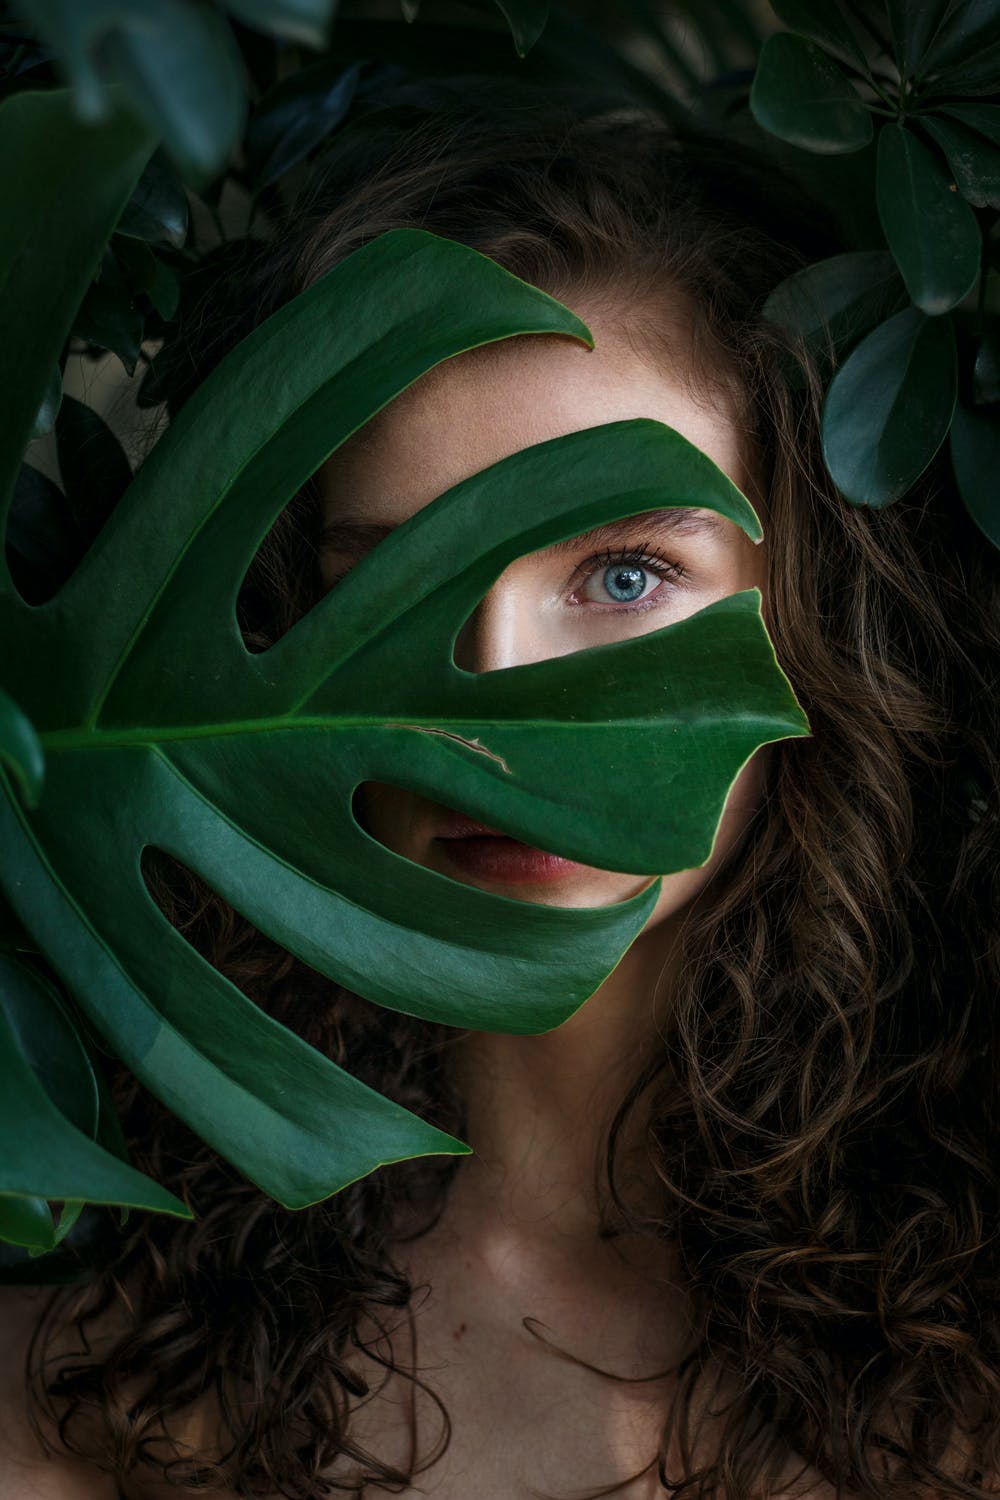
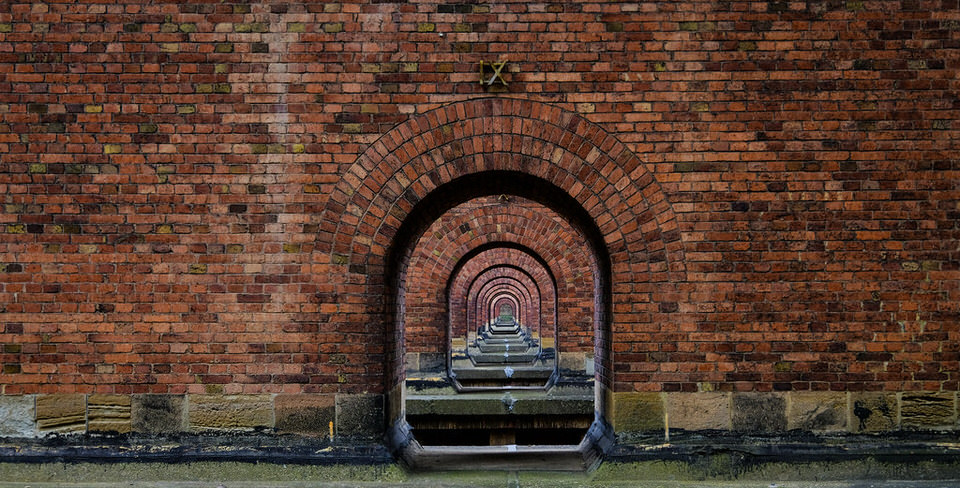
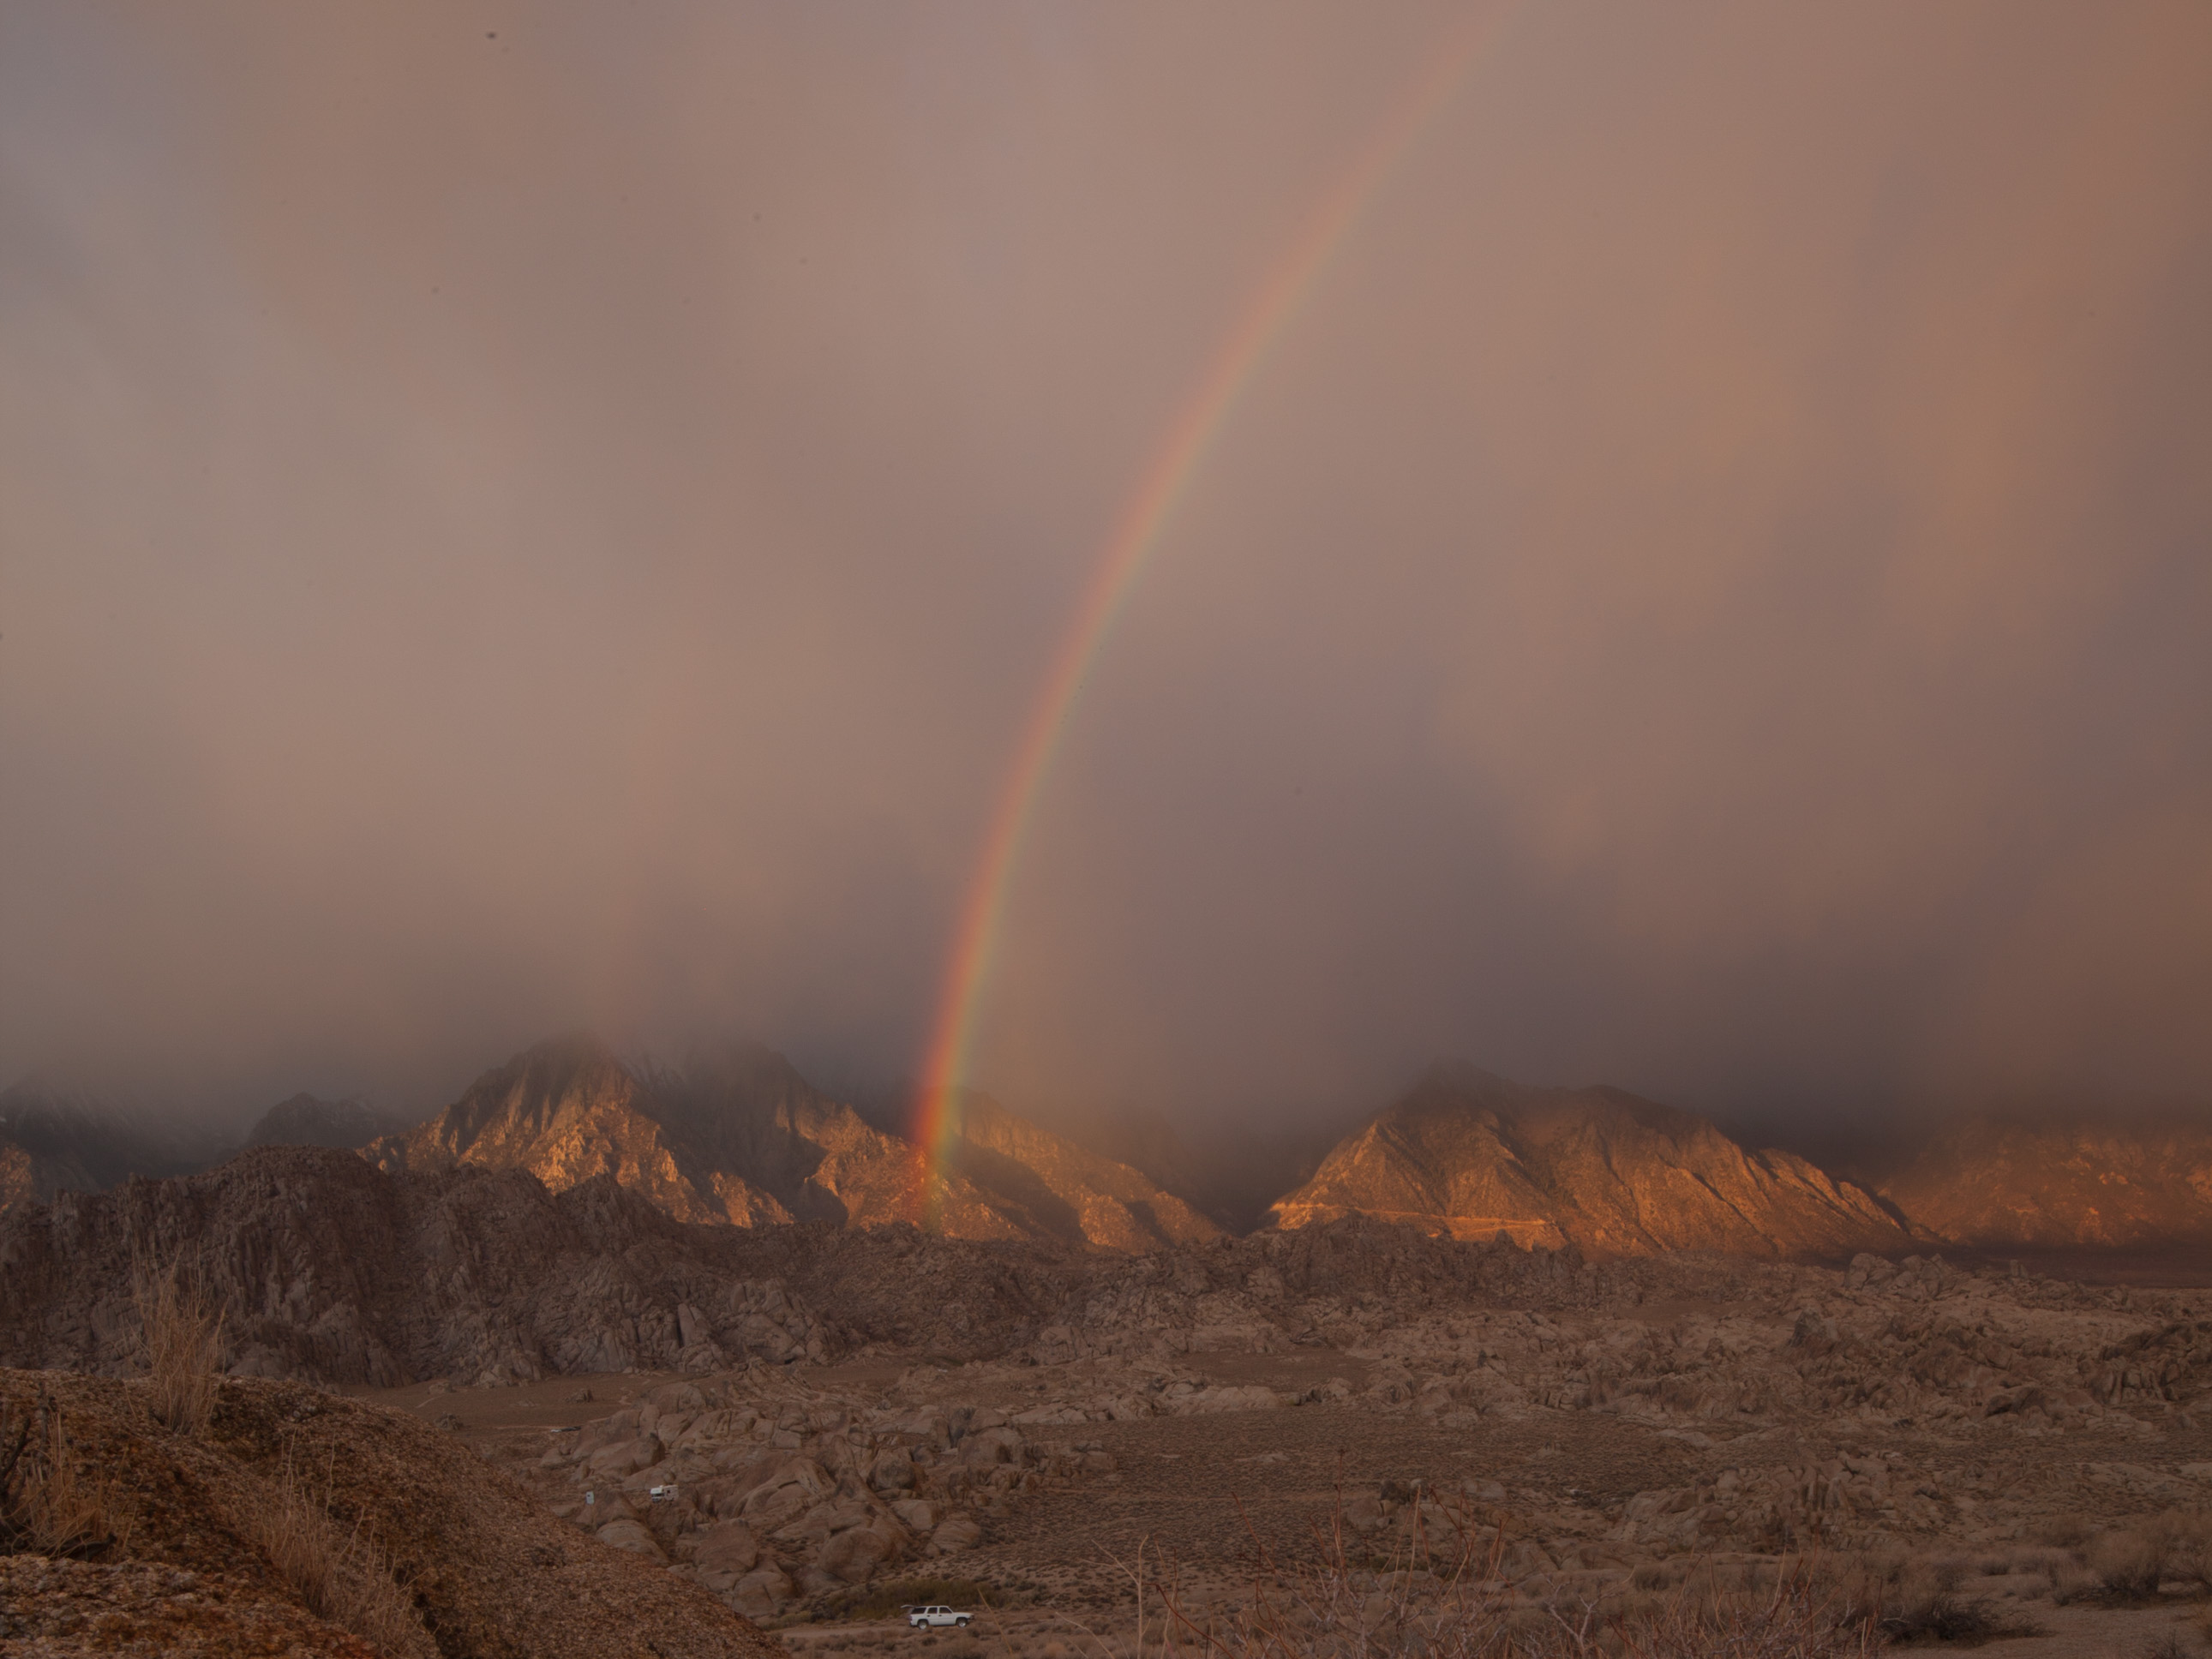
52 Wochen – Ergebnisse: Wasser

10:18:00 PM

Collage

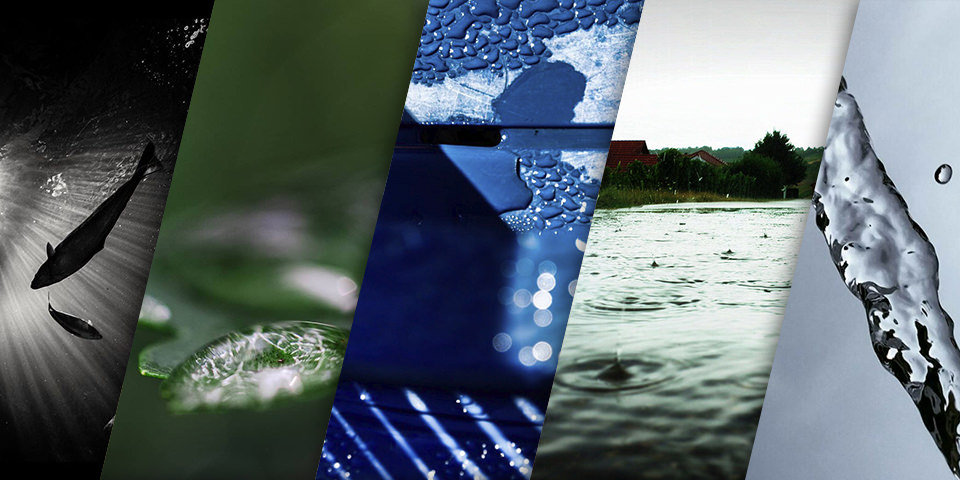
Was gibt es Besseres, als bei diesem warmen Wetter Zeit am Wasser zu verbringen? In unserer letzten Herausforderung haben wir deshalb das Wasser zum Thema gemacht und die Ergebnisse sind wirklich erfrischend. Ihr standet am Meer, habt den Wasserhahn aufgedreht oder mit Tropfen gespielt. Seht selbst.

Regen tropft in einen Teich

© Monika

Surreales Bild: Wassertropen auf blauer Oberfläche

© Andrea Epstein

Wassertropen auf zerbrochenem Glas

© Achim Eschenweck

Wasserstrahl

© cutjja

Das Projekt ist nach wie vor nicht als Wettbewerb gedacht, aber verratet uns dennoch gern, welches Bild dieses Mal Euer Favorit ist. Und nehmt gern noch am aktuellen Thema Lichtspiele teil. Montag geht es dann mit einem neuen Thema weiter.


kwerfeldein – Magazin für Fotografie https://ift.tt/2Do8sGQ

Sourced by Time Trap Photography sharing the best photography tips, news and tricks throughout the industry. Time Trap Photography is dedicated to freezing those special moments in life that can be revisited and admired for generations to come. - Shannon Bourque
Please visit our main site for booking availability and rates.


"Time


Receive valuable industry knowledge delivered free to your email each day.


"Time

Canon: EOS R5 Arriving on Schedule

6:49:00 PM

The Canon EOS R5 has had a storied history already and it isn’t even in most consumers’ hands yet.

We brought you a report yesterday about the possible delay in the wider release of the camera due to overheating issues.

Much of this was based upon speculation and Internet rumor, as many things are on the Internet. And it looks like Canon is going to clear up any false information because the company said everything is on track.

According to an article published by DPReview that features a direct comment from Canon on the shipment of the EOS R5, the “first set” of cameras should be on their way to retail.

“Orders of the EOS R5 are scheduled to be delivered as initially stated at launch. The first set of cameras shipped from our warehouses this week. We eagerly await the content that will be produced by talented creatives using this camera to be shared with the world.”

This confirmation joins an official statement from Canon Australia that said pretty much the same thing. DPReview does point out that the statement specifically refers to the “first set” of cameras. That might mean there is a potential delay for the second shipment? Who knows at this point but, if you’ve waited for the EOS R5 for a while now, it looks like that is going to come to an end and soon.

Are you waiting on a Canon EOS R5? Are you concerned at all about the reports of an overheating issue? What are you looking forward to most about the camera? Let us know your thoughts in the comments section below if you like.

Be sure to check out our other photography news articles on Light Stalking by clicking this link.

[DPReview]

Let's block ads! (Why?)


Light Stalking https://ift.tt/3fhQrag

Sourced by Time Trap Photography sharing the best photography tips, news and tricks throughout the industry. Time Trap Photography is dedicated to freezing those special moments in life that can be revisited and admired for generations to come. - Shannon Bourque
Please visit our main site for booking availability and rates.


"Time


Receive valuable industry knowledge delivered free to your email each day.


"Time

27 Powerful Portrait Photography Composition Examples Incorporating Trees and Leaves

5:49:00 AM

Let's block ads! (Why?)


Light Stalking https://ift.tt/33fOLM6

Sourced by Time Trap Photography sharing the best photography tips, news and tricks throughout the industry. Time Trap Photography is dedicated to freezing those special moments in life that can be revisited and admired for generations to come. - Shannon Bourque
Please visit our main site for booking availability and rates.


"Time


Receive valuable industry knowledge delivered free to your email each day.


"Time

31. Juli 2020

4:18:00 AM

Das Bild des Tages von: Karsten Zschache

Blick durch Brückentunnel


kwerfeldein – Magazin für Fotografie https://ift.tt/30cXVHg

Sourced by Time Trap Photography sharing the best photography tips, news and tricks throughout the industry. Time Trap Photography is dedicated to freezing those special moments in life that can be revisited and admired for generations to come. - Shannon Bourque
Please visit our main site for booking availability and rates.


"Time


Receive valuable industry knowledge delivered free to your email each day.


"Time

Pros & Cons of using a Circular Polarizers for Landscape Photography

4:03:00 AM

A circular polarizer is arguably the most useful photography filter you can own and the most important must-have tool for instantly improving images while out in the field. Unlike other filters, a polarizer’s effects cannot be mimicked in Photoshop. Circular polarizers work by blocking certain light waves from hitting the camera lens. Rotating the polarizer allows certain light waves to pass through, while blocking other light waves. Aside from providing protection for the front lens element, a polarizer can transform an otherwise lifeless scene into an image with richness, saturation, contrast, and depth.

Circular Polarizers Overview

For beginners, circular polarizers are very easy to use and require only a simple two-step process of attaching this photography filter to the front of your lens, then rotating clockwise or counter-clockwise to control the amount of polarization. I have been using B+W Circular Polarizing Filters for several years now and cannot praise enough the quality and durability of their filters. At a price-point of around $150-$200 (or more for higher-end quality), I find that they are an excellent value. In this article, I share some of the pros and cons of using circular polarizers in the field along with some examples of RAW unedited images I’ve taken. I also mention some things that you should look out for when using these polarizers.

Reducing Reflections and Enhancing Colors

  • Landscape photo of a waterfall with Without Circular Polarizer Filter by Candace Dyar

    Landscape photo of a waterfall without Circular Polarizer Filter

  • Landscape photo of a waterfall with a Circular Polarizer Filter by Candace Dyar

    Landscape photo of a waterfall with a Circular Polarizer Filter

Notice the difference between these two waterfall images. The left image without a polarizing filter has reflections and lighter colors, while the one with a polarizing filter appears to have richer, more saturated colors, no reflections, increased contrast, and blacker shadows. Polarizers remove reflections from non-metallic surfaces which makes them very useful when photographing water or wet surfaces such as the foliage in the image. Most importantly, it reduces reflections from water droplets in the air which we call atmospheric haze. Polarizers cut through haze and work to reduce polarized light and glare, making things appear more saturated, as we’re able to see again with the foliage. In general, more reflective objects see a greater increase in saturation when using these filters. Polarizer filters also have an added benefit for waterfall photography – they reduce the total amount of light reaching your camera sensor. When you’re taking longer waterfall exposures (usually from 1/2 to 1/8 second), a polarizer can take the place of additional light-reducing filters needed to shoot that slowly in daylight.

  • Mt. Hood without a Circular Polarizer Filter, Trillium Lake, Oregon by Candace Dyar

    Mt. Hood without a Circular Polarizer Filter, Trillium Lake, Oregon

  • Mt. Hood with a Circular Polarizer Filter, Trillium Lake, Oregon by Candace Dyar

    Mt. Hood with a Circular Polarizer Filter, Trillium Lake, Oregon

In the images above of Mount Hood overlooking Trillium Lake, you’re able to see how the mountain stands out more and appears prominent, versus without the polarizer. The polarizer can be rotated to cut reflections in water or on the surface of ice, revealing what is underneath such as rocks, fish, or bubbles trapped beneath the surface. As you rotate your polarizer, the reflection is replaced by the bottom of the lake and what is below the surface; keep turning, and the reflection returns. In lower light conditions such as this, it’s important to keep in mind that a circular polarizer costs you anywhere from one to two stops of exposure, depending on the type of polarizer and the amount of polarization you manually dial in. Since aperture controls depth, you’re able to compensate for the lost light with a longer shutter speed or higher ISO. In this type of situation a tripod is also extremely handy. It’s important to note that shadows are significantly darkened and contrast is increased with a polarizer present. In the images here, it is especially noticeable in the forest area and treeline near the mountain. Multiple exposures can be taken in order to compensate for this (via exposure blending), along with shadow recovery in camera RAW and post processing.

 Making Clouds Pop and Darkening The Sky

  • Tatoosh Range without a Circular Polarizer Filter by Candace Dyar

    Tatoosh Range without a Circular Polarizer Filter, Washington

  • Tatoosh Range with a Circular Polarizer Filter by Candace Dyar

    Tatoosh Range with a Circular Polarizer Filter by Candace Dyar

These images of the Tatoosh Range during an autumn evening illustrate another advantage of using a circular polarizer. You’re able to see here how the clouds seem to pop and appear more defined when using the filter. The sky is also a deep blue due to the filtering of atmospheric haze. However, there are also downsides to using the polarizer here. The effects of the filter are more pronounced when shooting away from the sun and are most extreme at 90 degrees from the sun. The effect of a polarizing filter is not uniform across the whole frame; it gradually tapers off on both sides. This non-uniformity is even more prominent when using a wide angle lens, which is what many people use for shooting landscapes. Therefore, when you use an ultra-wide lens, parts of the sky can turn deep blue to almost black while other parts of the sky at a smaller angle to the sun can be light blue. In other words, this is a typical example of over-polarizing an early evening image. You can’t effectively polarize the entire sky with a wide angle shot, so the result is that you wind up with a darker blotch towards the center of the image. The best plan is to compensate for this banding effect by dialing back the filter to a point where you’re still getting the effect of saturated and improved colors, but without overly distorting the sky color. It’s a trade-off but worth doing in the field, as correcting an image with over-polarized sky can be more complicated and time-consuming in post-processing. The end result is that you’ll have much better colors using the polarizer, even if not to its full effect.

Another consideration worth mentioning is that vignetting can often occur when using a circular polarizer. Sometimes the frame of a screw-on circular polarizer is thick enough to show up in the corners of images taken with wide-angle lenses. Its edges may block some incoming light, causing darkening around the corners of the photo. Thankfully, this is a relatively easy fix in post processing. You can also opt on a slimmer (but generally more expensive) model where there’s less of an issue.

Erasing and Emphasizing Rainbows

  • Alabama Hills Rainbow RAW image

    CP Filter rotated to enhance rainbow

  • Alabama Hills no rainbow RAW image

    CP Filter rotated to remove rainbow

The images above from the Alabama Hills illustrate how a rainbow can disappear from a scene with the use of a circular polarizer. This happens because rainbows are caused by glare when the sun’s rays hit a pocket of moisture. While this may be a disadvantage when shooting in such conditions, circular polarizers can be good for shooting rainbows as well. If the polarizer is spun in the opposite direction, it can effectively increase the amount of glare in a scene more than the natural eye sees, therefore making the rainbow even more prominent and intense. If rotated just right, a polarizer can make a rainbow stand out more and enhance the color and contrast by darkening background clouds. When trying to include both ends of a rainbow, a wide angle lens is usually required. In this case, the scene or rainbow may appear uneven with a polarizer and the rainbow could disappear at some positions. It’s also very tricky to stitch a panorama taken with a polarizer. Each photo gets polarized differently and the final photo of the stitched images can have unevenly colored skies.

I hope that these pros and cons are somewhat helpful when exploring the use of circular polarizers. If you have not already invested in this type of photography filter for your camera, hopefully these pointers encourage you to do so, or encourage you to give another try to the one that you already have collecting dust somewhere. Your photos are sure to substantially improve, especially in regards to waterfalls and landscapes. Please feel free to leave any comments below.

About Author Candace Dyar

Candace Dyar is a landscape and nature photographer based in Washington State. Her background in art history significantly contributes to her overall artistic vision and she is known for portraying a painterly type of style within her work. In addition to landscapes, Candace’s portfolio also includes intimate images of flora and fauna, and she is passionate about exploring and photographing the diversity of wilderness areas in their entirety. Her goal as a photographer is to reach viewers on an emotional level, while also spreading awareness of the necessity and vitality of the natural world.

Let's block ads! (Why?)


Visual Wilderness https://ift.tt/1ZYyobA

Sourced by Time Trap Photography sharing the best photography tips, news and tricks throughout the industry. Time Trap Photography is dedicated to freezing those special moments in life that can be revisited and admired for generations to come. - Shannon Bourque
Please visit our main site for booking availability and rates.


"Time


Receive valuable industry knowledge delivered free to your email each day.


"Time

Thursday, July 30, 2020

Die unberührte Landschaft Kamtschatkas

10:18:00 PM

Beeindruckende Landschaftsfotografien gibt es viele, aber oft wiederholen sich die Orte: Island, Namibia und Neuseeland – Ihr wisst sicher, was ich meine. Umso überraschter war ich über die Aufnahmen von Isabella Tabacchi. Eine solch wilde Landschaft mit kontrastvollen Farben und starken Strukturen hatte ich bisher noch nie gesehen.

Die italienische Fotografin ist für die Bilder im vergangenen Sommer in den äußersten Osten Russlands gereist, um die unberührte Landschaft Kamtschatkas einzufangen. Davon erzählt sie in diesen Worten:

Mein Ziel war es, diese natürliche Landschaft zu entdecken, die bis auf einige kleine Städte und die Stadt Petropawlowsk-Kamtschatski vollständig aus unberührter Natur, Wäldern und riesigen Vulkanen besteht.

Die Natur von Kamtschatka ist noch größtenteils unerforscht und wirklich gefährlich, alles ändert sich ständig. Deshalb habe ich die Halbinsel mit Hilfe von zwei lokalen Führern erkundet. Was mich am meisten beeindruckt hat, ist der Kontrast zwischen den Farben des Lebens – der Bäume, der Blumen, der Wälder und den Farbtönen des Todes: der Vulkane, der Asche.

Landschaft

LandschaftLandschaft

Landschaft

Blumen im Vordergrund und Berg im HintergrundLandschaft

Landschaft

Landschaft

Landschaft

Landschaft

LandschaftLandschaft

Berglandschaft

Landschaft

Im Portfolio der Fotografin sind natürlich auch die oben erwähnten beliebten Foto-Reiseziele zu finden. Aber auch diesen sieht man das professionelle Auge an. Schaut Euch unbedingt auf ihrer Webseite um oder folgt Ihr auf Instagram.


kwerfeldein – Magazin für Fotografie https://ift.tt/3hPKHWY

Sourced by Time Trap Photography sharing the best photography tips, news and tricks throughout the industry. Time Trap Photography is dedicated to freezing those special moments in life that can be revisited and admired for generations to come. - Shannon Bourque
Please visit our main site for booking availability and rates.


"Time


Receive valuable industry knowledge delivered free to your email each day.


"Time

6 Things to Learn After Manual Mode

7:02:00 PM

Now that you know how your camera manual mode works, and you are in control of what it is doing when you take a picture, what’s next? Our brain likes the process of constantly learning something new. That’s why we network with other people, visit conferences, read books and articles, travel, scroll social media feeds, and so on.

manual-mode-cover

There are many more things to know about your camera, such as focus modes, metering modes, working with an external flash, and post-processing. The better you understand all camera settings, the better pictures you can get because you are in full control of shooting. Let’s get started.

Focus modes

Focusing modes is not something all photographers know, but learning focus modes is a great way to take your skills to the next level. Photography focus modes rely on either the camera’s technology or using your hands and focusing manually. However, both of these focus modes are useful in particular situations.

Manual Focus Mode (M)

Photographers used manual focus mode for decades before auto-focus was developed. Since autofocus can make mistakes and choose the wrong subject to focus on, manual focus comes in handy.

Manual focus is extremely useful when you shoot in low-light conditions, but it also works pretty good for still life, architecture, and macro photography.

Autofocus Mode (AF)

Autofocus is available thanks to the camera’s technology and lens motors. It depends on different factors, such as lighting, your subject, and your camera’s capabilities.

In the last few years, autofocus modes became more advanced. There are three types of autofocus, such as

– One-Shot (AF-S),

– AI Servo (AF-C), and

– AI Focus (AF-A).

One-Shot focus is quite simple and it does this in the way it focuses on a single shot. It is a perfect option for subjects that are not moving.

AI Servo (AF-C) or continuous focus works the best for moving subjects, when you shoot some sports activities or cars, for example. It focuses when you press the shutter button partially, but it still controls the movement within the frame.

AI Focus (AF-A) is a mix of both technologies mentioned above. It fits the best for shooting subjects that could move without much notice, such as birds. AI focus can be applied for subjects that are slightly moving.

All modern DSLRs allow you to turn off the autofocus and try manual focus. Many people may find it too difficult and time-consuming, but photography is a creative genre that requires some unusual decisions from time to time.

Metering Modes

When you grow your digital abilities, you become in control of the light on the scene. Knowing metering modes can help you to work with tricky lighting conditions and make them less challenging for you.

metering-modes

Nancy Young

In a nutshell, metering is the process that your camera undergoes when it works out what exposure to choose for a particular shot. There are a few metering modes that you can choose for certain conditions.

A correctly exposed photo is made of 3 tones of light: shadows, mid-tones, and highlights. Take a look at the image below: it features

  • Highlights on the sky,
  • Shadows in the front,
  • Mid-tones in the middle of the scene.

2-1-tones-of-light

If you choose to expose the image only for the sky, the sky would be well-exposed, but the rest of the picture would be underexposed and way too dark. If you decide to expose the image using the forest on the forefront, the foreground would be well exposed, however, the sky would be overexposed, and you would get blown-out highlights.

There are four major metering modes and below I’m going to explain what they do.

Evaluative (Matrix) Metering Mode

It’s a complicated and modern way to meter the scene. This is the metering mode your camera uses and it goes by default settings. Your camera reads light all over the scene, and then the camera’s technology determines the correct exposure and perfect amount of highlights, shadows, and mid-tones.

Partial Metering Mode

This metering mode collects the data from the round small area in the centre of the photo. This small area covers only 10-15% of the image. This metering mode will come in handy when your subject is in the very centre of the image.

Spot Metering Mode

Spot metering mode means that the camera takes a small spot in the centre of the picture (about 5%) and determines correct exposure. It works better than the partial mode because it takes into account metering for a very small area. However, it could leave the rest of the image underexposed.

Centre-Weighted Metering Mode

Centre-weighted metering mode is similar to partial metering, but it reads a much larger area from 60-80% of the whole scene. Camera manufacturers know that most people take pictures where the subject is placed in the middle of the scene. To give an accurate exposure value, there should be an effective metering system inside of a DSLR. However, this metering mode is difficult to use and predict.

A quick tip: if your photo is lit, use evaluative metering mode. In the case where your subject takes most of the scene, use spot metering mode. Centre-weight metering mode will be useful in situations when you have the sun (or another illuminating object) behind the subject.

Using External Flash to Set the Mood

Quick explanation: an external flash is the one that is not built into your camera body. You can mount an external flash on a camera or remotely trigger it to light off-camera.

When do you need an external flash?

Obviously, with built-in flash, it’s difficult to illuminate wide-angle shots; that’s why when you shoot something far away from you, the corners of the scene remain dark. Here an off-camera flash can come in handy.

Another big advantage of  external flash is that it does not use the camera’s battery and lasts longer.

external-flash

Besides, you can’t control the direction of the built-in flash. It produces harsh-looking shots every time. But with an external flash, you can produce bounced light that gives softer shadows and an  illuminated background that looks almost like natural light.

External flash also reduces red eye in the photo. Of course, you can always  change that in Photoshop, but with an external flash, you’ll get real eye color.

Reading and Using Natural Light to Your Advantage

We are all familiar with natural light, but have you ever thought about how you can use natural light as an advantage?

Natural light in photography means that you use the sun as a light source. The lighting varies with the time of the day.

The noon sun will give you very strong shadows and highlights, while one hour before the sunset allows you to take magical pictures with soft yellow light. That’s why many photographers love the time before sunset which is called the golden hour, but this is a topic for the next article.

The best way to start reading and using natural light is to experiment with it.

Shoot with Hard Light at Midday

Most photographers try to avoid midday sun because it gives hard shadows and a harsh appearance, but you can still  get some creative beautiful shots at noon. Shadows could be a great composition element, just like in the image below.

4-1-shadows

Try to Shoot at Sunset and Sunrise

Shooting in the morning or the evening gives you the best possible light. The sun is low and it offers softer shadows. You can shoot not only sunsets (that is a cliche), but soft light before the sun goes down is a perfect time to shoot portraits.

4-2-sunset

Shoot with the Sun in Front

Taking pictures with the sun in front of you gives you amazing light flares that look magical in the pictures. In this case, your subject with the backlight could be underexposed, but you can always change that with post-processing.

4-3-backlight

Straight Light on the Subject

The angle of light can make a huge difference. Light straight on the subject is one of the simplest and straightforward techniques for outdoor photography. It helps to avoid hard nasty shadows on the subject.

straight-light

Side Lighting

Side lighting can help you to show texture on a surface, for example, on the interior design or body muscles. At the same time, you should be careful with side lighting, because it could create bad shadows on a model’s face.

side-light

Improving Your Post-Processing Skills

After you have mastered manual mode, you also need to get familiar with the basics of photo editing.

Cropping and cleaning up your images

When we talk about cropping and cleaning up, there are a series of things you need to understand, and we are going to be taking a look at them one after the other.

  • Straighten images: the first thing is for you to make sure that your images are horizontal when you shoot, and if you happen to miss that, you have to make sure that you straighten your images.
  • Image cropping: another thing you have to consider is cropping your images to improve the positioning/composition and remove all the unwanted elements.
  • Spot cleaning: the final step here is spot cleaning, and this has to do with changing your view of the photo to checkout spotted locations and make sure the image is spot free and better looking.

Adjust the white balance

White balance is something that has to do with color levels rather than exposure. White balance is all about changing your images’ overall color tone, especially when you feel like they do not fit the overall context of the image you are trying to portray.

white-balance

Nancy Young

For JPG files, you need just a small amount of white balance adjustments because of the availability of less digital data than the raw image files.

Exposure and contrast adjustments

You knew I was not going to leave this out of this article, didnt  you?

  • Adjusting exposure: some pictures are great, but they do not look as great as we want them to be. One thing is that they are not as bright or as dark as we would want them to be, and that is where exposure comes in.
  • Adjusting contrast: this has to do with tones, and you do not want it to be either too high or lower than you need it to be, which means that the best selection is the middle tone.

You can adjust exposure, crop images, change brightness, and contrast using numerous post-processing programs. Two of the best and most popular tools for photo editing are Adobe Lightroom and Capture One.

Lightroom is a solution for photographers that can help you post-process images and also organize them. It allows you to import/save, organize, view, edit, tag, and share large numbers of digital images. The best part about Lightroom is that you can use Color Mix to adjust Hue, Saturation, and Luminance of any color.

Capture One is a similar tool that lets you edit photos and create image catalogues, as well as post-process raw files. With Capture One you can create annotations that give an ability to edit the image by different people and see their comments. When it comes to their interface, you can place tools anywhere you like or hide them anytime.

Using Your DSLR for Videography

Did you know that your DSLR can not only take pictures but also make videos? Without a doubt, taking video with your camera is way more complicated than taking stills, but it’s definitely an interesting and exciting skill to master.

DSLRs have evolved so much in this aspect that for productions many people use them instead of large, expensive bulky professional camcorders.  You can now find all sorts of accessories such as camera cages and rigs to turn your DSLR into a full production camera.

You do not need to spend thousands on any extra equipment to film with your DSLR.  There are even some with built in microphones and you can use the mounting points like a hotshoe adapter and tripod screw to add a few things  you may need.

Because of their large image sensors and ability to change lenses, plus manual zoom and focus, adjustable frame rates and other features, you can make really cinematic videos with as shallow of a depth of field as you want.

The best cameras that are suitable for shooting videos are Nikon D810, Canon 5D Mark III, Sony Alpha a7SII, and Canon 80D. You can Google if you can use your camera for videos.

Check out the following video on using your DSLR for filmmaking:

Conclusion

After you mastered camera manual mode, you need to know 6 more things that you can learn about your DSLR. I hope these things will help you to become a better photographer. Never stop learning something new.

Take a look at the following link to learn how to use your camera’s depth of field creatively.

Let's block ads! (Why?)


Photodoto https://ift.tt/3gfhQLx

Sourced by Time Trap Photography sharing the best photography tips, news and tricks throughout the industry.
Time trap photography><br></a> <hr><a href=Time trap photography tweet
Sourced by the Time Trap Photography guys https://ift.tt/1LW7xnO
Time Trap Photography is dedicated to freezing those special moments in life that can be revisited and admired for generations to come.

Canon EOS R5 Shipments Delayed Due to Overheating Issue

6:49:00 PM

Do you remember that overheating issue that was plaguing Canon’s upcoming EOS R5?

It looks like it has delayed the shipment of the camera to customers until a fix can be found. PetaPixel even speculates that this could be the beginning of a recall by the company for the units already out in the wild.

EOSHD reported that a major outlet in Germany only received five cameras while the country in general got about 70. You read that right: The entire nation of Germany only received 70 EOS R5’s…at least, according to EOSHD’s source. Other websites are reporting that the delay could extend until November of this year.

Canon Rumors, long a source of insider knowledge at the company, reports that the number of units being shipped to retail are far lower than would be expected with the overheating issue speculated as being one of the primary reasons behind the delay. As PetaPixel reports, and EOSHD speculates, if this was a simple firmware fix then the company would likely not delay in releasing more units to the public for retail. It seems like the fix might be something beyond that.

For their part, Canon hasn’t really avoided this issue. Then again, the company didn’t really have much of a choice when you look at how many people were reporting on this issue in the early reviews of the device. Whatever the company decides to do, we will keep you updated as things develop.

Are you looking forward to the Canon EOS R5? What do you think of the delay in shipments? Let us know your thoughts on Canon’s upcoming camera in the comments section below.

You can check out our other photography news articles on Light Stalking by clicking this link here.

[PetaPixel]

Let's block ads! (Why?)


Light Stalking https://ift.tt/312kON0

Sourced by Time Trap Photography sharing the best photography tips, news and tricks throughout the industry. Time Trap Photography is dedicated to freezing those special moments in life that can be revisited and admired for generations to come. - Shannon Bourque
Please visit our main site for booking availability and rates.


"Time


Receive valuable industry knowledge delivered free to your email each day.


"Time

About Us

Time Trap Photography is dedicated to freezing those special moments in life that can be revisited and admired for generations to come. - Shannon Bourque

The lens in focus

“Life is like a camera. Just focus on what’s important and capture the good times, develop from the negatives and if things don’t work out, just take another shot.” — Unknown

TIME TRAP PHOTOGRAPHY COPYRIGHT 2016