
A circular polarizer is arguably the most useful photography filter you can own and the most important must-have tool for instantly improving images while out in the field. Unlike other filters, a polarizer’s effects cannot be mimicked in Photoshop. Circular polarizers work by blocking certain light waves from hitting the camera lens. Rotating the polarizer allows certain light waves to pass through, while blocking other light waves. Aside from providing protection for the front lens element, a polarizer can transform an otherwise lifeless scene into an image with richness, saturation, contrast, and depth.
Circular Polarizers Overview
For beginners, circular polarizers are very easy to use and require only a simple two-step process of attaching this photography filter to the front of your lens, then rotating clockwise or counter-clockwise to control the amount of polarization. I have been using B+W Circular Polarizing Filters for several years now and cannot praise enough the quality and durability of their filters. At a price-point of around $150-$200 (or more for higher-end quality), I find that they are an excellent value. In this article, I share some of the pros and cons of using circular polarizers in the field along with some examples of RAW unedited images I’ve taken. I also mention some things that you should look out for when using these polarizers.
Reducing Reflections and Enhancing Colors
-

Landscape photo of a waterfall without Circular Polarizer Filter
-

Landscape photo of a waterfall with a Circular Polarizer Filter


Notice the difference between these two waterfall images. The left image without a polarizing filter has reflections and lighter colors, while the one with a polarizing filter appears to have richer, more saturated colors, no reflections, increased contrast, and blacker shadows. Polarizers remove reflections from non-metallic surfaces which makes them very useful when photographing water or wet surfaces such as the foliage in the image. Most importantly, it reduces reflections from water droplets in the air which we call atmospheric haze. Polarizers cut through haze and work to reduce polarized light and glare, making things appear more saturated, as we’re able to see again with the foliage. In general, more reflective objects see a greater increase in saturation when using these filters. Polarizer filters also have an added benefit for waterfall photography – they reduce the total amount of light reaching your camera sensor. When you’re taking longer waterfall exposures (usually from 1/2 to 1/8 second), a polarizer can take the place of additional light-reducing filters needed to shoot that slowly in daylight.
-

Mt. Hood without a Circular Polarizer Filter, Trillium Lake, Oregon
-

Mt. Hood with a Circular Polarizer Filter, Trillium Lake, Oregon


In the images above of Mount Hood overlooking Trillium Lake, you’re able to see how the mountain stands out more and appears prominent, versus without the polarizer. The polarizer can be rotated to cut reflections in water or on the surface of ice, revealing what is underneath such as rocks, fish, or bubbles trapped beneath the surface. As you rotate your polarizer, the reflection is replaced by the bottom of the lake and what is below the surface; keep turning, and the reflection returns. In lower light conditions such as this, it’s important to keep in mind that a circular polarizer costs you anywhere from one to two stops of exposure, depending on the type of polarizer and the amount of polarization you manually dial in. Since aperture controls depth, you’re able to compensate for the lost light with a longer shutter speed or higher ISO. In this type of situation a tripod is also extremely handy. It’s important to note that shadows are significantly darkened and contrast is increased with a polarizer present. In the images here, it is especially noticeable in the forest area and treeline near the mountain. Multiple exposures can be taken in order to compensate for this (via exposure blending), along with shadow recovery in camera RAW and post processing.
Making Clouds Pop and Darkening The Sky
-

Tatoosh Range without a Circular Polarizer Filter, Washington
-

Tatoosh Range with a Circular Polarizer Filter by Candace Dyar


These images of the Tatoosh Range during an autumn evening illustrate another advantage of using a circular polarizer. You’re able to see here how the clouds seem to pop and appear more defined when using the filter. The sky is also a deep blue due to the filtering of atmospheric haze. However, there are also downsides to using the polarizer here. The effects of the filter are more pronounced when shooting away from the sun and are most extreme at 90 degrees from the sun. The effect of a polarizing filter is not uniform across the whole frame; it gradually tapers off on both sides. This non-uniformity is even more prominent when using a wide angle lens, which is what many people use for shooting landscapes. Therefore, when you use an ultra-wide lens, parts of the sky can turn deep blue to almost black while other parts of the sky at a smaller angle to the sun can be light blue. In other words, this is a typical example of over-polarizing an early evening image. You can’t effectively polarize the entire sky with a wide angle shot, so the result is that you wind up with a darker blotch towards the center of the image. The best plan is to compensate for this banding effect by dialing back the filter to a point where you’re still getting the effect of saturated and improved colors, but without overly distorting the sky color. It’s a trade-off but worth doing in the field, as correcting an image with over-polarized sky can be more complicated and time-consuming in post-processing. The end result is that you’ll have much better colors using the polarizer, even if not to its full effect.
Another consideration worth mentioning is that vignetting can often occur when using a circular polarizer. Sometimes the frame of a screw-on circular polarizer is thick enough to show up in the corners of images taken with wide-angle lenses. Its edges may block some incoming light, causing darkening around the corners of the photo. Thankfully, this is a relatively easy fix in post processing. You can also opt on a slimmer (but generally more expensive) model where there’s less of an issue.
Erasing and Emphasizing Rainbows
-

CP Filter rotated to enhance rainbow
-
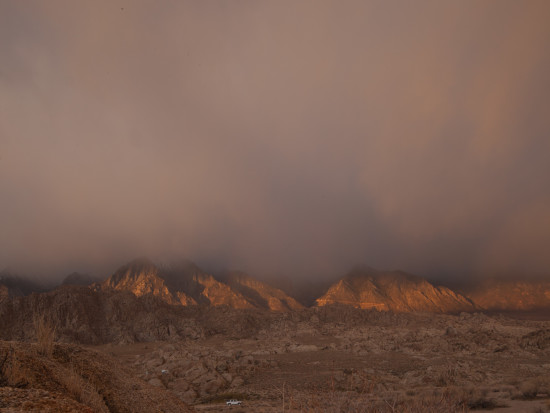
CP Filter rotated to remove rainbow
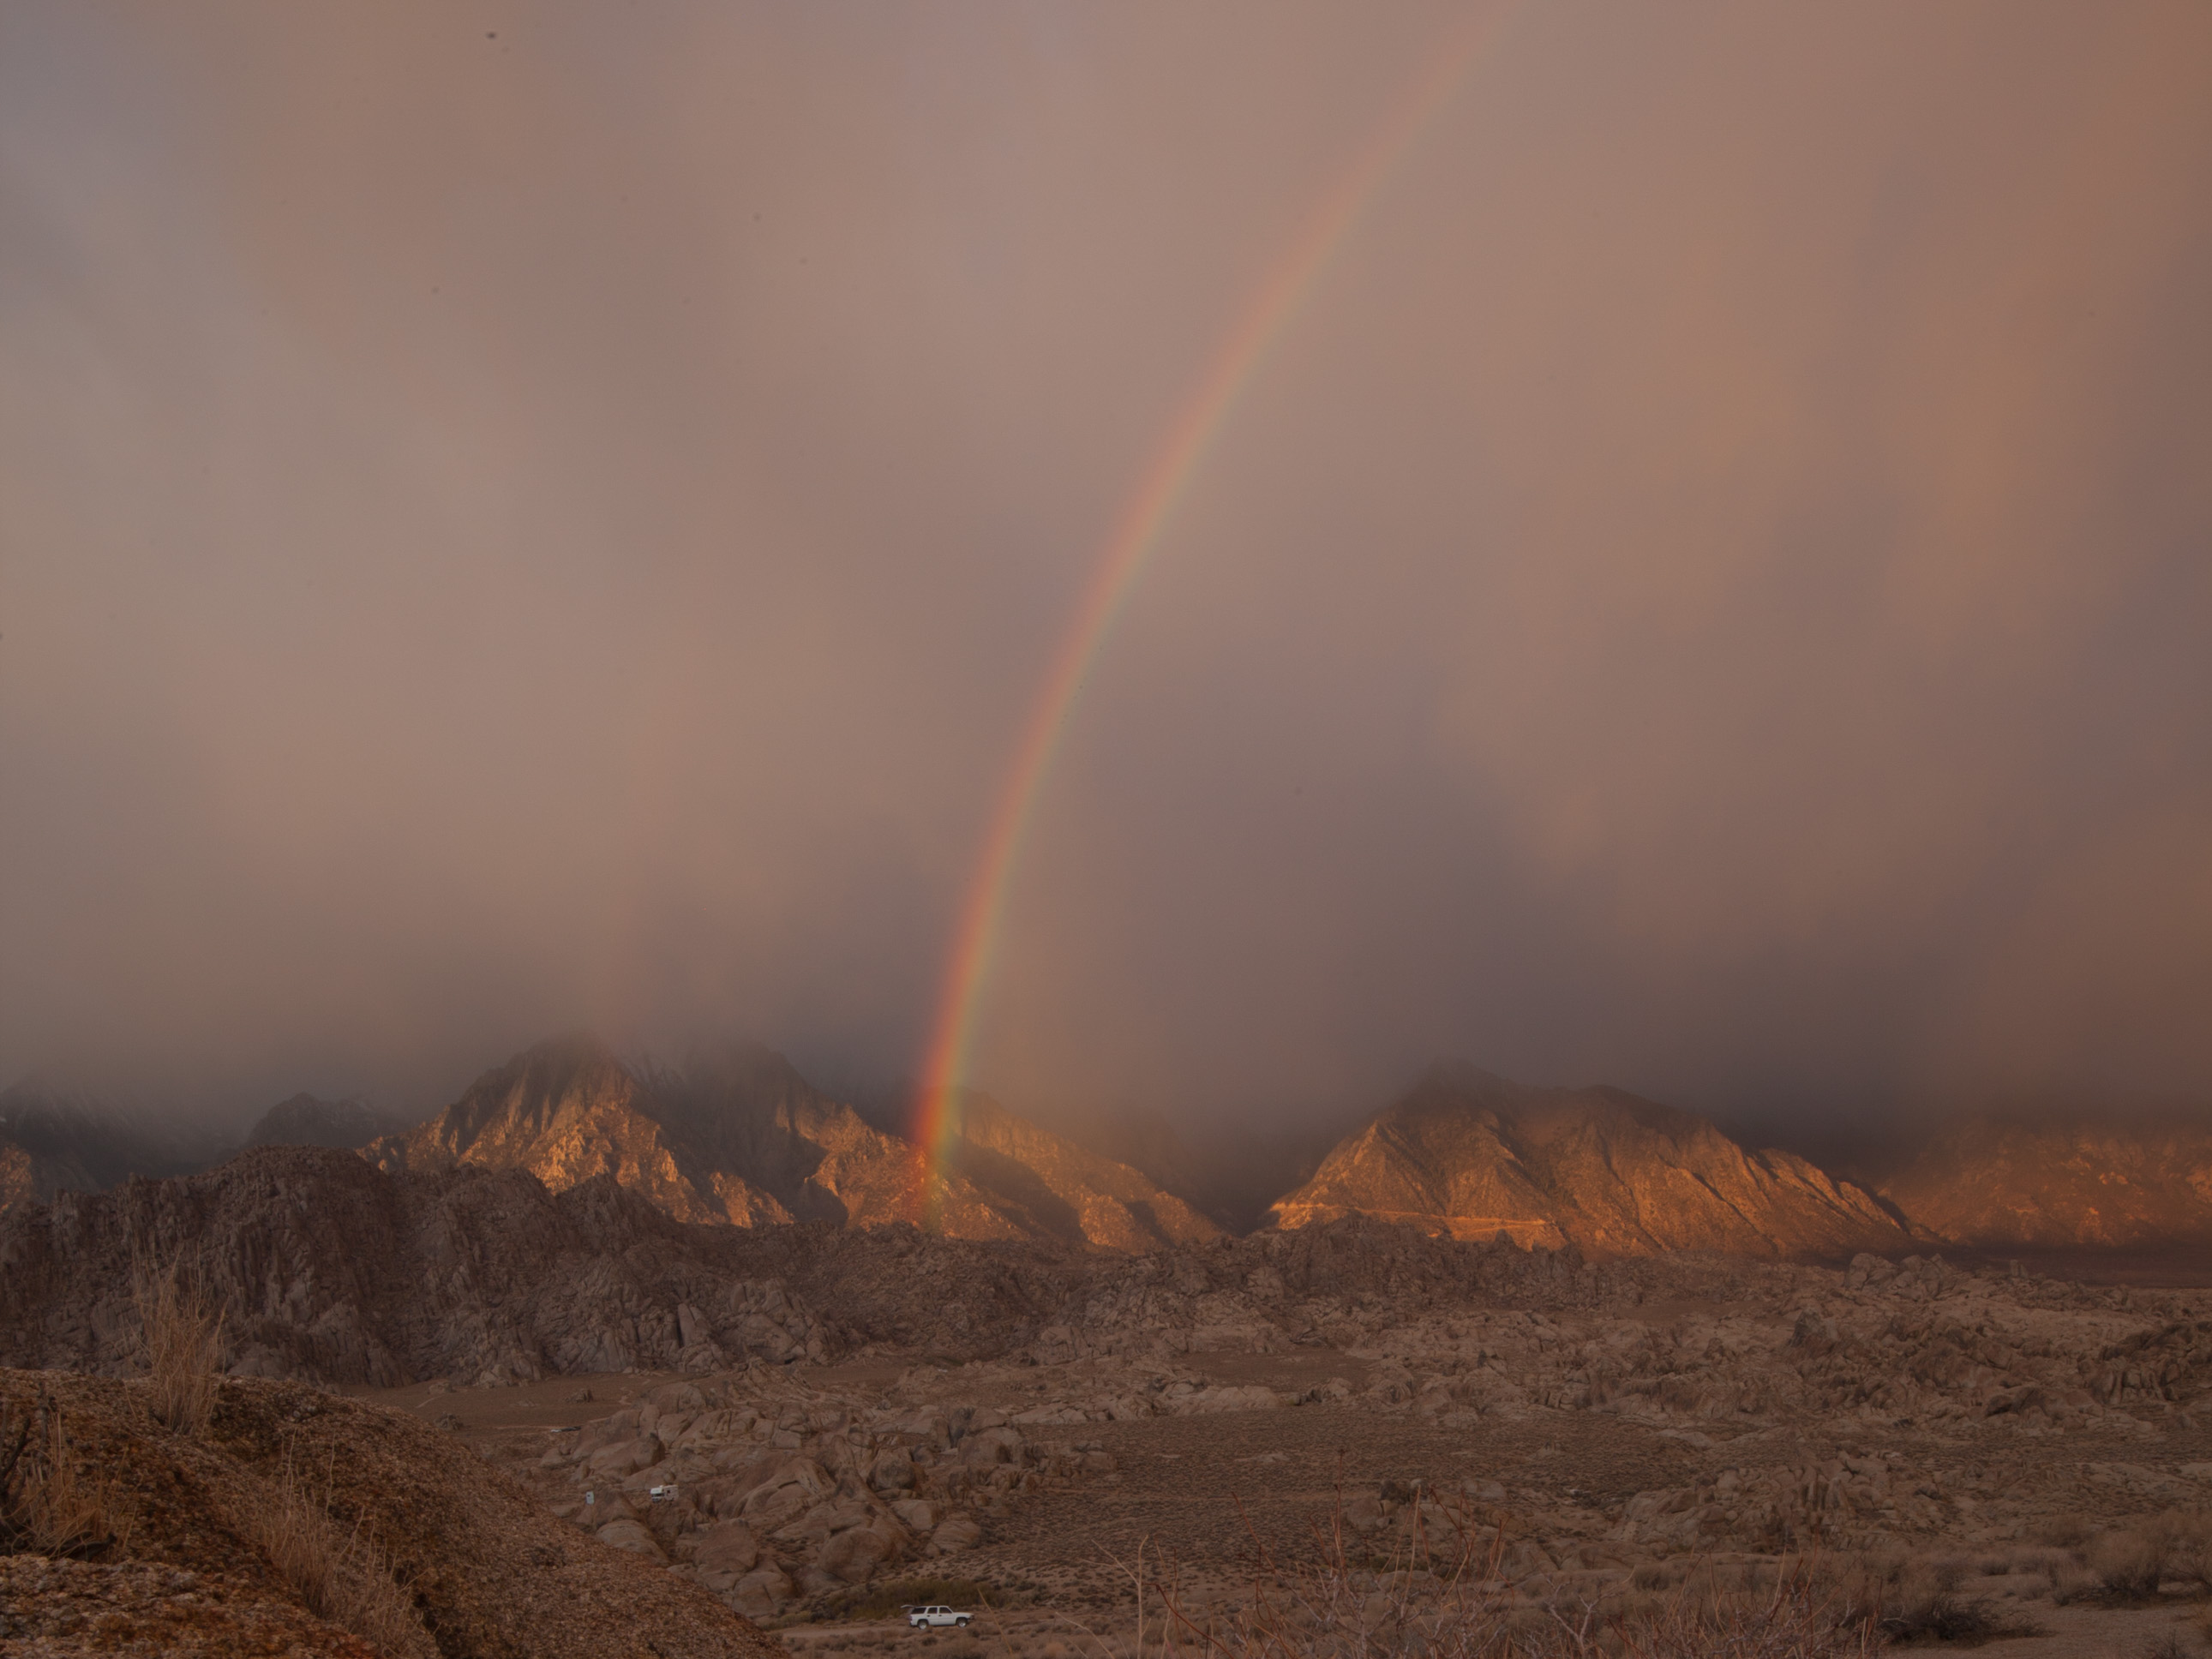

The images above from the Alabama Hills illustrate how a rainbow can disappear from a scene with the use of a circular polarizer. This happens because rainbows are caused by glare when the sun’s rays hit a pocket of moisture. While this may be a disadvantage when shooting in such conditions, circular polarizers can be good for shooting rainbows as well. If the polarizer is spun in the opposite direction, it can effectively increase the amount of glare in a scene more than the natural eye sees, therefore making the rainbow even more prominent and intense. If rotated just right, a polarizer can make a rainbow stand out more and enhance the color and contrast by darkening background clouds. When trying to include both ends of a rainbow, a wide angle lens is usually required. In this case, the scene or rainbow may appear uneven with a polarizer and the rainbow could disappear at some positions. It’s also very tricky to stitch a panorama taken with a polarizer. Each photo gets polarized differently and the final photo of the stitched images can have unevenly colored skies.
I hope that these pros and cons are somewhat helpful when exploring the use of circular polarizers. If you have not already invested in this type of photography filter for your camera, hopefully these pointers encourage you to do so, or encourage you to give another try to the one that you already have collecting dust somewhere. Your photos are sure to substantially improve, especially in regards to waterfalls and landscapes. Please feel free to leave any comments below.
About Author Candace Dyar
Candace Dyar is a landscape and nature photographer based in Washington State. Her background in art history significantly contributes to her overall artistic vision and she is known for portraying a painterly type of style within her work. In addition to landscapes, Candace’s portfolio also includes intimate images of flora and fauna, and she is passionate about exploring and photographing the diversity of wilderness areas in their entirety. Her goal as a photographer is to reach viewers on an emotional level, while also spreading awareness of the necessity and vitality of the natural world.
Visual Wilderness https://ift.tt/1ZYyobA
Sourced by Time Trap Photography sharing the best photography tips, news and tricks throughout the industry. Time Trap Photography is dedicated to freezing those special moments in life that can be revisited and admired for generations to come. - Shannon Bourque
Please visit our main site for booking availability and rates.

Receive valuable industry knowledge delivered free to your email each day.


No comments:
Post a Comment
Thank you so much for your comment. A moderator will review and approve all relevant posts. We appreciate your support and encourage you to stay with us by subscribing to our email updates. Where you can easily pick and choose what photography subjects interests you. Subscription link: http://bit.ly/photo-sub