Showing posts with label PhotoTips. Show all posts

Monday, November 9, 2020

3 Landscape Photography Traps Beginners Should Avoid

4:05:00 AM

Recently I saw a post on social media that started with “What do I need to get started in landscape photography?” The problem with asking questions on social media is that you don’t know who is offering good advice and who is not. I saw numerous answers to this question on both from professional landscape photographers as well as amateurs. While some answers offered useful advice, others did not.

So, if you are a beginner landscape photographer looking to get started, here is some common advice often found on social media that you should avoid:

#1: I need the latest landscape photography equipment

Some landscape photographers spend hours reading every single review of the latest cameras. They study the MTF curves for each lens in their collection and indulge in countless debates about the best gear for pursuing their landscape photography passion. After endless hour of research, they may spend some big bucks on a brand new Canon 5D MKXX or the Nikon DXXX as well as the most expensive lenses money can buy. But will this help them conquer the world of landscape photography?
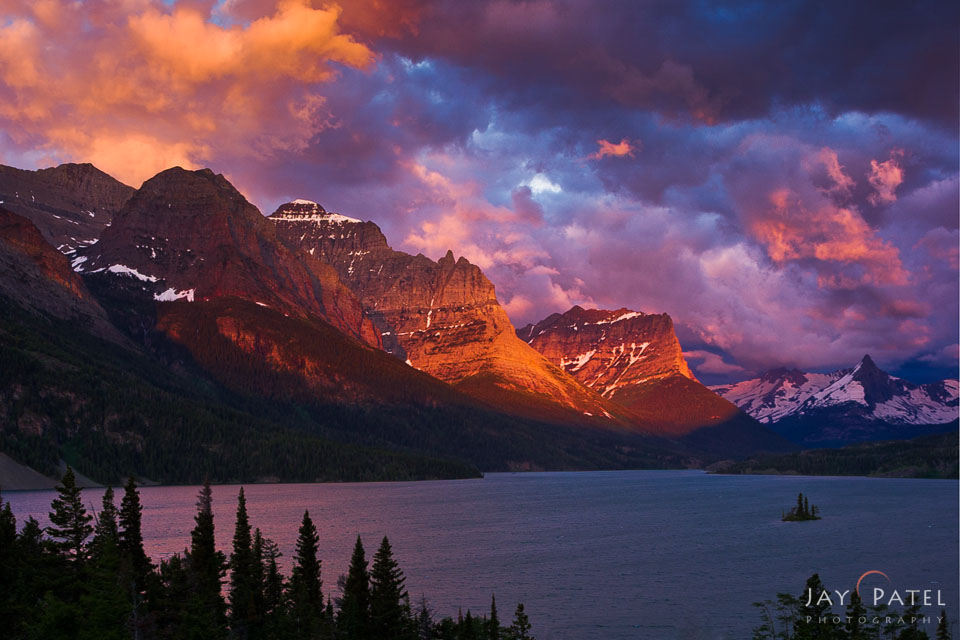
Landscape Photography Canon D30, Glacier National Park, Montana by Jay Patel

Landscape Photography Canon D30, Glacier National Park, Montana

Let’s face it… buying landscape photography gear is the fun and easy part. However, all this fancy photography equipment does little to guarantee that a beginner landscape photographer will be successful in capturing stunning photos. Sometimes they forget to consider something more important – how to use that fancy gear, what to photograph, and how to get a good landscape photo. Knowing these things allows a beginner landscape photographer to consistently capture effective images no matter what.

I know some of you are thinking that this is definitely not true… and that there is no way a 10-year old camera can take the same stunning photos as a brand new DSLR. It is true that cameras today have far greater capability than cameras produced just a few years ago. However, an effective landscape photographer can find opportunities to take photos with any camera because they are intimately familiar with what their camera can and cannot do. We shot both of the photos above with 10-year old cameras.

So unless money is no object, I advise beginner landscape photographers to purchase a good mid-range camera, a couple of good lenses, and a tripod. And then devote some serious effort in trying to acquire knowledge about getting a great landscape photo.

#2: Landscape photographers must spend months on location

During interviews, people often ask us, “How much time do you spend on location in any given year?” Most beginner landscape photographers are surprised to learn that we travel no more than 30-40 days in a year. We spend the rest of the time managing our landscape photography business. We plan our landscape photography outings so that we maximize our chances of getting the best weather patterns and the right seasons. But things don’t always go according to the plan. Experience has taught us to be flexible and open to new ideas.

In 2013 we traveled to Florida, California, Utah, Oregon, Nicaragua, Denver, and Hawaii. For an example of a typical landscape photography trip, consider our trip to Oregon. We spent three full days hiking, exploring, and shooting in the Columbia River Gorge and the surrounding area. To date, I have processed 14 unique images (photos with completely different compositions) that will make it to my portfolio. Sometimes we’ll shoot more and sometimes less… but 14 shots is a nice average for a short photography trip.

Waterfall Photography from Punch Bowl Falls, Columbia River Gorge, Oregon by Jay Patel

Punch Bowl Falls, Columbia River Gorge, Oregon

So how can we produce so many landscape photos with such minimal amounts of traveling?  It comes down to research and field techniques that allow us to shoot in a variety of different light conditions. Before we go out, we research weather patterns, tides, seasonal colors, phases of the moon, climate, flora, fauna, and locations. We often contact local photographers and pick their brains about the local landscapes. Based upon this research, we try to choose the locations that will allow us to maximize the probability of getting a good landscape photo at the time we plan to travel to the location. When we arrive at the location, our plans are always fluid. They may change as necessary, based upon weather patterns.

Fall Landscape Photography from Snowmass Wilderness, Colorado by Jay Patel

Fall Photography from Snowmass Wilderness, Colorado – 2007

We first visited Maroon Bells in 2007. I used an interesting root structure beneath the surface of the lake as a foreground object in the photo above. Five years later, in 2012, we returned to the lake. This time, we discovered that the lake had shrunk dramatically because of a long summer drought. It no longer reached the grassy shores we remembered from our previous trip. Instead, mud and rotting wood surrounded the lake. The brilliantly colored moss that was growing under water in 2007  had died off.

  • Fall Photography from Crystal Creek, Colorado by Jay Patel

    Fall Photography from Crystal Creek, Colorado – 2012

  • Nature Photography with Telephoto Lens, Marble, Colorado by Varina Patel

    Nature Photography with Telephoto Lens, Marble, Colorado – 2012

  • Macro Photography, Marble, Colorado by Varina Patel

    Macro Photography, Marble, Colorado – 2012

Though the banks of the lake were uninspiring, I still felt that there was incredible beauty to be captured. I focused my attention on the nearby areas based on the research we had done prior to our arrival. In the end, I was able to come away with a photo that I like because I was willing to be flexible and look for alternative shots. So, the next time you are faced with unexpected conditions, don’t give up.

#3: I will fix it in Photoshop

Creativity is perhaps one of the most underrated skills in landscape photography. As a beginner landscape photographer, it’s important to develop your post-processing skills. This allows you to do all sorts of fancy stuff with your landscape photography. However, you should never use post-processing skills as a substitute for creative field work or your camera skills. We strongly discourage the “I will fix it in Photoshop” attitude during our workshops.

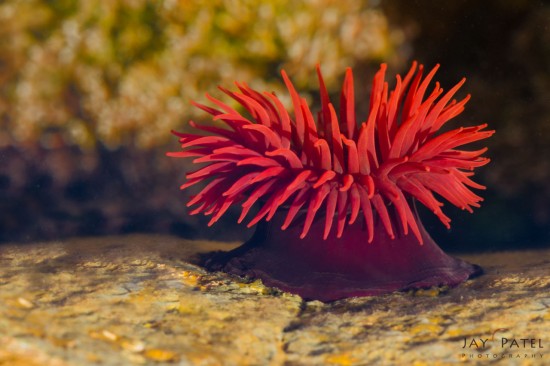
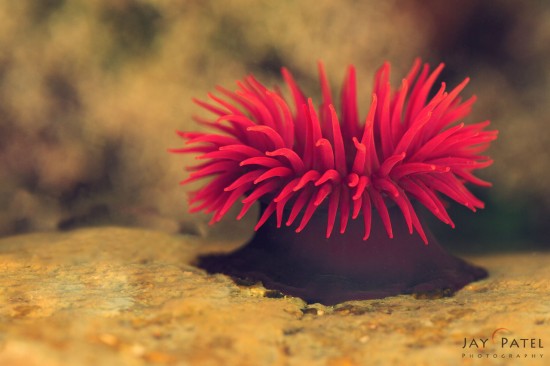
When we were in Australia, we discovered some beautiful sea anemones. Unfortunately, they were closed up during low tide. As the water in their tidal pool decreases, the anemones close to preserve the nutrients while they wait for high tide to return.
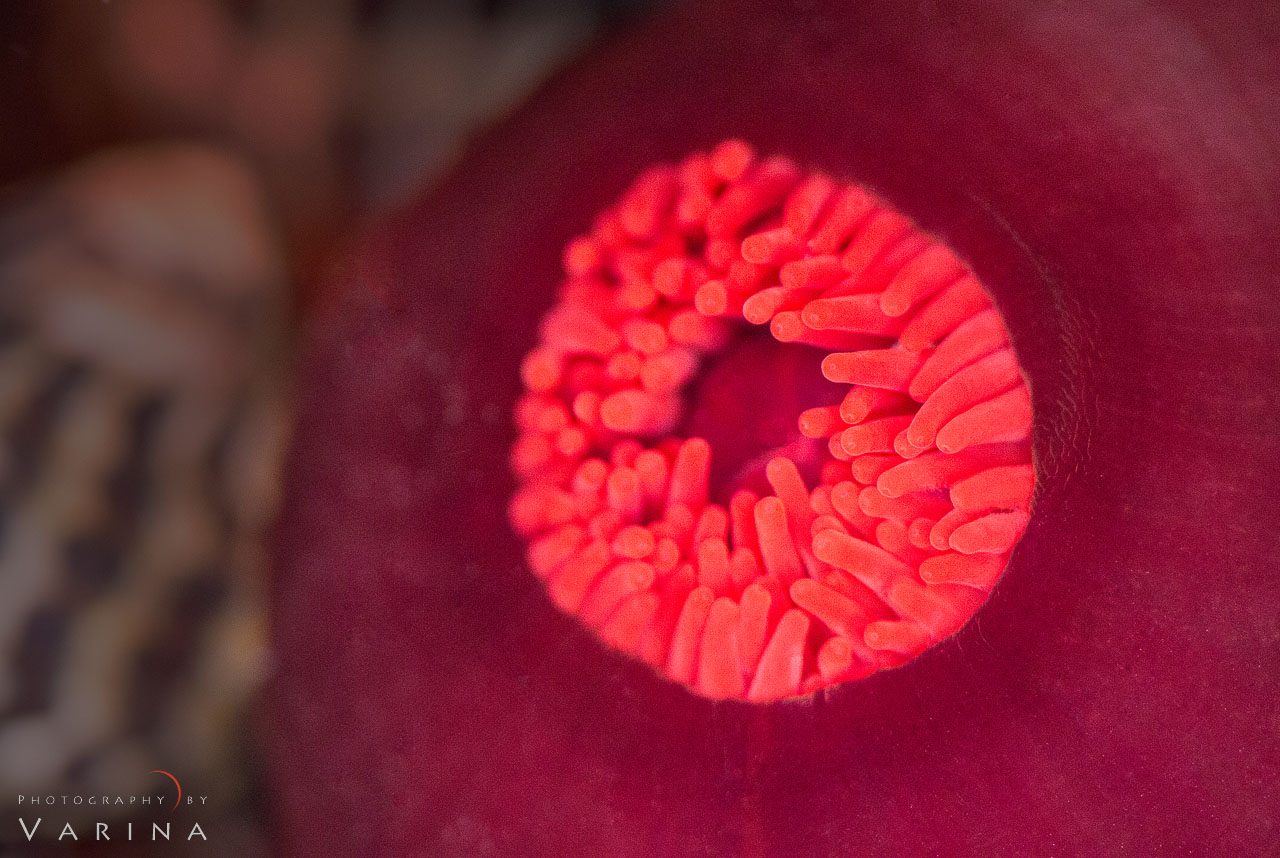
Sea Anemones at low tide, Australia by Varina Patel

Sea Anemones at low tide, Australia

To be able to capture their brilliance, my first step was to open the anemones. To do this, I filled up a water bottle with fresh sea water and poured it into the anemones’ pool. I poured it in such a way to simulate the natural tidal conditions with splashes of water and bubbles. After about 30-60 seconds, the anemones opened and displayed their true brilliant colors. At this point, I could then use my technical skills to set up the shot I wanted.

  • Harsh light behind the Sea Anemone, Australia by Jay Patel

    Harsh light behind the Sea Anemone, Australia

  • Soft light behind the Sea Anemone with a Diffuser, Australia by Jay Patel
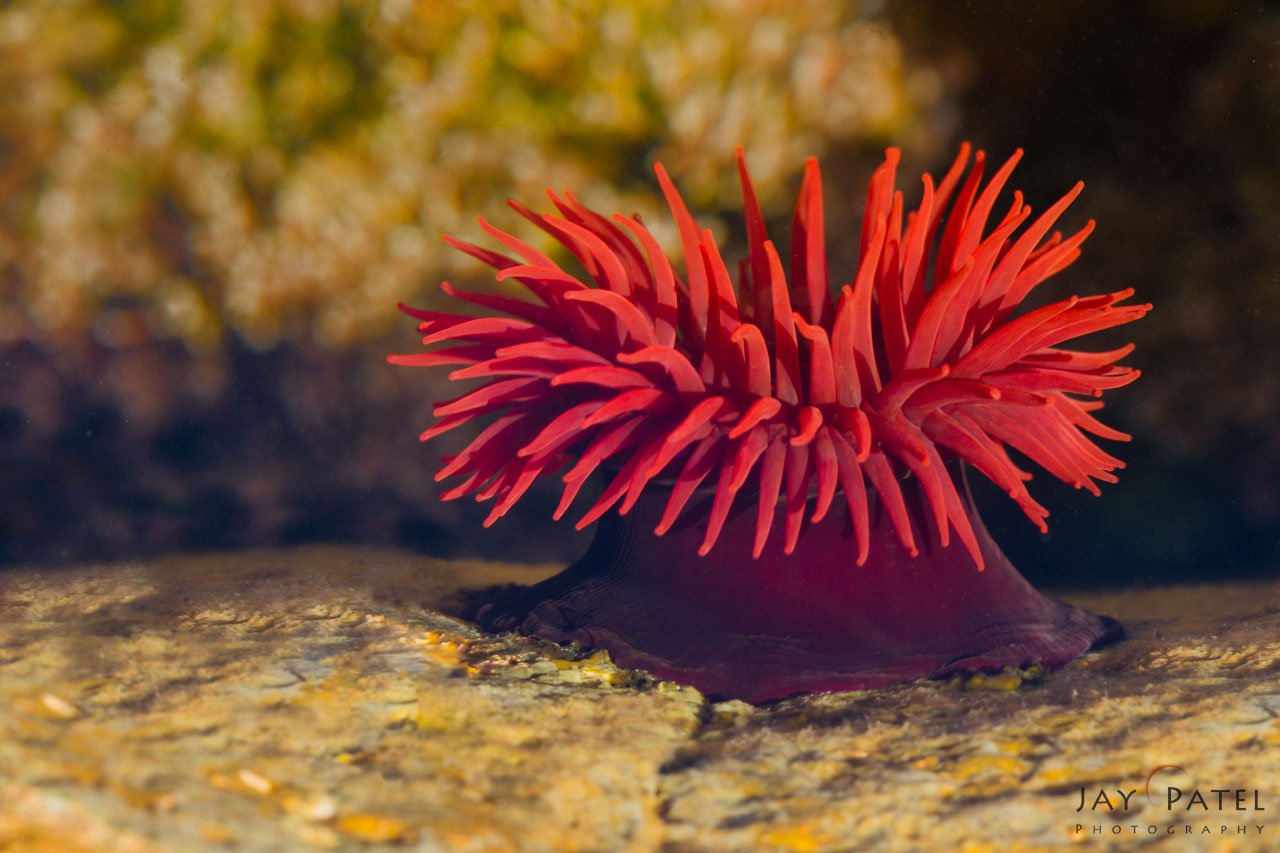
    Soft light behind the Sea Anemone with a Diffuser, Australia
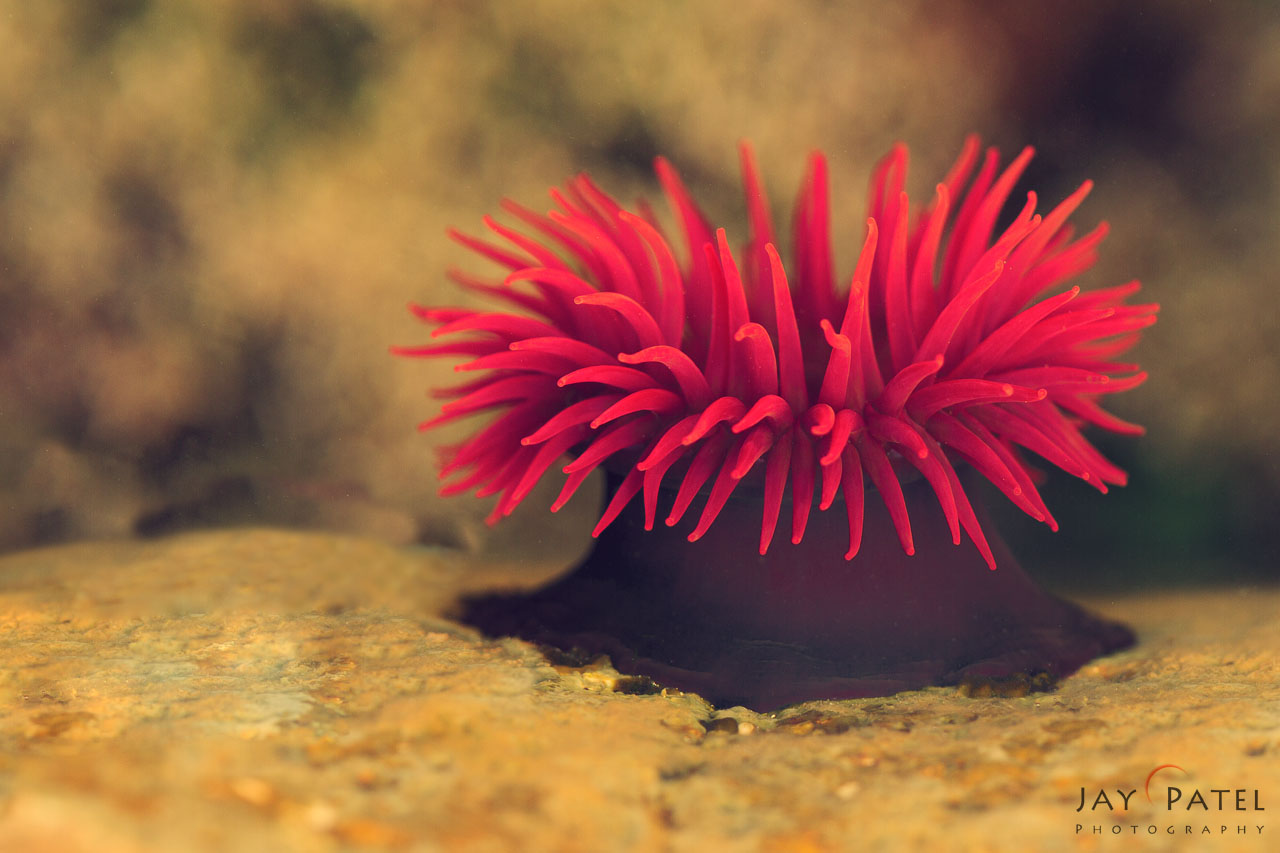
After I set up the shot, I realized that the sun, along with enhancing the anemone’s brilliant color and the underwater details, was also creating a harsh distracting shadow behind the anemone. I tried a variety of methods ranging from different filters to using my hands in an attempt to remove the shadow… but I had no luck. I finally used a diffuser to create an even light on the anemone which then removed the harsh shadow. I had to carefully place the diffuser – if it was too close to the subject, it would create a reflection that would decrease the desired underwater contrast.

No amount of Photoshop skills would have allowed me to capture the photo I was after in this situation. You must always carry an extra dose of creativity along with your landscape photography equipment to capture your stunning photos.

Get Started the Right Way

It is easy to get intimidated by watching pro landscape photographers and fanboys on social media rave about their latest equipment, their travel, and their post-processing skills. While a seasoned pro who makes his or her living with landscape photography can afford to travel to exotic locations with their latest gear, it is not always the best approach for beginners.

My advice to beginners? Get started with equipment that you can afford. Then spend lots of time and resources into improving your camera skills and post-processing skills before undertaking expensive landscape photography-related travel. This approach focuses on developing our skills and gets you capturing stunning photos before long. Good luck!

About Author Jay Patel

I could startoff like this – “Seeds of Jay Patel’s appreciation for beautiful places were planted early in his childhood….” but it would get boring really fast. I will just sum it up and say that I am a Landscape and Wilderness Photographer who loves to capture dramatic light. My photographs have been published in various magazines, calendars and advertising materials throughout the world.
Patience is a virtue...unless you are chasing your dreams

Let's block ads! (Why?)


Visual Wilderness https://ift.tt/2U9s5rm

Sourced by Time Trap Photography sharing the best photography tips, news and tricks throughout the industry. Time Trap Photography is dedicated to freezing those special moments in life that can be revisited and admired for generations to come. - Shannon Bourque
Please visit our main site for booking availability and rates.



"Time


Receive valuable industry knowledge delivered free to your email each day.


"Time

Thursday, November 5, 2020

What Camera Modes should Beginners use for Nature Photography?

6:06:00 AM

When you’re first starting out in nature photography, understanding the many adjustments and settings associated with your camera is paramount. At the same time, this initial learning curve can be rather intimidating. Of all the camera features to understand, arguably the most important to grasp are the different camera modes that are available. The four primary camera modes are Automatic, Aperture Priority, Shutter Priority, and Manual. 

Fully Automatic mode is more than likely where you’ll feel most comfortable when you’re first starting out, but you’ll want to transition out of this mode as quickly as possible. The longer you spend shooting in full automatic mode, the more difficult it will be to progress to other shooting options. Once you decide to make the leap and venture outside of Automatic mode, where do you go from there? First, you’ll want to understand how each mode operates and become comfortable with when to use mode.

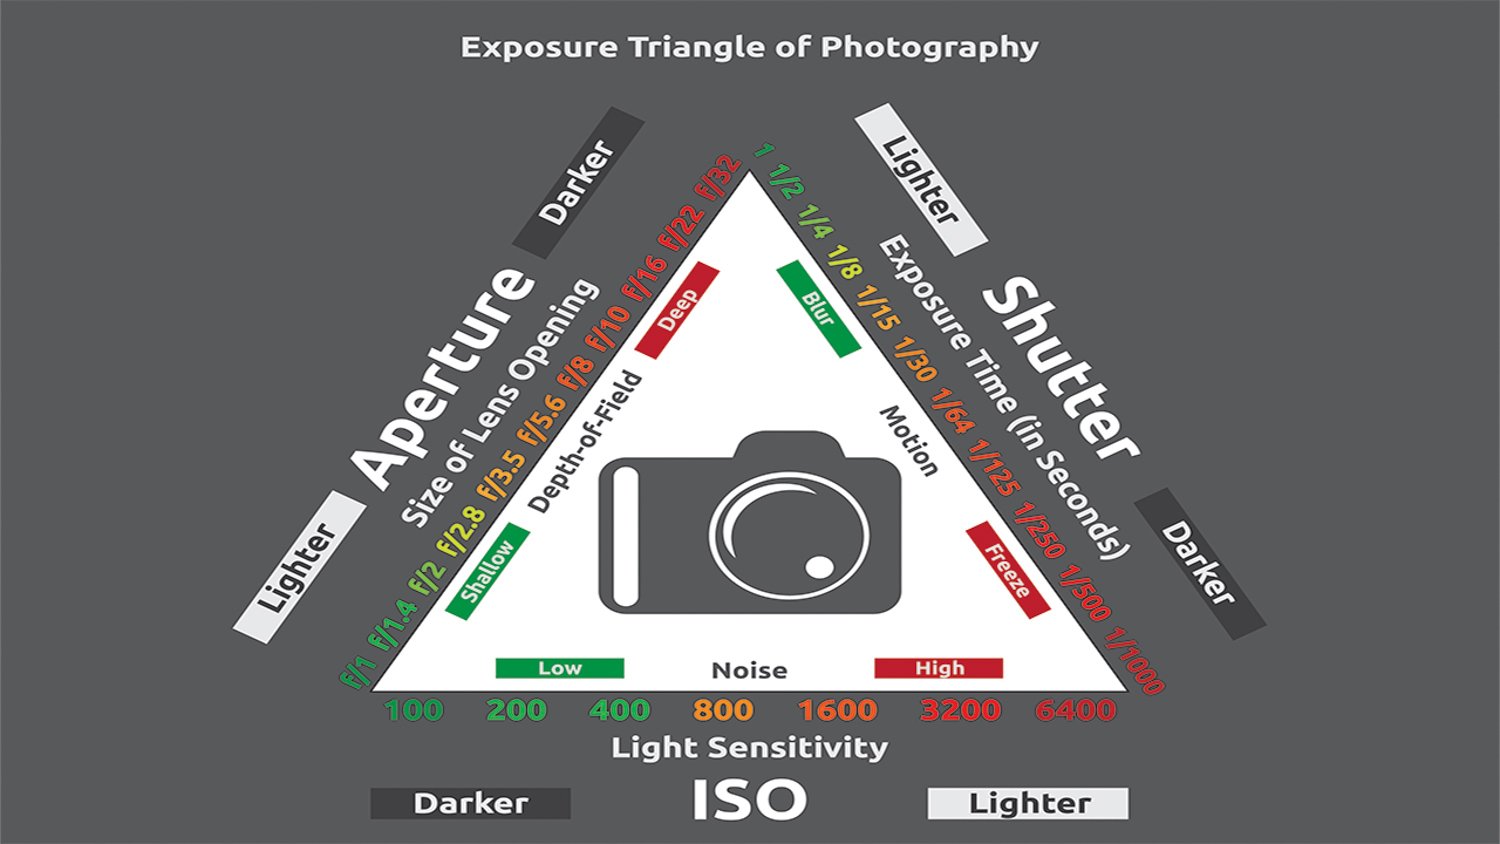
Photography Exposure Triangle

Before we dive into the individual shooting modes, lets first recap the inner workings of the Exposure Triangle. The three sides of the exposure triangle represent Aperture, Shutter Speed, and ISO. These are the three components that determine the overall exposure of an image.

Photography Exposure Triangle Diagram by Mark Denney

Photography Exposure Triangle Diagram

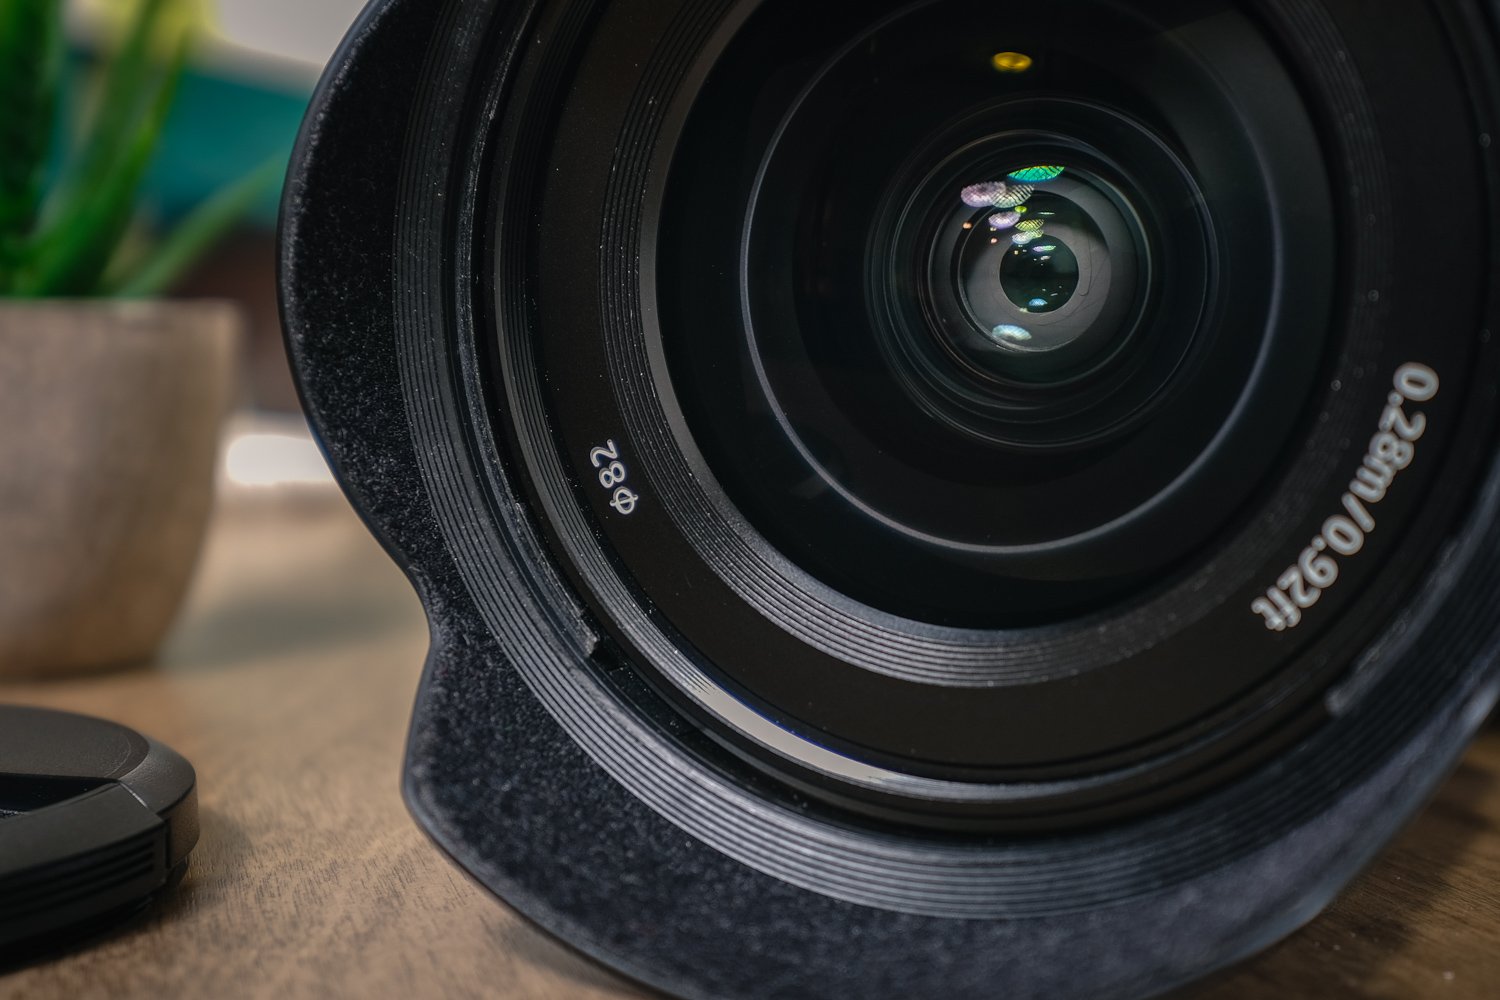
  • Aperture: Aperture measures the opening of the lens (f-stop) that ultimately determines the amount of light that is allowed to pass through the lens to your camera’s sensor. The higher the f-number (f-stop), the smaller the opening and the lower the f-number the larger the opening.
Markings on Front Element of F/5.6 16-35mm wide angle camera Lens by Mark Denney

Markings on Front element F/5.6 16-35mm Camera Lens

  • Shutter Speed: Shutter speed measures the amount of time the shutter remains open allowing light to pass through to your camera’s sensor. A slower shutter speed results in more light passing through and a faster shutter speed results in less light.
  • ISO: ISO allows you to brighten or darken an image and determines how “sensitive” your camera is to the available light in your scene. The higher the ISO, the brighter your image and the lower the ISO, the darker your image.

Automatic Shooting Modes

Fully Automatic Mode

As the name suggests, this mode is fully automatic. The camera adjusts all settings that it deems necessary to create a properly exposed image. This is a good place to start for a beginner photographer, but you don’t want to spend a great deal of time in this mode. Your goal should be to upgrade from Automatic mode as soon as possible into one of the creative shooting modes such as Aperture, Priority, or Shutter Priority.

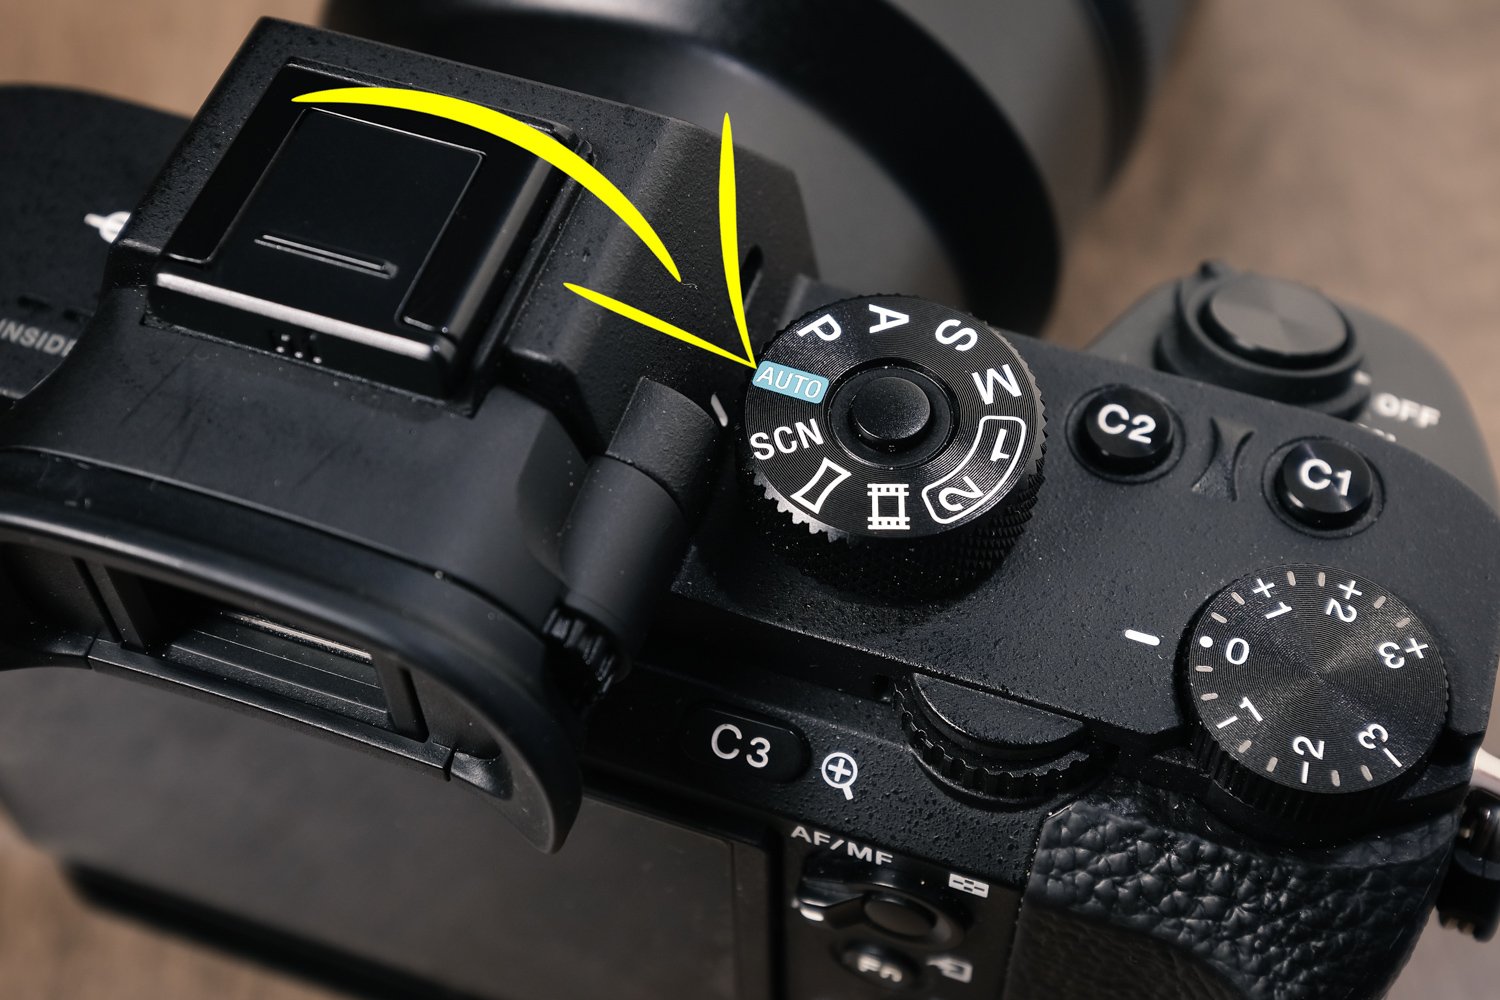
Typical shooting mode in DSLR or mirrorless Camera

Typical shooting mode in DSLR or mirrorless Camera

Programmed Auto Mode or P Mode

Program mode is a great first step away from relying solely on fully automatic mode for your photography. In Program mode your camera will handle the exposure for you from both a shutter speed and aperture perspective, but you’ll have some control over your camera’s exposure at your disposal. This includes ISO Settings and Exposure Compensation – these will be the settings that will be at your discretion to make changes to. This is a natural progression for beginner nature photographers to step away from camera’s automatic mode and a great way to begin testing the waters so to speak towards using a more camera’s manual mode.

Priority Modes

Aperture Priority Shooting Mode

Aperture Priority is probably the most popular camera mode for photographers. This mode is easy to understand and very functional yet still allows for a great deal of creative flexibility. In this mode, you’ll set the aperture (f-number) along with the desired ISO level. Then, the camera determines the correct shutter speed given the amount of light in the scene. This mode is great for just about every genre of photography including nature photography. In this mode, you’re basically telling the camera that the aperture is the most important setting for what you’re photographing and you want to control that – that’s where the name Aperture Priority comes from.

Shutter Priority Shooting Mode

In this shooting mode, you’ll select the shutter speed and ISO and the camera will determine the best aperture to use in order to create a properly exposed image. I rarely use this camera mode for nature photography. However, it can be useful when photographing fast moving subjects for sport or wildlife photography. When photographing birds for example, having a fast shutter speed is critical in order to freeze the action of the birds in flight. This mode is great if you’re looking to show motion in moving water or passing clouds by utilizing a slower shutter speed. In this mode, you’re telling the camera that shutter speed is the most important setting for what you’re photographing and you want to control that – that’s where the name Shutter Priority comes from.

Waterfall photography by Mark Denney

Waterfall photography captured with shutter priority camera mode to create smooth water.

Another benefit of using both aperture priority and shutter priority mode is that you’ll also retain control over things like exposure compensation and exposure bracketing. So although your camera will retain control over either aperture or shutter speed depending on which mode you’re in, you’ll still have the ability to make certain changes in order to balance your overall exposure. 

Manual Camera Mode

Manual is certainly the most intimidating of all camera modes at first. But once you use it a few times, you’ll realize that it’s much easier than you previously thought. In this mode, you have full control over your camera, which is a beautiful thing! You’ll set the aperture, shutter speed, and ISO level. This is my favorite go to camera mode for nature photography unless I find myself in a situation where my scene is unfolding quickly and I’m rushed. Manual mode provides you with the most creative possibilities and gives you ultimate control over every aspect of your image.

Typical shooting modes and how to set your camera to manual camera mode

Typical shooting modes and how to set your camera to manual camera mode

Perhaps one of the most important skills to understand when you begin using Manual Mode is how to decipher the information contained within your camera’s histogram and exposure meter. The exposure meter is probably an easier place to start as a “proper exposure” according to your camera’s metering system is when the indicator is on zero. Most exposure meters range from exposure values of -3 to +3 which makes it very easy to see if your image is 1 to 3 stops underexposed or 1 to 3 stops overexposed. 

Landscape photography from Hof, Iceland by Jay Patel

Landscape photography captured in manual mode with exposure bracketing, Hof, Iceland

Histograms in photography is another way to determine a well exposed image as well. Perhaps the most important component of using histogram in photography is to determine if your nature photo is either over or under exposed. Proper use of histograms in photography and also tell if you need exposure bracketing to capture all the details in shadow and highlights in your photos. Before you can use your camera’s histogram display you will need to master how to read the histogram properly.  Both the exposure meter and histograms in photography may seem intimidating at first, but with a bit of practice both will unleash an entirely new understanding of exposure. 

Auto ISO Settings

Auto ISO is a setting or an adjustment and not a mode per se, but something that is found in many camera’s today. This camera setting is one that you can apply regardless of which shooting mode you’re in and give you the ability to set your camera’s minimum and maximum ISO levels along with minimum and maximum shutter speeds. However not all the cameras support auto ISO setting. It is best to check your camera manual to see if your camera supports auto ISO setting. Auto ISO isn’t a setting that I use often, but it can be useful in situations where lighting conditions are evolving quickly or when photographing wildlife. 

I know this may seem like a great deal of information to digest but, in reality, the best approach to understanding the four primary camera modes is to get out and start testing each of them. This is the fastest way for you to take the next step towards mastering your camera’s shooting modes.

About Author Mark Denney

Hi there! Mark Denney here - I’m a North Carolina based outdoor and landscape photographer. My affection for travel, photography and the great outdoors is something thats matured over the past six years. I’ve always been fascinated with camera technology, but the art of photography was something that escaped me until 2012. This is when I discovered the calming zen like meditation that is landscape photography. I’m a naturally anxious person and photography provided me with a channel to encourage patience and a means to slow down. I’ll never forget the tranquil feeling I experienced during my initial attempt at landscape photography. I remember arriving early to my location, setting up my composition and waiting for the setting sun - this was the moment I began to realize what my passion was. The transition time between setting up my shot and waiting for the “good light” to arrive is still meaningful to me as it creates a captive audience within myself and provides ample time to reflect and appreciate the beauty that surrounds us all. Outside of the technical and creative aspect of photography, I enjoy teaching the storytelling ability of photographs and encouraging others to not focus solely on the the end result, but to appreciate the overall photographic experience.

Let's block ads! (Why?)


Visual Wilderness https://ift.tt/38fTdwW

Sourced by Time Trap Photography sharing the best photography tips, news and tricks throughout the industry. Time Trap Photography is dedicated to freezing those special moments in life that can be revisited and admired for generations to come. - Shannon Bourque
Please visit our main site for booking availability and rates.


"Time


Receive valuable industry knowledge delivered free to your email each day.

"Time

Monday, November 2, 2020

How to Use Negative Space in Nature Photography Composition

4:04:00 AM

Negative space is the area around the subject in a nature photography composition. And to me, it is just as important as the subject itself. In some cases negative space can be just as important as your nature photography subject. It defines the mood… provides a sense of place… enhances or competes with the subject. It can make or break a nature photo. Therefore it is critical that you learn to build an appealing photo using negative space. When I shoot, negative space is always on my mind.

Negative Space in Photography Composition

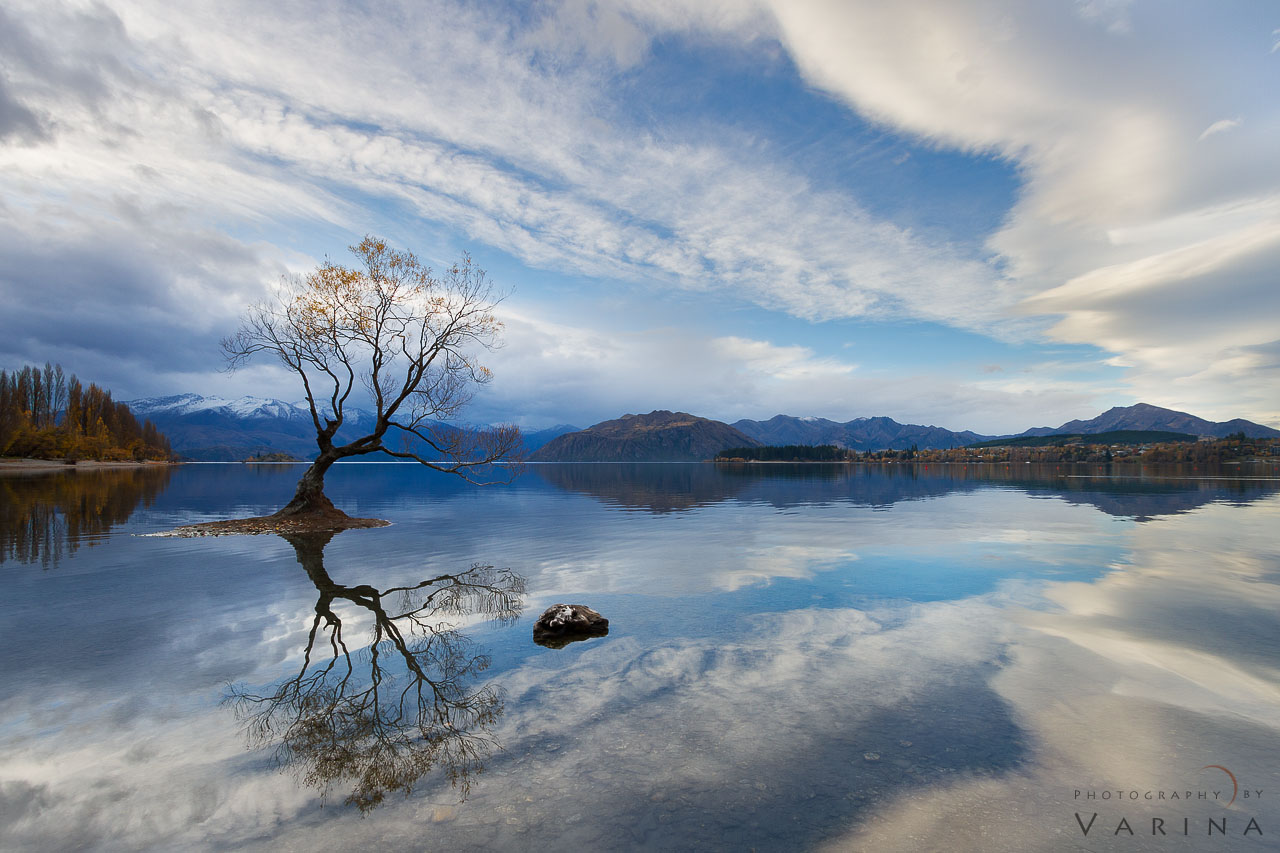
I took this photo of the Wanka tree in New Zealand on a calm sunny day with a spectacular sky and calm lake that allowed me to capture this perfect reflection. In this photo, the Wanka tree is clearly my nature photography subject and the space surrounding it is the negative space. This includes the spectacular sky and the reflection in Lake Wanka as well as the mountainside. It is not the subject of the photo… but it’s important nonetheless.

Nature photography composition with a large negative space around the Wanka Tree in New Zealand by Varina Patel

Photography composition with large negative space around the subject – Wanaka Tree, New Zealand

The negative space complements the subject by giving it a sense of place. It also helps define the mood. Take a look at the photo of the same Wanka tree taken a few hours earlier during a passing storm. The main subject of this nature photography composition is exactly the same – the Wanka tree. However, the negative space surrounding it is very different. The calm blue skies and perfect reflection is replaced by passing dark storm clouds that gives this nature photography composition a more dramatic mood.

Landscape Photography from New Zealand by Jay Patel

Creating mood in nature photography composition using negative space

I am not suggesting that one photography composition is better than the other, but rather they evoke different feelings due to different negative spaces.

Negative Space vs Dead Space

Ineffective use of negative space in nature photography composition can turn it into a dead space. Unlike negative space, dead space does nothing to enhance the subject or the mood of the photo. More often than not, dead space distracts the viewers from the nature photography subject. Other times, dead space can be made up of elements that are unappealing or irrelevant to the subject you are trying to photograph. In such cases it is often hard to identify your subject in your nature photography composition.

Image #1 below is a good example of nature photography composition with lots of dead space. I took this photo near Lake Pukaki in New Zealand. The photo is ineffective at best… and that’s because it’s mostly dead space. What is my subject? Perhaps the blue mountain in the distance? Does the open field on the lower left add to the photo? Does the clear blue sky add anything? Do they help define the subject? I’d answer “no” to all these questions. The leading line on the right draws me toward that element… but the open field and the empty sky do nothing to highlight it.

  • Photography composition with lots of "Dead Space", New Zealand by Varina Patel

    Photography composition with lots of “Dead Space”, New Zealand

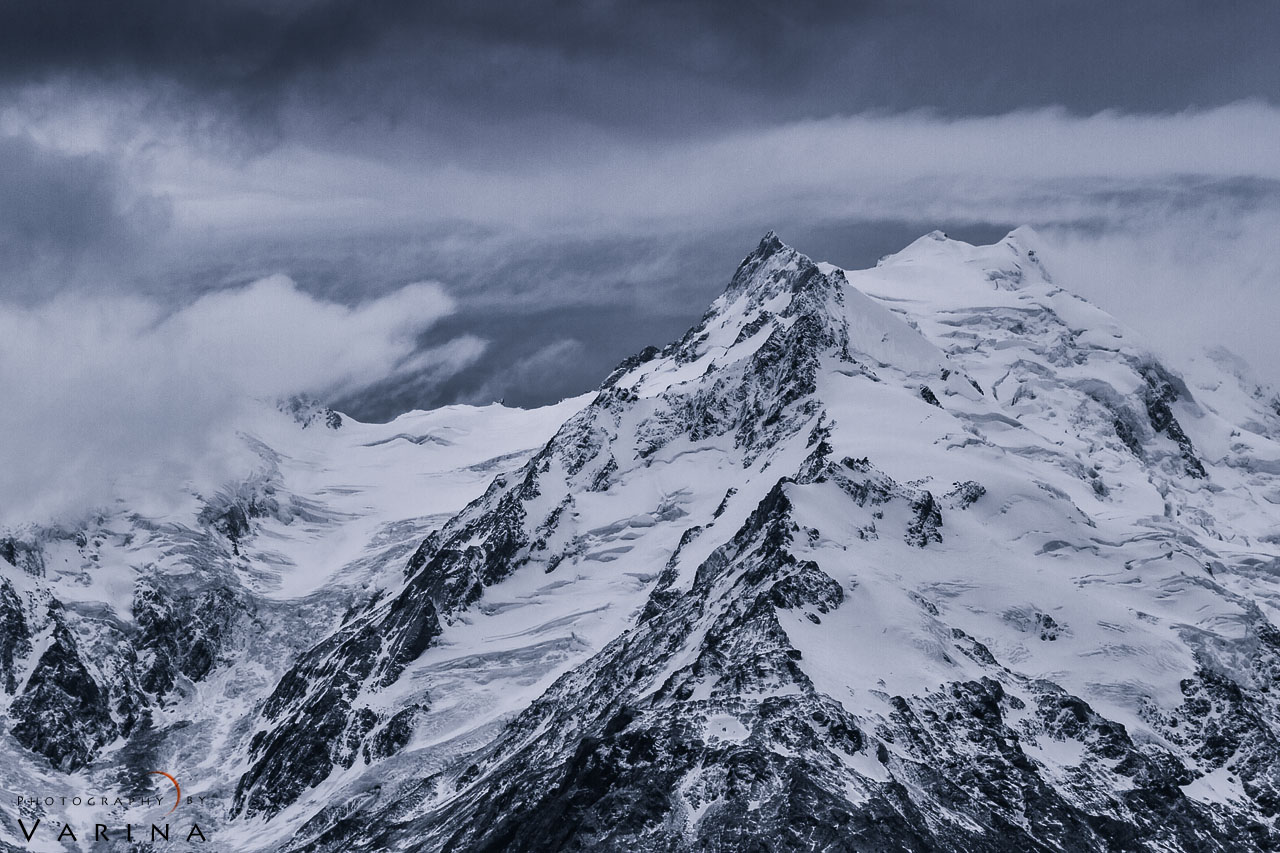
  • Nature photography composition from Mt. Cook, New Zealand by Varina Patel

    Photography composition after removing “Dead Space” Mt. Cook, New Zealand

Compare this photo with Image #2 that was taken at the same location at the same time. Here I used a telephoto lens to eliminate the dead space and help the viewer focus their attention on my subject – Mt. Cook. The sky, which forms the negative space in this image, also has interesting textures which help define the mood of an approaching storm over Mt. Cook.

The most effective nature photographers have learned to make the most of negative space – and to avoid “dead” space.

Tips for creating effective Negative Space

I am a firm believer in the importance of negative space in your nature photography compositions. I think it is just as important as the subject of a photograph. How you use negative space helps to define your image. It effects impact and mood and can make or break an image. Dead space can kill a photo, but effective use of negative space can enhance it.

When you are planning your photography composition, think about which detail is most important. This is your subject. Then, consider the surrounding details that should be included but are less critical – these become part of your negative space. Also consider the information that is unimportant and look for ways to eliminate it from your photograph. Here are a few tips to create effective negative space around your nature photos.

#1: Secondary Point of Interest

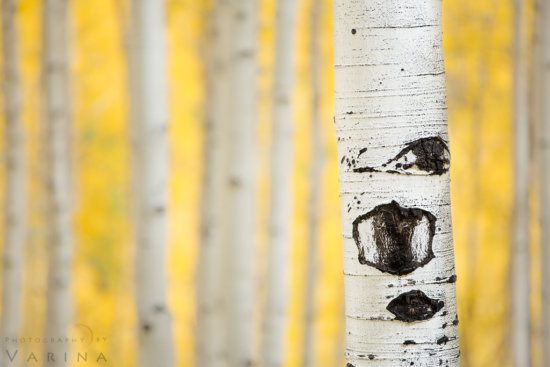
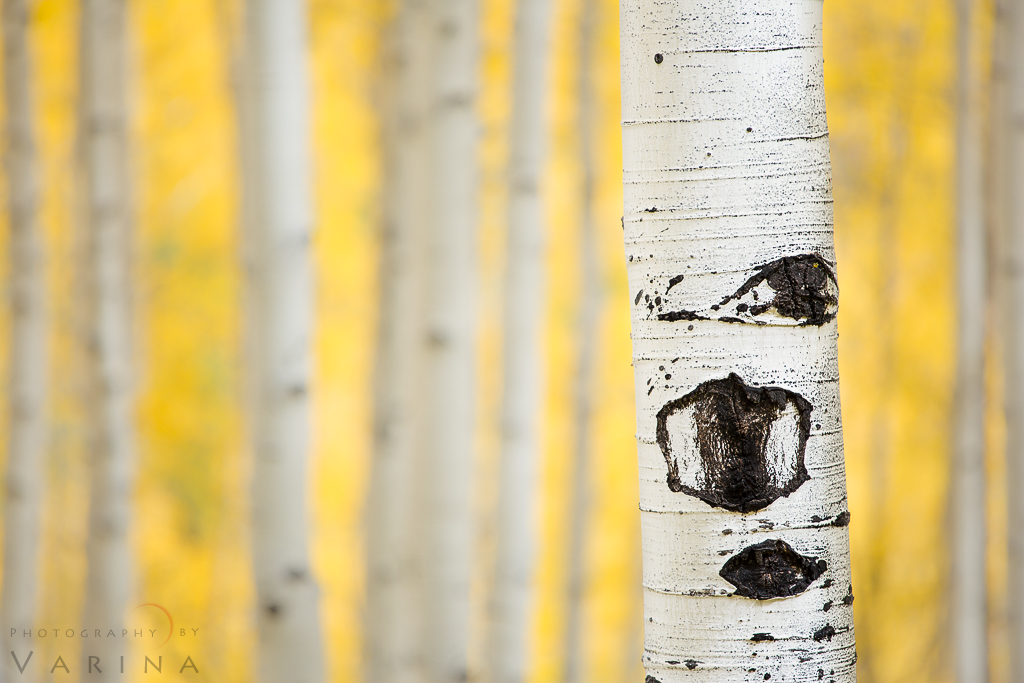
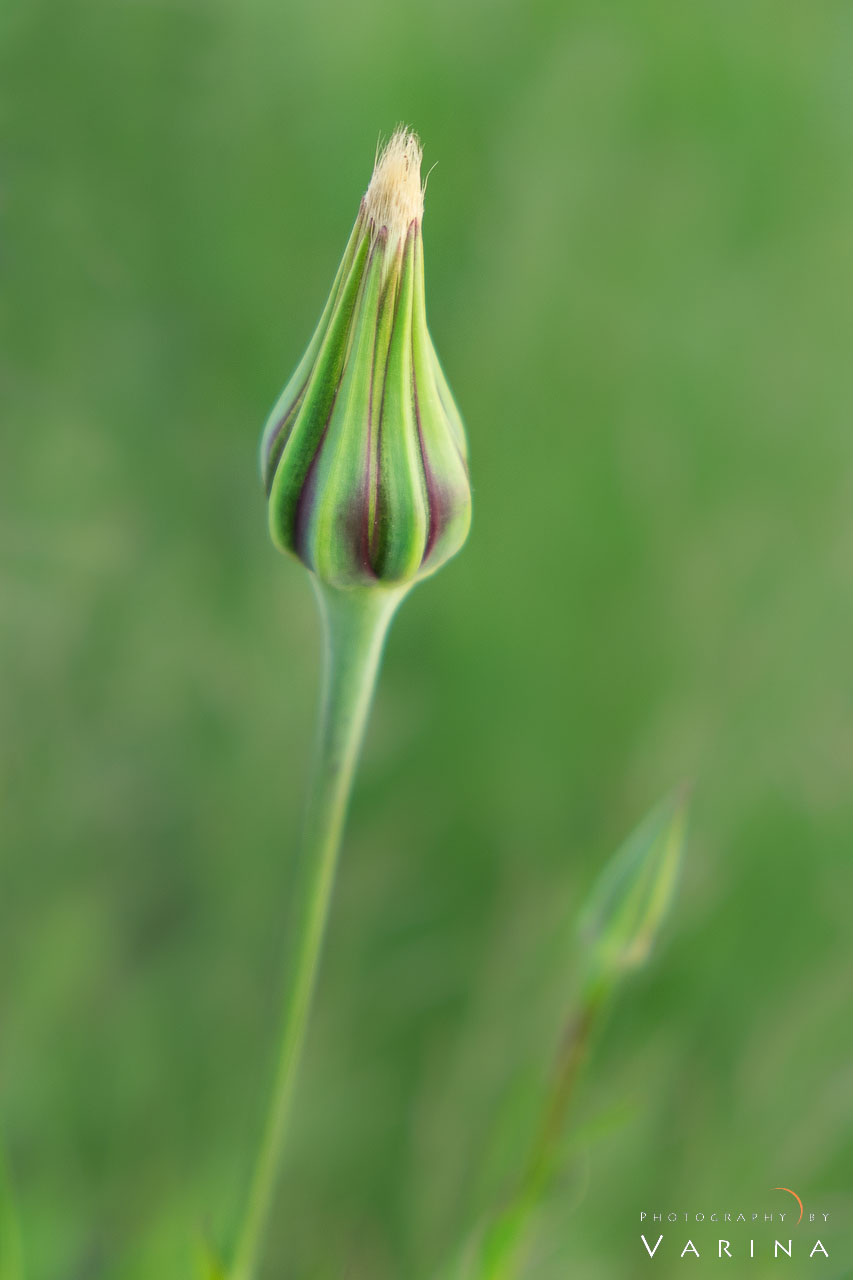
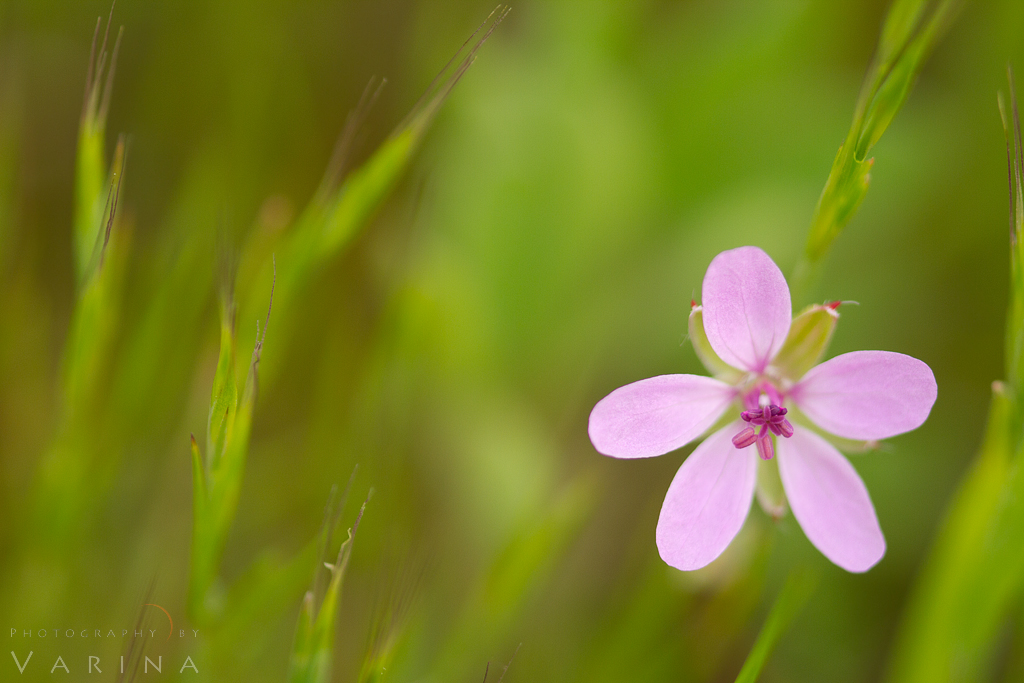
When used effectively, a secondary point of interest can be used to create an effective negative space around your subject. But if I’m using a secondary point of interest, I want to be sure I’m using the background in a subtle way that doesn’t take away from the subject itself. In Image #1, the blurred flower in the background adds a secondary point of interest in the negative space. It’s a soft compliment to the subject. However the secondary point of interest can also be color or mood. In Image #2, I used fresh green color in the background to give the viewers a sense of time.

  • Effective use of negative Space with a secondary point of interest by Varina Patel

    Image #1: Blurred background flowers creates a secondary point of interest in this macro photography composition

#2: Depth of Field

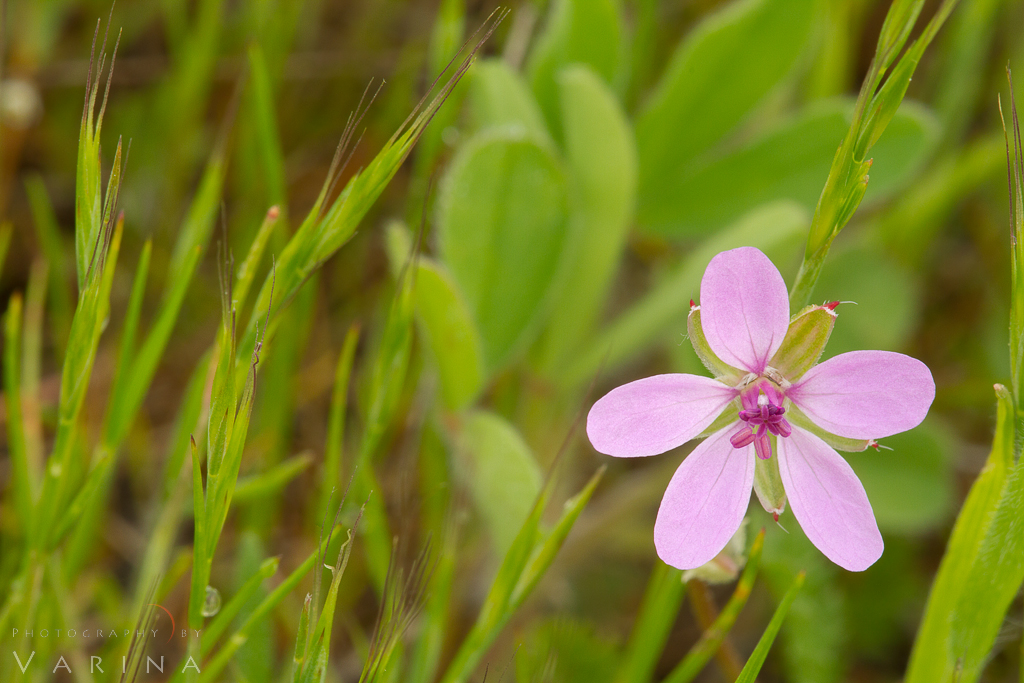
Depth of field is a highly-effective camera setting to define the look and feel of the negative space in your nature photography compositions. Take a look at the photo below from Columbia River Gorge in Oregon. I took Image #1 with a wide aperture and used a much narrower one for Image #2. The subject looks nice either way… but the background is another story.

  • Macro photography composition with clean negative space by Varina Patel

    Image #1: Shallow DOF to create clean macro photography composition with negative space – Tom McCall Preserve, Oregon

  • Image #2: Wide DOF creates a macro photography composition with "Dead Space"

    Image #2: Wide DOF creates a clean macro photography composition with “Dead Space”

The negative space is a bit of a mess in Image #2. There is a lot of clutter that pulls your eye away from the point of interest. Image #1, on the other hand, is much more appealing. The smooth background lets the flower stand out and I’ve included just enough detail to give you a sense of place.

#3: Shutter Speed

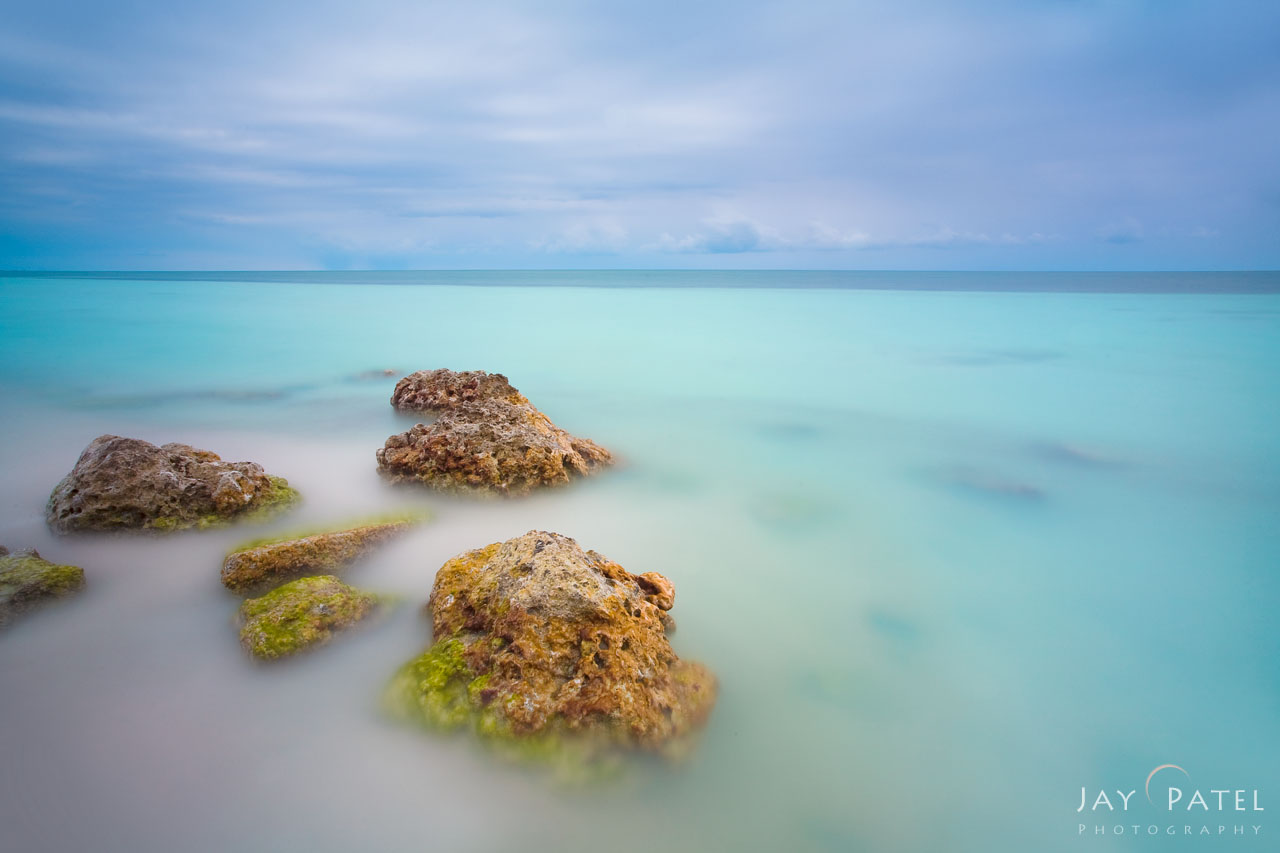
Just like DOF, shutter speed can be used to eliminate distraction and create pleasing negative space around your subject. In Image #1 below, Jay used a super-slow shutter speed (53 sec) to eliminate all distracting elements, including the textures in the water as well as dark floating seaweed. The slow shutter speed also blurred the details in the clouds. The smooth texture-less nature of the negative space allowed him to draw the viewer’s attention to the sharp rocks as well as create a calming mood in this nature photography composition.

  • Long Exposure nature photography with clean negative space from Bahia Honda, Florida by Jay Patel

    Image #1: Using slow shutter speed to create pleasing negative space, Bahia Honda State Park, Florida

  • Nature photography with "dead space" from Bahia Honda State Park, Florida

    Image #2: Faster shutter speed turns the negative space into dead space, Bahia Honda State Park, Florida

Compare this with Image #2 which was taken with a much faster shutter speed. The smooth negative space in the first image now turns into dead space in this nature photo with prominent textures and dark seaweed that does not add to the overall mood of the image.

When you are shooting, do you think about negative space? An effective nature photography composition requires that you build a photo around your subject. So pay attention to your negative space when you are shooting and make sure to eliminate any dead space in your photography composition.

If you have tips to share with our readers to effectively use negative space in your photography composition, please feel free to comment below. We always appreciate your input!

About Author Varina Patel

There is nothing more remarkable to me than the power of nature. It is both cataclysmic and subtle. Slow and continuous erosion by water and wind can create landscapes every bit as astonishing as those shaped by catastrophic events – and minuscule details can be as breathtaking as grand vistas that stretch from one horizon to the other. Nature is incredibly diverse. Burning desert sands and mossy riverbanks… Brilliant sunbeams and fading alpenglow… Silent snowfall and raging summer storms… Each offers a unique opportunity. I am irresistibly drawn to the challenge of finding my next photograph, and mastering the skills required to capture it effectively.

Let's block ads! (Why?)


Visual Wilderness https://ift.tt/34OQQz1

Sourced by Time Trap Photography sharing the best photography tips, news and tricks throughout the industry. Time Trap Photography is dedicated to freezing those special moments in life that can be revisited and admired for generations to come. - Shannon Bourque
Please visit our main site for booking availability and rates.


"Time


Receive valuable industry knowledge delivered free to your email each day.

"Time

About Us

Time Trap Photography is dedicated to freezing those special moments in life that can be revisited and admired for generations to come. - Shannon Bourque

The lens in focus

“Life is like a camera. Just focus on what’s important and capture the good times, develop from the negatives and if things don’t work out, just take another shot.” — Unknown

TIME TRAP PHOTOGRAPHY COPYRIGHT 2016