Sunday, September 30, 2018

Und plötzlich auf der Straße

10:02:00 PM

Wir sind festgelegt. Nach den ersten Versuchen mit der Kamera entdecken wir unser Genre und bleiben dort. Wir fotografieren entweder Architektur oder Akt, Sport oder Stillleben. Nur wenige agieren in zwei oder mehr Bereichen gleichzeitig. Als ich vom Kollektiv Soul of Street zu einem Streetwalk durch Köln eingeladen wurde, war ich deshalb erst einmal sehr unsicher.

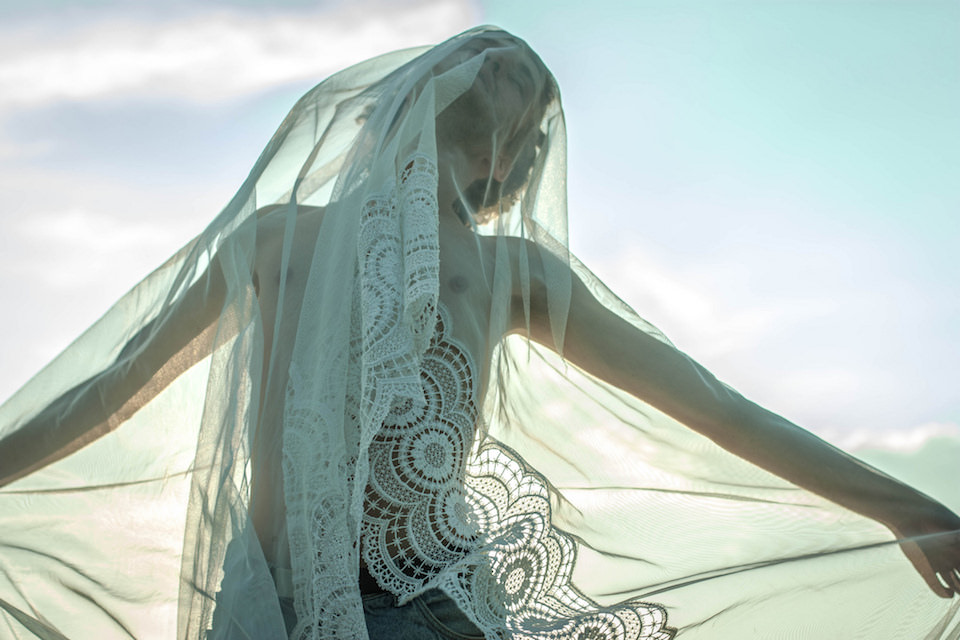
Ich bin Portraitfotografin. Ich arbeite in einem sehr inszenierten Genre, in dem es darum geht, eine Person zu fotografieren, die sich der Kamera absolut bewusst ist. Straßenfotografie ist für mich das komplette Gegenteil davon. Hier geht es um einen Moment, in dem nichts arrangiert und nichts wirklich geplant werden kann. Mit diesem Gedanken im Kopf lachte ich also zunächst die Einladung weg, bemerkte aber schnell, dass das zu kurz gedacht ist.

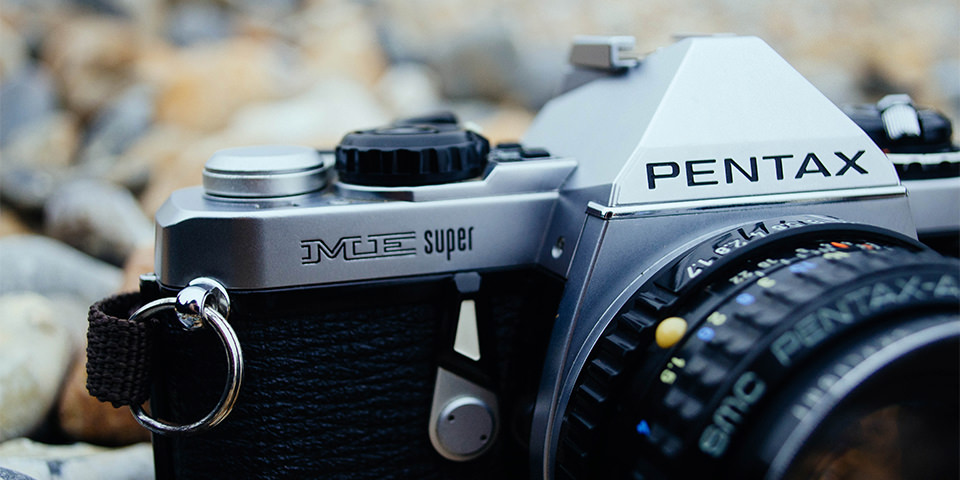
Und so stand ich am Samstagmorgen zusammen mit neun anderen Teilnehmer*innen am Deutzer Bahnhof und bekam mein Werkzeug für den Tag in die Hand: eine Ricoh GR II . Zusammen liefen wir vier Stunden durch die Straßen, konnten dem Kollektiv Löcher in ihre Bäuche fragen und die Straßenfotografie entdecken. Der Tag war ideal, das Wetter schön und durch die Photokina liefen überall Menschen mit Kameras herum. Um hier als Fotografin aufzufallen, hätte ich einiges tun müssen.

Ein Mann sitzt in der Sonne an einer Straße

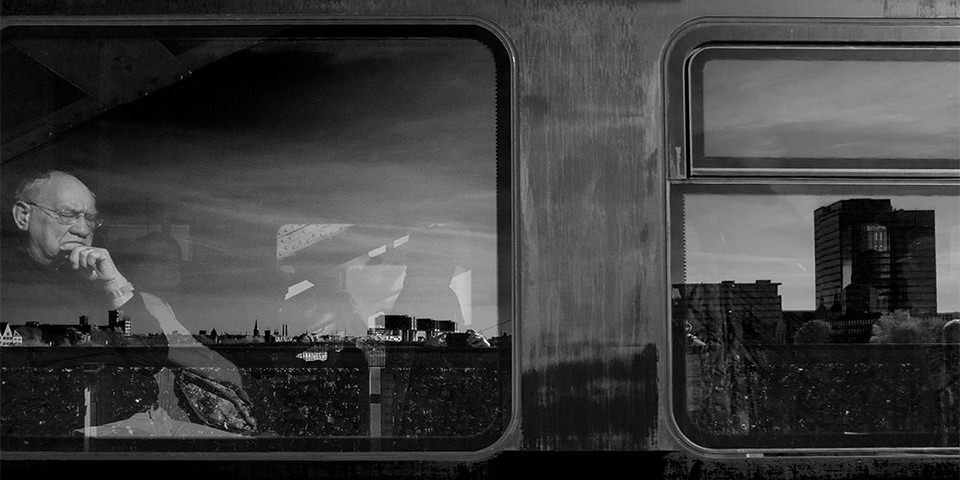
Die Kamera auf Menschen zu richten, die sich dem nicht bewusst sind, ist dennoch eine ganz andere Sache. Ich habe es hin und wieder getan, aber man sieht meine Unsicherheit in den Bildern. Sie sind zu weit weg, ich war zu schnell und unüberlegt – oder habe zu lange überlegt und der Moment war bereits vorüber, als ich endlich den Auslöser drückte.

Nach diesem ersten kleinen Dämpfer begann ich deshalb, die Menschen anzusprechen, die ich interessant fand. Auch das war eine enorme Herausforderung für mich. Aber die Truppe stärkte mich, berichtete mir von ihren Erfahrungen und machte mir Mut. Und tatsächlich, niemand war mir böse auf eine Frage nach einem Foto. Ein paar sagten nein, die meisten ja. Was hatte ich erwartet?

Mann mit Monokel

Hunde haben sich hervorragend als Gesprächsanfang herausgestellt. So entstand auch mein Lieblingsbild. Ich begrüßte den Hund des Passanten, ihm fiel meine Kamera auf, er wollte sie sich näher ansehen und klemmte sich dafür ein Monokel vor ein Auge. Ich bat um ein Bild und er hatte Spaß daran und posierte sogar etwas für mich.

Das waren eigentlich nicht die Bilder, die ich auf der Straße machen wollte, aber es war mein erster Schritt und es begann, Spaß zu machen. Und darauf kam es mir am Ende auch an.

Zwei Hunde

Nach zwei Stunden bemerkte ich langsam, wie unendlich müde ich wurde. Es war erst 12 Uhr, wir saßen für eine kurze Pause in einer Kölner Urkneipe und ich fragte mich, warum mir die Augen zufielen. Straßenfotografie ist enorm anstrengend. Während man normalerweise mit einem geistigen Filter durch die Straßen läuft, schaltet man bei der Suche nach dem Motiv die Filter ab, um ja nichts zu verpassen.

Ein Mitglied von Soul of Street riet mir, mich auf ein Thema zu konzentrieren, zum Beispiel die Farbe Rot. Mit dieser Begrenzung wird alles etwas leichter, weil man sich auf etwas ganz Bestimmtes konzentrieren kann. Ich entschied mich jedoch dagegen und fotografierte einfach weiter. Sollte ich noch einmal allein unterwegs sein, werde ich diese Idee aber auf jeden Fall annehmen – auch damit meine Bilder am Ende etwas besser zusammen passen.

Frau mit Rose in der Hand

Ich weiß nicht, ob ich die Straßenfotografie selbst weiter verfolgen werde, aber mein Respekt vor Straßenfotograf*innen ist um einiges gewachsen. Und ich habe in den vier Stunden einiges gelernt. Nicht nur in Bezug auf die Straßenfotografie, sondern auch einiges, das ich sicher in meine bisherige Portraitfotografie einbringen kann. Und am Ende vor allem etwas über mich selbst.

Und mit dieser Erkenntnis möchte ich dazu ermutigen, Euch ebenso in einem Fotogenre auszuprobieren, mit dem Ihr bisher kaum Berührungspunkte hattet. Mal aus der eigenen Blase herauszukommen, ist nie verkehrt. Am Ende sind es doch die neuen Erfahrungen, die uns weiterbringen.

Für die Transparenz: Ich habe die SD-Karte aus der Kamera behalten dürfen. Die Kamera selbst musste ich wieder abgeben und weder das Kollektiv noch die Firma Ricoh hat mich um einen Artikel gebeten oder dafür bezahlt.


kwerfeldein – Magazin für Fotografie https://ift.tt/2NTTgpd

Sourced by Time Trap Photography sharing the best photography tips, news and tricks throughout the industry. Time Trap Photography is dedicated to freezing those special moments in life that can be revisited and admired for generations to come. - Shannon Bourque
Please visit our main site for booking availability and rates.


"Time


Receive valuable industry knowledge delivered free to your email each day.


"Time

German Tourist Trampled by Elephants During Photo Attempt

6:03:00 PM

Some caution always enters into the equation when you’re working with animals in photography. And if you’re in a wild area this is particularly wise as you cannot predict what an animal may do.

Image via Pixabay from Pexels.com.

A recent story in The Independent serves as a stark reminder of the dangers of wildlife photography – particularly if you are dealing with elephants.

In what is one among a string of incidents involving elephants, a German tourist on holiday in Zimbabwe was killed after exiting her tour vehicle to snap some pictures of a herd of elephants her tour group encountered at the popular Mana Pool game reserve. Her injuries were so extensive that she later died in hospital.

Zimbabwe Parks and Wildlife Management Authority Tinashe Farawo detailed the events that led up to the woman’s unfortunate death but was unsure as to whether or not her actions may have caused the elephants to attack. He did add that visitors are given plenty of warnings about the animals before they begin their tour and that all are instructed to keep a safe distance from them lest someone get attacked.

Of course, we’ve brought you multiple stories here of photography and animals gone sideways but it’s something that, though it has always been a part of the field, is growing in prominence because more and more people are aiming for that perfect shot whether for social media or other purposes.

We told you about the social media star dragged underwater by sharks and the wildlife photographer who faced down a polar bear back in July.

And, as The Independent reports, elephants are particularly prominent in the headlines regarding photographer-related deaths. One tour guide was killed by a trained elephant near Victoria Falls and another person was killed while herding elephants for tourists according to the publication.

Let's block ads! (Why?)


Light Stalking https://ift.tt/2IrtNxv

Sourced by Time Trap Photography sharing the best photography tips, news and tricks throughout the industry. Time Trap Photography is dedicated to freezing those special moments in life that can be revisited and admired for generations to come. - Shannon Bourque
Please visit our main site for booking availability and rates.


"Time


Receive valuable industry knowledge delivered free to your email each day.


"Time

Say Hello to Our New Mirrorless Overlords

4:15:00 PM

Say Hello to Our New Mirrorless Overlords

Those Single Lens Reflex cameras with their movable mirrors have had a good run. But is it time to say hello to our new mirrorless camera overlords?

To put all this in context, it's worth noting that cameras haven't always had mirrors. There once was a time when cameras had a single, straight-through image path, light coming in through the lens in the front, and on toward the film plate at the back. In order to focus and compose the shot, photographers had to remove the camera back and fit it instead with a ground glass screen onto which the scene was projected upside down. When everything seemed in order (other than being upside down that is), the film back was reattached, and the photograph taken. Being a photographer back then must have been cumbersome.

To simplify the process, twin lens cameras started gaining preference. As their name implies, such cameras featured two objective lenses of the same focal length, mounted in line with each other. The bottom lens (or taking lens) allowed light to reach the film back. The top lens projected a parallel image toward a separate viewfinder. Needless to say, such a large camera with dual lenses would have been awkward to hold up to your eye. Still too cumbersome.

To make being a photographer more comfortable, another innovation was needed. And this time, it was all done with mirrors. Enter the Twin Lens Reflex (TLR) camera, a new-fangled improvement on the twin lens camera that used an angled mirror to reflect the image from the top, focal lens upwards into a ground glass screen one could look down on. The word "reflex" in the new designation referred to the reflection introduced by the newly added mirror. This new focal screen design meant the camera could be held much more comfortably and stably against the body. And the photographers rejoiced. They were at last comfortable.

But they still weren't happy. Even though the two lenses in their cameras were right next to each other and facing in the same direction, the image seen by each differed ever so slightly due to something known as "parallax error." The easiest way to understand parallax is to look at something in the distance through your left eye, and then through your right. Just take turns closing first one eye, then opening it and closing the other. The further away the object is you are looking at, the less of a difference you will notice between dependent on which eye you are looking through at the time. But if you switch to looking at something closer to you, the distance between your eyes will become more relevant, and the view seen by each will become increasingly disparate. Each has its own point of view, so to speak. To the extend this experiment, look down at the nose on your face and repeat the described parallax test. You will find that your left eye is looking at the completely opposite side of your nose as your right sees. This shifting perspective from two parallel but separate viewpoints is parallax error. And it gets worse the closer you are to your subject.

This brings us up to the era of camera optics most of us are more familiar with, the era of the single lens reflex, or SLR camera. As should be obvious from its name, the SLR camera dispenses with one of the two lenses that defined the Twin Lens Reflex. In this case, the single lens serves double duty, with the mirror now able to flip up out of the way. With the mirror lowered, the focused image gets reflected up from the angled mirror into the viewfinder. When the mirror is flipped up, the exact same image is allowed to reach the film plane at the back of the camera. Although there have been some SLR cameras fitted with ground glass focusing screens, the majority return to eye-level viewfinders made possible by the addition of a pentaprism used to reorient the image. I guess the weight savings from only needing a single lens meant that photographers were again OK with holding cameras up, and their subjects were OK with no longer being forced into having what few family photos they own all shot from waist high. It is a bit of a silly vantage point, come to think of it. And so both photographers and their subjects were happy.

All this change was part of an ongoing evolution in how we see what it is we are taking pictures of. What might at first seem to be a trivial problem turns out to be nothing of the sort. You see, or should I say, you don't see, because the physical existence of the camera naturally wants to be in the exact spot that blocks our seeing what lies on the other side. Early photographers had to move the film out of the way and put it back when ready to shoot, then we moved to using two lenses fit next to each other. And finally, we hit on the idea of a reflex mirror sitting behind a single lens, but one that could be temporarily swung up out of the way to allow light from that single image to be sent two different directions, up towards the viewfinder, and straight through to the film. Or digital sensor, in a modern context.

And it's specifically this modern digital context that allows us to revisit this age-old viewfinder problem once again. Digital rules the day. And now with each generation of the digital photography era, sensors and other electronics have evolved and improved. First, we had sensors that overheated if you shoot a longer exposure image, requiring extra post-processing to clean up the mess of noise. Gradually, we got better single frame sensors and eventually ones that were good enough support limited "live view" and even video capture modes. Display screens have improved too. Not only are current LCD screens bigger and much higher resolution than were the ones found on early digital cameras, their images can be seen more clearly across an increased range of viewing angles and lighting conditions. All of these are ingredients to the present mirrorless technological leap.

Once digitized by the sensor, a mirrorless camera can repurpose a single image or video stream both to an electronic viewfinder (EVF) and, when the shutter is fired, to the memory card for be saved for posterity. With digital, we no longer need line of sight manipulated by mirrors to see what we are photographing. We just need a whole bunch of expensive, state of the art electronics. See, progress.

This really is the next step in an evolutionary line going back to the earliest of cameras. Removing the mirror will enable camera makers to build full frame cameras that are much more compact than their SLR ancestors. And perhaps even more important, it is enabling them to shorten the lens mount flange distance to open up new possibilities in lens design that will benefit us all. Think faster apertures and wider-angle focal lengths for starters.

So, what will not having a mirror cost you? Well, you won't be able to impress your friends with the fact that your camera is bigger than theirs is, or that yours has mirror lock-up and theirs doesn't. And, thanks to the FTZ adapter (or whatever Canon calls theirs) it seems you won't be able to complain too loudly about being forced to buy all new lenses. And I guess you won't be able to look at yourself in your camera's mirror to see if you've got something stuck between your teeth. Not that I've ever done that, you understand. Asking for a friend.

So, are these things really ready for prime time yet? Well, I'm not sure yet. The jury is still out on this, what with Nikon's new mirrorless Z6 and Z7 just starting to ship, and Canon's full-frame mirrorless strategy not yet officially unveiled. Personally, I'd bank on it taking another few generations for the skeptics (and perhaps realists) to quiet down. For full disclosure, I have not ordered a Nikon Z7 and am more than happy with my manly, mirror-endowed D850. But I'm just saying, mirrorless is the future.

Say hello to our new mirrorless overlords.

So, are we happy yet?

Let's block ads! (Why?)


Earthbound Light Photography Tips https://ift.tt/2xPzMrX

Sourced by Time Trap Photography sharing the best photography tips, news and tricks throughout the industry. Time Trap Photography is dedicated to freezing those special moments in life that can be revisited and admired for generations to come. - Shannon Bourque
Please visit our main site for booking availability and rates.


"Time


Receive valuable industry knowledge delivered free to your email each day.


"Time

“Distracted Boyfriend” Meme Called Sexist by Swedish Ad Authority

3:38:00 PM

Whether or not you’re a fan of memes, they’re definitely an endless source of amusement – and controversy – for many people on the Internet.

Image via Bahnhof.

Some people even think they are part-and-parcel with the whole Internet experience yet others point to their misleading, controversial, or even outright offensive content as a source of annoyance. We in the photography world often observe that little to no attribution is given to the creators of these ubiquitous images, a perennial issue across the web for people who work in digital media, and that they represent some of the most glaring examples of outright theft on the Internet, garnering even the attention of the EU with their latest copyright efforts which would effectively kill memes on most social media platforms if allowed to come into effect.

In a first, Swedish ad regulation agency Reklamombudsmannen (RO) received complaints from people that the famous “distracted boyfriend” meme, using a stock photograph from Antonio Guillem called “Man Looking at Other Woman,” is sexist in nature. The meme, as anyone can imagine just from reading the title of the original photograph, often compares two different things with the boyfriend being tied to one but checking out the other option quite blatantly. The meme is used to push everything from political viewpoints to brands of optical equipment and is, if anything, one of the more anodyne examples of an Internet meme out there by any rational estimation.

The controversy erupted when Swedish Internet service provider Bahnhof used the meme in an attempt to advertise employment with the company according to The Guardian. The figures in the photo are appropriately called “you,” “your current job,” and “Bahnhof” following the formula established for this type of meme. Obviously your current job isn’t checking out a new position with Bahnhof, so that would leave the male figure as the obvious candidate for being “you” and some people took offense at this depiction of men and objectification of women. Of the two issues, the latter seemed to weigh most heavily in the RO’s ruling on the ad.

“The advertisement objectifies women…It presents women as interchangeable items and suggests only their appearance is interesting […] It also shows degrading stereotypical gender roles of both men and women and gives the impression men can change female partners as they change jobs. According to the committee, the objectification is reinforced by the fact that women are designated as workplace representatives while the man, as the recipient of the advertisement, is being produced as an individual.”

Bahnhof for their part told local Swedish newspaper The Local: “Everyone who follows the internet and meme culture knows how the meme is used and interpreted. [Whether someone is a] man, woman or neutral gender is often irrelevant in this context. … We are an internet company and are conversant in this, as are those who would look for a job with us, so we turned to that target group. If we should be punished for anything, it’s for using an old and tired meme.”

Though the agency does not have any power to sanction Bahnhof making the complaint largely an interrogative process to discuss the whys and why nots of this type of ad.

Let's block ads! (Why?)


Light Stalking https://ift.tt/2QkPRMT

Sourced by Time Trap Photography sharing the best photography tips, news and tricks throughout the industry. Time Trap Photography is dedicated to freezing those special moments in life that can be revisited and admired for generations to come. - Shannon Bourque
Please visit our main site for booking availability and rates.


"Time


Receive valuable industry knowledge delivered free to your email each day.


"Time

A Tale Of Two Titans – Kodak and Fuji

6:06:00 AM

In 1975 an engineer by the name of Steve Sasson demonstrated a new technology to his employees. The size of a toaster, the invention took photographs, not onto film but onto an electronic sensor.

The image was recorded to cassette tape, was black and white and had a resolution of 0.01 megapixels yet it would eventually revolutionize the world we live in. Steve Sasson had invented the digital camera. His employers were Kodak.

Kodak, inventors of the digital camera. By Thomas Belknap

The Rising Sun

On the other side of the world, the biggest rivals to Kodak in the film world were Fuji. By the 1970’s Fuji, like Kodak was a highly diverse photographic company, producing not only film but a wide range of photographic-based hardware both for consumers and industry. While Kodak held a virtual monopoly on film sales in the US, Fuji had the same hold over the passionate Japanese photographers. They struggled however to break the US market.

Kodak was totally dominant in the lucrative US market. By Brian Crawford

A Tale Of Two Decisions.

Steve Sasson’s technology demonstration was a hit. The technical people loved it, the management thought it was “cute” It was cute, but it was not film and of course Kodak was predominately a film company. The management’s reaction was to tell Steve Sasson to keep quiet about it. A film-less camera, after all, could damage their film sales. Kodak had, classically, failed to see the power of a disruptive technology.

By the early 80’s Fuji had still failed to make any great inroads into Kodak's dominant position in the US film market. Their decision was to spot an opportunity and capitalize on it. That opportunity was the sponsorship of the 1984 Olympic Games. The green colors of Fuji were plastered not only all over the host city of Los Angeles but on every television screen in the world. Fuji had broken the US market.

Fuji's sponsorship of the 1984 Olympics helped them “break” the US market. By Mr. Littlehand

The Last Decade Of Film

Walk into any camera store in the 1990s, anywhere in the world, and the film fridges would be dominated by two colors. The Yellow of Kodak and Green of Fuji. Head to head were the two iconic Kodak films, Ektachrome and Kodachrome, pitched against them was Fuji’s new kid on the block Velvia.

In the background, however, both companies had been working on digital imaging. In 1988 Fuji revealed the DS-P, the worlds first viable digital camera, but never marketed it. In 1991 Kodak unveiled the Kodak DCS, in partnership with Nikon.

Kodachrome and Ektachrome v Velvia was the battle of the 90s. By Jussi

While Fuji had realized that digital was going to become a mainstream consumer technology, Kodak clung to the idea that it would merely be an alternative or supporting technology to film. There is no better example of this than the Kodak Advantix Preview system. Launched in 1996 it was a camera based on Advantix film but with an LCD screen that allowed you to review the image you had just shot. By this time, however, both Minolta and Casio had launched consumer level full digital cameras and in 1997 Fuji launched the Fujix DS-300.

The Kodak DCS cameras were aimed squarely at professionals. By Mr.TinDC

New Millennium, Old Strategies.

By the early 2000s, Fuji had gained a hold on the digital consumer market with its Finepix range of compacts. They were relatively affordable, easy to use and attracted not just photographers but general consumers too.

Meanwhile, Kodak still saw a future in film despite the obvious trend in the market. They were so tied up in producing film and the paraphernalia of chemical-based imaging that they could not foresee it’s demise. While they did produce some consumer-level digital cameras, they were half-hearted affairs that did not bring anything innovative to the table.

Fuji, however, had spotted that the Digital SLR market was not going to remain a professional only arena. In 2000, they released the FinePix S1 Pro. Cleverly, it was based on the Nikon F60 body and mount and so gave access to Nikon’s huge range of optics. Inside the technology and sensors were Fuji’s own. The S Pro series was not a massive success but it did allow Fuji to advance its digital technologies, a strategy that put it in good stead for the future.

Not a huge success but certainly a building block. The S Pro series. By Nick Rice

The End Game

Through the early years of the new Millennium, Kodak remained innovative in the digital arena but also stubbornly fixated on celluloid imaging. By 2003, digital cameras started to outsell film but for Kodak it was too late. Already losing money they resorted to filing frivolous lawsuits for patent infringements rather than launching a comeback product.

In 2007, Apple launched the iPhone and in doing so created the new trend of smartphone photography. Smartphones began to kill the compact digital camera market, the only area where Kodak marketed digital cameras.

Fuji in the meantime seemed to have spotted the compact’s demise. While maintaining a diverse range of compact cameras, Fuji went back to their photographic roots and started to develop a true “photographer’s” compact camera. Released in 2011, the X100 was expensive, limited yet exquisitely made and designed. It set Fuji on the road to its highly acclaimed X series of cameras and returned them to the forefront of the photographic industry.

A film photographer's camera for the digital age. The Fuji X100. By onur bahcivancilar

Just 11 months after the release of Fuji’s X100, Kodak filed for Chapter 11 bankruptcy. Today the once ubiquitous name of Kodak lives on as a much smaller technology company focussing on imaging for business.

In September 2018, Kodak released a new product for photographers. Its called Ektachrome and its a revival of its iconic 35mm transparency film. It remains to be seen if Kodak’s faith in celluloid will eventually pay off.  I am sure the irony is lost on few.

And so we come full circle. By Thistle33

If you have a view on these film titans' fight or any other interesting points about the history of photography and film, tell us in the comments below.

Let's block ads! (Why?)


Light Stalking https://ift.tt/2NVTlcc

Sourced by Time Trap Photography sharing the best photography tips, news and tricks throughout the industry. Time Trap Photography is dedicated to freezing those special moments in life that can be revisited and admired for generations to come. - Shannon Bourque
Please visit our main site for booking availability and rates.


"Time


Receive valuable industry knowledge delivered free to your email each day.


"Time

30. September 2018

4:01:00 AM

Das Bild des Tages von: Pe Wi


kwerfeldein – Magazin für Fotografie https://ift.tt/2P1oDun

Sourced by Time Trap Photography sharing the best photography tips, news and tricks throughout the industry. Time Trap Photography is dedicated to freezing those special moments in life that can be revisited and admired for generations to come. - Shannon Bourque
Please visit our main site for booking availability and rates.


"Time


Receive valuable industry knowledge delivered free to your email each day.


"Time

browserfruits 39.2018

12:00:00 AM

Die Photokina ist vorbei und prägt auch unsere heutigen browserfruits. Die meisten Redaktionen konnte ich an ihren Ständen treffen und in den weiten des Netzes fanden sich hauptsächlich Technikberichte. Wir haben versucht unsere Linktipps nicht zu teschnisch zu halten, aber ganz geht die Messe natürlich nicht an uns vorbei.


Linktipps

• Sicherheitsleute führten den Fotograf Yigit wegen seines “Freiheit für Journalisten”-T-Shirt auf der Pressekonferenz ab. → ansehen

• Ein aktuelles Highlight im Techniksektor: Zeiss kündigt die erste eigene Vollformat-Kamera an. → ansehen

• Generell geht der Markt eher in Richtung Spiegellos und Vollbild. Eine Analyse dazu gibt es bei Heise. → ansehen

• Regeln sind dafür da, sie zu brechen. Das weiß auch Keenan Hastings und erklärt zehn falsche Regeln, die man häufig über die Streetfotografie hört. → ansehen

• Eine neue Art der Social-Media Plattform ist ARS. Hier sollen sich Kunstschaffende durch Kritik gegenseitig unterstützen. Das Ganze gibt es aktuell noch in der Beta-Version. → ansehen

• Eine Portraitreportage über ältere Menschen mit Tattoos der Organisation GetOud, deren Ziel es ist zwischen Generationen zu vermitteln. → ansehen

• In “Through The Walls” erforscht der belgische Fotograf Matthieu Litt die Komplexität des Ortes, indem er sein Augenmerk auf unspektakuläre Szenen des täglichen Lebens im Iran richtet. → ansehen

• Auch analoge Technikfans dürfen sich freuen: Cinestill hat ein neues Temperaturkontrollsystem zum Mischen der Chemie und für die Farbentwicklung. → ansehen

• Deutschlandfunk Kultur hat ein Interview mit der Fotografin Barbara Klemm → ansehen


Buchempfehlungen

Anfang Nichts auf diesen Fotos ist arrangiert, die Timm Rautert ein Jahrzehntlang von Familien in Deutschland gemacht hat. So wenig Einfluss nahm der Fotograf, dass nicht einmal ein konkreter Ort festgelegt wurde, an dem sie sich innerhalb ihrer Wohnungen fotografieren ließen. Immer – der heiligen Familie gleich – als Triptychon arrangiert. In den Porträts spielen nicht nur Elternpaare und ihre Kinder die Hauptrolle, auch wenn sie im Mittelpunkt stehen, sondern auch ihre Lebensentwürfe, die in Details erkennbar zu sein scheinen. Das Buch ist im Verlag Steidl erschienen und kostet 38 €.

Der Weg zur Portraitfotografie: Von der Auswahl der richtigen Ausrüstung bis hin zum Einfluss von Farbe und Bewegung erklären die Profis Paul Wilkinson und Sarah Plater, wie man das Beste aus der Kamera herausholt und den eigenen Blick für das Motiv Mensch schärft. Das Buch ist im Verlag Edizioni White Star erschienen und kostet 16,95 €.


Ausstellungen

Vivian Maier
Zeit: 26. September 2018 bis 6. Januar 2019
Ort: Freundeskreis Willy-Brandt-Haus, Stresemannstr. 28, 10963 Berlin

Gilles Lorin | Platinum prints
Zeit: 26. September bis 21. Dezember 2018
Ort: Kunsthandel Jörg Maass, Rankestr. 24, 10789 Berlin

Sibylle Bergemann und Martin Parr – Golden Hearts
Zeit: 27. September bis 21. Dezember 2018
Ort: Loock Galerie, Potsdamer Str. 63, 10785 Berlin

Nicholas Nixon: Life Work und Back to the future
Zeit: 29. September bis 2. Dezember 2018
Ort: C/O Berlin, Hardenbergstr. 22-24, 10623 Berlin

Andy Gotts: Unseen
Zeit: 26. September bis 10. November 2018
Ort: Flo Peters Gallery, Chilehaus C, Pumpen 8, 20095 Hamburg

Ctrl-X. A topography of e-waste und Auf Kosten anderer: Globalisierung in Bildern
Zeit: 28. September bis 7. Oktober 2018
Ort: laif – Agentur für Photos & Reportagen, Merowingerstr. 5-7, 50677 Köln


Drüben auf Instagram

@luca_bortolato – Luca Bortolato zeigt auf Instagram minimalistische und zugleich sehr surreale Frauenbilder.


Videos

Techlove hat einen kleinen Einblick in die diesjährige Photokina.


Wir haben auf Youtube eine etwas ältere Doku von Arte zum Thema inszenierte Fotografie entdeckt.


Das Titelbild stammt von Naomi Hutchinson. Vielen Dank dafür!


kwerfeldein – Magazin für Fotografie https://ift.tt/2zFZccy

Sourced by Time Trap Photography sharing the best photography tips, news and tricks throughout the industry. Time Trap Photography is dedicated to freezing those special moments in life that can be revisited and admired for generations to come. - Shannon Bourque
Please visit our main site for booking availability and rates.


"Time


Receive valuable industry knowledge delivered free to your email each day.


"Time

Saturday, September 29, 2018

Quick Tip: Having Troubles to Open RAW files? DNG Files Might Help You

6:01:00 AM

Right after changing my DSLR setup to a more compact yet complete set up I found out that my current version of Lightroom wasn't opening my RAW files. My first option was to convert my RAW files (that are *.RAF) to DNG files, and everything went smoothly. A couple of days after that I upgraded my version of Lightroom and it was able to read my files.

The guys at Adobe came up with this friendly solution of standardizing RAW files into one single and universal file that could be open by their software. The solution was called DNG Conversion, and it basically transforms your RAW files into DNG files. You can download the software for free here.

What Does DNG Stand For?

So, DNG stands for Digital Negative, how awesome is that? After a lot of work, they developed a way of transforming any RAW file into one standard file, and since RAW files are basically the purest files your camera's sensor can create, it makes sense to see them as negatives, just like from the film era.

No matter the RAW file, they promise to transform them into one universal file.

Is DNG Still RAW?

Photo by Federico Bottos on Unsplash

Some people would say no, but Adobe states that yeah, they are indeed RAW files and that they suffer no information loss during the process. I have made my own tests (I'm not an engineer BTW – so it is just me) and they seem similar to me. Unlike RAW files, DNG files can be opened easily without any extra plugins or upgrades (besides the DNG converter).

A couple of months ago, when we started developing RAW files in my Photography 102 class in the University, a couple of students couldn't manage to open their RAW files from Nikon (*.NEF) and we easily opened them by turning them into DNG files. These kids are studying Graphic Design so they have a very keen eye, and they were absolutely happy with the results.

What Are The Pros And Cons Of Using A DNG File?

I have found that robust RAW files like the ones from Fujifilm that have embedded camera profiles (you can choose various film simulations even after the shot has been made, just like correcting white balance) are more restricted when it comes to toggling between profiles, but at the very least, now my file is open and I can edit it in my usual way.

This is a quick tip – if you are wanting more on the editing process, check out The Ultimate Guide To Fundamental Editing over at Photzy. This guide will not only show you how to edit your images but why you should and in what order you should edit in. It is a great resource that you'll come back to time and again.

There is nothing more frustrating than trying to open your RAW files from your brand new camera and seeing that annoying message from Lightroom stating that it cannot open your files – so if that happens, give DNG conversion a go.

Let's block ads! (Why?)


Light Stalking https://ift.tt/2xWx7vH

Sourced by Time Trap Photography sharing the best photography tips, news and tricks throughout the industry. Time Trap Photography is dedicated to freezing those special moments in life that can be revisited and admired for generations to come. - Shannon Bourque
Please visit our main site for booking availability and rates.


"Time


Receive valuable industry knowledge delivered free to your email each day.


"Time

29. September 2018

4:05:00 AM

Das Bild des Tages von: Frieda Rike


kwerfeldein – Magazin für Fotografie https://ift.tt/2NOKg4T

Sourced by Time Trap Photography sharing the best photography tips, news and tricks throughout the industry. Time Trap Photography is dedicated to freezing those special moments in life that can be revisited and admired for generations to come. - Shannon Bourque
Please visit our main site for booking availability and rates.


"Time


Receive valuable industry knowledge delivered free to your email each day.


"Time

Friday, September 28, 2018

This App Lets You Know When the Weather is Perfect for Photography

10:02:00 PM

We’ve all had this happen to us before: You plan, you gather, you pack, and everything seems ready to go until the day of your big shoot when the weather decides it is not going to cooperate and you’re forced to reschedule the whole thing.

Image via Tahir Shaw from Pexels.com.

Not only is this a huge bummer for most photographers but also a huge time waste as well.

Wouldn’t it be perfect if you could predict the weather with some degree of accuracy or at least know ahead of time whether conditions will be right for what you want to capture?

WeatherScout, an app for Apple iOS, wants to create such a world for you and it promises to match up your preferences with local, current conditions so that you never again have to be disappointed by Mother Nature’s whims.

Basically you set your user preferences in the app and it takes it from there. It even has preferences relating to the blue hour and golden hour in your specified location. There are even settings for wind speed among other things.

You might be thinking it sounds like a glorified weather app with tailored notifications but WeatherScout also comes with an alarm that you can set to trigger a certain time before ideal conditions are expected.

You can also add multiple locations in the app so you can check up on the conditions in your favorite spots for photography. In all, WeatherScout really seems to combine a ton of different functionalities into one centralized app.

There are a few drawbacks to the app, however, chief among them being lack of an Android version as of press (though we’re sure the devs will correct that in the future). One of the biggest complaints is that WeatherScout collates redundant information from other weather services and thus isn’t as accurate as it promises to be. That said, it will only get better with time.

Let's block ads! (Why?)


Light Stalking https://ift.tt/2R8gXrK

Sourced by Time Trap Photography sharing the best photography tips, news and tricks throughout the industry. Time Trap Photography is dedicated to freezing those special moments in life that can be revisited and admired for generations to come. - Shannon Bourque
Please visit our main site for booking availability and rates.


"Time


Receive valuable industry knowledge delivered free to your email each day.


"Time

Leica’s New 64MP Medium Format DSLR Camera the S3

10:02:00 PM

Some history is worth repeating, especially if you’re Leica, one of the most beloved makes in the optics industry.

Image via Leica.

Ten years after its predecessor made its world debut at the same trade show, Leica’s latest camera to join the S-System family of cameras, the 64MP medium format DSLR the S3, promises to continue the legacy of the S2 with improvements to its performance in varied lighting conditions according to marketing from the company.

This comes on top of the company's announcement of an L-Mount alliance with fellow optics giants Panasonic and Sigma. Needless  to add, Leica has their hands full these days.

Armed with a 64MP ProFormat sensor, the S3 will also have 4K video recording in medium format as well as an improved viewfinder and autofocus. Other than that the styling looks like an evolution over the Typ 007 but still maintains that iconic Leica look.

Aside from a bump up in power over the S2 the S3 will also offer classic Leica styling and build quality as well as compatibility with related products. There are many other features and upgrades that will be revealed over time but, for now, Leica is basically just preparing the way for the full spec rollout to come. For reference, the Leica S (Typ 007) has a 37.5MP sensor making the S3’s 64MP sensor a step up indeed.

Promising something that is cutting edge and top of the line, Leica’s history and reputation largely bolsters these statements and we will all be on the edge of our seats waiting to see just what the S3 is. That said, there are no details on pricing or an exact release date though PetaPixel speculates that the launch will occur in mid-2019. The publication also sites the current Leica S (Typ 007)’s price point of $USD 20k as a starting place for speculation as to where the S3 will fall.

Let's block ads! (Why?)


Light Stalking https://ift.tt/2N8y4qf

Sourced by Time Trap Photography sharing the best photography tips, news and tricks throughout the industry. Time Trap Photography is dedicated to freezing those special moments in life that can be revisited and admired for generations to come. - Shannon Bourque
Please visit our main site for booking availability and rates.


"Time


Receive valuable industry knowledge delivered free to your email each day.


"Time

Why You Should Consider Cropping Your Images To Get The Best From Your Compositions

8:02:00 AM

Before knowing Arnold Newman's work, I was pretty reluctant to crop, but honestly, it is a powerful tool and one of the first things that you should do when developing a RAW file.

Cropping enhances a concept during the post-production stages, and because it’s done with a clear vision (sometimes well after the shot has been made) it helps the photographer decide better about which elements should be within the frame and what others need to be left behind.

Think of it as a minimalism driven procedure where less is more. Especially during situations like street photography where everything happens so fast, that is hard to frame everything perfectly and still capture the moment before it fleets away – a great crop in post can make or break an image. 

Cropping Affects The Histogram

The reason why you should consider cropping during the first moments of RAW development is that it reconstructs the histogram with each crop that you make. This might seem strange, but the concept is pretty logical since the histogram is a visual representation of how light is distributed across the image you've captured, so cropping is really making a new image from your original.

Let's take a look at how the histogram slightly changes (it is hard to see, but it does change) by cropping Roberto Nickson's cute picture of a pup.

First up – the image in full

Photo by Roberto Nickson (@g) on Unsplash

By giving this image a closer crop, you can see the histogram changes as well.

Photo by Roberto Nickson (@g) on Unsplash

The Benefit of Keeping Standard Ratios

Standard ratios help keep things in order, for both online showcasing and image printing. I remember a sad story now from a couple of years ago. I wanted to print some images, and due to “free” cropping (the one you get by unlocking the little lock in the cropping panel), I got strangely cropped prints from my final images. Standard ratios help photographs avoid these sad situations a lot.

Cropping Is Really Enhancing Our Composition – So Keep Some Composition Rules In Mind When Cropping

Whenever we are looking through our viewfinder, we are cropping already, we are cropping reality with our cameras. That is pretty much the very beginning of composition, therefore cropping in post-production is still a continuing procedure of composition. In Lightroom, when choosing the Crop tool (R) and then pressing the shortcut O you can toggle between a various arrays of composition layouts – these can help in thinking about yoru new composition:

Use Cropping Responsibly

There are some genres in photography like Photojournalism where cropping should be done with extreme care because leaving something out can and does change the context and story of the reality behind the image. It can give the viewer a whole different message – it could even become sensationalist.

Nowadays I enjoy cropping almost all my images, even slightly because it gives me a reconnecting feeling with the moment that I captured the image in the past. Cropping is a prime stage of editing and it should be done with care, but most importantly, with joy.

Let's block ads! (Why?)


Light Stalking https://ift.tt/2DEMKy5

Sourced by Time Trap Photography sharing the best photography tips, news and tricks throughout the industry. Time Trap Photography is dedicated to freezing those special moments in life that can be revisited and admired for generations to come. - Shannon Bourque
Please visit our main site for booking availability and rates.


"Time


Receive valuable industry knowledge delivered free to your email each day.


"Time

Better Beach Photography. Make A Splash With These Tips On Gear, Settings, And Composition

6:06:00 AM

Beach photography can be a beautiful and fulfilling genre of photography and a lot of people either live not too far from a beach or enjoy regular holidays to the coast.

If your camera is gathering dust just because you feel that there are no interesting subjects around to photograph, go to a nearby beach and you can come back home with some winning photographs.

Shooting beach photography is very similar to shooting any other landscape, but with one fundamental difference – the water. If you pay attention to the moving water you can incorporate the magic of the sea in your composition, and definitely, you can create extraordinary photographs.

Here are some important tips, settings, requirements, and facts to take into account when getting into beach photography.

Adrianna Calvo at Pexels


Gear Required:

  • Any camera can be used for beach photography, but if you are looking for longer exposures, go for one that can shoot in manual mode
  • A wide angle lens if you are shooting a wider perspective or a mid focal length lens or tele lens if you are looking to capture water features in detail.
  • Tripod if you are shooting long exposures. For normal exposures as well, tripods help with getting better compositions. 
  • Neutral Density Filters, if you are shooting long exposures or you are shooting under very bright light conditions
  • If there is too much variation in light intensity between the sky and the waterbody, you can make use of a graduated neutral density filter.
  • Circular polarising filters if you are looking to avoid reflections off water, flora and looking to bring some colour and details in a bright sky.

Christian Fregnan at Unsplash

  • Lens hood to remove unwanted flare or other artifacts.
  • A remote shutter release or cable release to avoid blur due to camera shake.

Camera Settings:

  • As with any genre of photography, it is good to shoot using manual mode. Knowledge of the exposure triangle will be of great help.
  • Use the lowest iso possible to avoid noise in photographs
  • Aperture value can be between f/5.6 to f/11, depending on your lens’ sweet spot.
  • If your lens performs well at narrow apertures, do not hesitate to go up to f/16 for longer exposures and for shooting under bright light conditions.
  • It is best to use matrix metering when shooting waterscapes as this is very similar to shooting landscapes.
  • Choose your shutter speed depending on what you intend to shoot. If you are looking to freeze actions like a crashing wave or water splashing, go for faster shutter speed. If you are looking to record movements, you will need to go for longer exposures, in other words, slow shutter speed of 1 to 10 seconds or longer depending on what you wish to photograph.

George Desipris at Pexels

  • Focus on one-third of the scene to get the entire scene in focus or use the hyperfocal distance to get the scene in focus. Manual focus is recommended
  • Using the camera on a tripod with live view turned on, can help with easy but interesting compositions.
  • Slow shutter speed can be achieved by using very low iso, narrow aperture. If you want even longer exposures, make use of ND filters.
  • Choose auto white balance. By shooting raw, you can always change the white balance during post-processing

Best Time Of The Day For Beach Photography:

  • The best time to photograph waterscapes will be the blue hour and golden hours. These are the times before and after sunrise and sunsets. 
  • If you are looking to avoid people in the frame, an hour before sunrise to an hour after sunrise would be the best time for getting some beautiful colors in the sky and for amazing soft light
  • If you wish to include people in the frame to enhance composition or to show scale and balance in the composition, then evenings would be the best time when there are people around. Shoot from an hour before sunset to an hour after sunset.
  • The time before sunrise and after sunset is the best time for beautiful soft long exposure images.

Snapwire at Pexels

  • If you are shooting during the daytime when the sun is very bright up in the sky, make use of ND filters to compensate for the harsh light. 
  • If you want to eliminate unwanted weird reflections off water or from other elements like trees, and want to bring some colours and details to the skies, make use of the circular polarising filter. The circular polarising filter works well only when the sun is at 90 degrees to the frame.

Pok Rie on Pexels

Great Weather Conditions For Beach Photography:

  • When it comes to weather, beaches lend beautiful images whether it is a colourful sunrise or a cloudy/foggy day. As photographers, it is our goal to make the situation work in our favour. Do not be put off by foggy weather, as beautiful moody images can be made during those days.
  • Overcast days can be your best friend if you are focusing on the water features and not including much of the skies. The soft light and the reflected light from the water can illuminate the scene with a soft glow.

Pexels at Pixabay

Steps You Need To Take To Shoot The Beach:

  • Put your camera on a tripod
  • Use manual mode for longer exposure and use the mirror lockup feature if using DSLRs
  • Focus manually into one-third of the scene
  • Use the lowest iso possible and aperture between f/5.6 to f/16 depending on exposure time, available light and sharpness of the lens.
  • If you still think the image is too bright for the exposure you are looking for (usually for long exposures or very bright light conditions) use ND filters to compensate for that
  • Frame your image – using live view is recommended for better compositions.
  • Use a remote or cable release and expose the frame.

Some Of The Subjects That You Can Photograph 

Of course, there are plenty of great compositions when you are down at the beach to photography. You can just focus on the waterscapes and fill the frame with the sea or include surrounding elements to add to the composition.

If you are focussed on just the water body, you will usually be composing a feature (maybe a rock) or an action (the waves) that are happening down at the beach. There may also be reflections of nearby structures that can lend for some compelling images and these will be the focal point in the frame.

Besides these, incorporating elements in or nearby the beach can help with strong compositions. 

Cleverpix on Pixabay

Here are some elements or subjects that you can include in your beach pictures:

  • Foreground elements – include a meaningful or dominant foreground element to create powerful beach photography
  • Rocks – these could be used as leading lines or to enhance depth in the image. Rocks can be used in layers to create depth in composition.
  • Sunsets and sunrises can make for some of the most beautiful beach pictures.
  • Leading lines like deckings, posts, piers or other bridges in the waters can be used to create a strong composition.

Nextvoyage at Pexels

  • Lighthouse, boats, surfers are other elements that can add meaning to a beach-scape
  • Some trees that you will find down at the beachfront are palm trees or even mangroves. Use the verticals and other leading lines in there to compose images that include these trees. If there are boats or other water transports used there, include them while composing your images.
  • Buildings/architecture – There are buildings on oceanfronts. Make use of these architectural structures to compose your images.

Nathan Cowley at Pexels

  • Add a human in the frame to show emotion or to add strength to your composition.
  • In some areas, beaches can be places where one can witness a lot of action. For example, fishing can help you compose images that include actions or will help document a story

Image by QuangPraha

Some Composition Guidelines That Work For Beach Photography:

There is so much you can compose and photograph when it comes to beach photography – the possibilities are many. Here are some compositional guidelines that you can work with or incorporate into when photographing the beach.

  • Rule of Thirds – Make sure you place the elements on or near the intersection of the rule of third lines and the horizon along the lower or upper horizontal line. Also, align any vertical elements on or near one of the vertical lines.
  • Space to move – If there are moving elements in the frame, make sure you give the element enough space to move in the frame. This could be a boat, a surfer, a bird or a person walking by the shore.

David Whittaker at Pexels

  • Diagonals – incorporate diagonals using elements in the beach picture or using any elements that are moving at the beach
  • Negative space – look for minimal compositions where you have just one simple element in the frame

Sara at Pexels

  • Curves – look for curves along coastal areas
  • Textures and patterns – use textures from rocks or patterns from water to create dramatic compositions
  • Leading lines – there are places where rocks can lead a viewer’s eye into the image to the focal point or other elements like bridges and piers can be used to lead the viewer into the frame.

Mahkeo on Unsplash

  • S curve – when photographing the coast, look for the famous “s curve” to create a strong composition

Dane Deaner on Unsplash

  • Verticals – if you are including elements like trees, use the verticals to support your composition.
  • Layers – use the elements of the frame and arrange them as layers in such a way that they show or enhance depth in the image. 
  • Rule of odds – try to have an odd number of elements in the frame rather than even numbers as having odd numbers of elements in a frame is visually appealing and helps with creating powerful images.

Mario Azzi on Unsplash

  • Colours – make use of contrasting colours to enhance compositions and draw attention
  • Perspectives – look for aerial perspectives when shooting the beach. Shoot from the top of a cliff or use a drone and you will be amazed at what you can capture. You can also shoot from a lower angle to get intriguing shots.

Juan Jose on Unsplash

  • Fill the frame – when photographing seascapes, you can zoom in and fill the frame with a part of the ocean along with some interesting rocks that can help with composition.
  • Reflections – waterscapes are great places to look for beautiful reflections. The best places to look for reflections would be wet sand or rock pools as still water helps best with capturing detailed reflections.
  • Symmetry – this is another photographic composition that you can make use in your beach photography. Either look for horizontal or vertical symmetry to create a strong composition

Zukiman Mohamad at Pexels

  • Monochrome – use monochrome (different shades of the same colour) to avoid distractions and focus on the features and elements in the image. You will still need to pay attention to the composition.

Tips For Beach Photography:

  • Make sure you do not use a UV filter when photographing sunsets or sunrises along with waterscapes, as these can create ghost images or unwanted flares and artifacts. Make sure the front elements are not exposed to sand or sea spray during this process.
  • The ripples or reflections from the ocean can make for some great abstract images. When photographing ripples, you can just freeze action (faster shutter speed) to get the textures/ripples or use a longer exposure (slower shutter speed) to get a softer image that depicts movement.

Zukiman Mohamad at Pexels

  • Long exposures show the dynamics of water in beach photography. Depending on how evident you want the trails, for example, the ocean trails – adjust your shutter speed accordingly.
  • There are days when the sea may be fierce because of a high tide or a storm. Use a faster shutter speed to freeze actions when a fierce wave crashes on to a rock by the shore. This can help create spectacular action shots. 
  • Look for life in and around the beach – for example, animals, birds, plants and trees that can make for great subjects to photograph. These can lend for some great action shots too!
  • Shoot moving elements like boats, surfers, people walking, etc.
  • Use sunsets or sunrises as focal points when photographing waterscapes. These can also add to dramatic colours in the sky and waterscape.
  • Do not be afraid to get your feet wet as some of the best compositions can be done from within the water. Move into the water to compose images as the perspective is different here and make sure that you and your gear are safe here. 
  • Do not hesitate to shoot the beach at night, especially when there is moonlight to add to the ambient light. You will be rewarded with stunning night images that not many other photographers make.

Studio 7042 at Pexels

Did you know? Long exposure beach photography can lead to some beautiful fine art images. Why don’t you give them a try? You never know what you can create without trying it first!

Protect Your Gear:

  • When photographing the beach you may be very close to water and of course, sand that could damage your gear. Make sure you take all precautionary measures to protect your gear from these elements and any adverse weather that you may encounter. 
  • Do not change lenses in areas where waves are crashing or when it is windy in sandy areas, as these can settle on your sensors and other parts of your camera and lenses causing serious damage. UV filters can be used to protect the front element of the lens from sand, dust and water/sea sprays
  • You can use rain covers to protect your gear and use desiccants like silica gel in your camera bag, that will help absorb any moisture present.

Pixabay at Pexels

Post-Processing Beach Photography: 

No image is complete when shot RAW, without a bit of post-processing. Here are some basic steps for a brilliant final image.

  • Make sure you adjust the white balance settings to match what you saw on location
  • Adjust the exposure and contrast.
  • Use the crop tool to get the horizon straight if you haven’t got it right straight out of the camera
  • Make use of the contrast, highlights, shadows, vibrance, saturation, sharpening and clarity sliders to make any other basic adjustments. 
  • If the image has a hazy look due to bright lights, make use of the dehaze tool to get a bit of contrast in the image.
  • If you feel that you have lost a bit of cloud or other sky details, make use of a graduated filter or other brush tools to get the details right.

Ibrahim Asad at Pexels

Learnings From Around The Web:

Take a look at these great tips on beach photography from around the web

Further Reading On Light Stalking:

Of course, we have a plethora of tips, tricks, and guides on beach photography here at home on Light Stalking for you to return to time and again, whenever you need it

  1. 10 Tips To Create Beach Photos You’ve Only Dreamed About
  2. How to Photograph Beach Life for Great Shots
  3. Photographing at the Beach: 10 Tips for Better Beach Photos
  4. How to Shoot a Picture Perfect Beach Portrait
  5. 7 Quick Tips for Better Beach Photography

Let's block ads! (Why?)


Light Stalking https://ift.tt/2zCMfAy

Sourced by Time Trap Photography sharing the best photography tips, news and tricks throughout the industry. Time Trap Photography is dedicated to freezing those special moments in life that can be revisited and admired for generations to come. - Shannon Bourque
Please visit our main site for booking availability and rates.


"Time


Receive valuable industry knowledge delivered free to your email each day.


"Time

About Us

Time Trap Photography is dedicated to freezing those special moments in life that can be revisited and admired for generations to come. - Shannon Bourque

The lens in focus

“Life is like a camera. Just focus on what’s important and capture the good times, develop from the negatives and if things don’t work out, just take another shot.” — Unknown

TIME TRAP PHOTOGRAPHY COPYRIGHT 2016