Thursday, March 29, 2018

29. März 2018

4:09:00 AM

Das Bild des Tages von: Kevin Ramolla
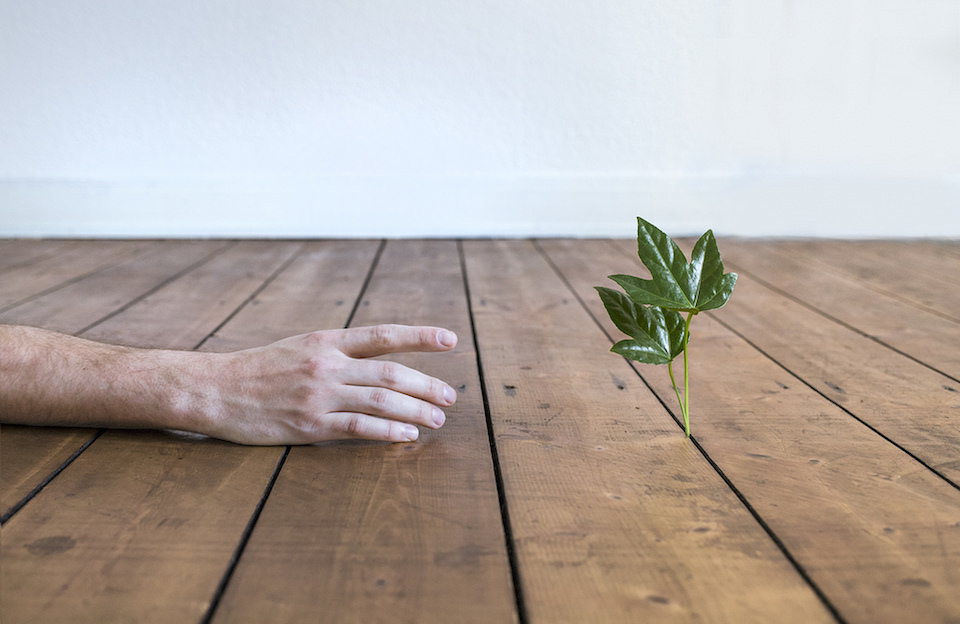

kwerfeldein – Magazin für Fotografie https://ift.tt/2GiQpSO

Sourced by Time Trap Photography sharing the best photography tips, news and tricks throughout the industry. Time Trap Photography is dedicated to freezing those special moments in life that can be revisited and admired for generations to come. - Shannon Bourque
Please visit our main site for booking availability and rates.



"Time


Receive valuable industry knowledge delivered free to your email each day.


"Time

Wednesday, March 28, 2018

SLC-OE-01: DIY Portable Doorway

9:22:00 AM

Pictured above is Moishe Appelbaum, of Midwest Photo fame, whom you may remember from Lighting 103.

Moishe is lit with a single small flash. But the gentle wrap of the light—and the soft glow of the suppressed specular highlights—should cue you in to the fact that the light modifier itself is huge.

Today, we'll learn how to make a door-sized modifier DIY style, for about $20 and in a form factor that is super easy to transport. (It collapses down to about the size of a folded light stand.)
__________

For the ten years before I joined the staff of The Baltimore Sun in 1998, I worked for a chain of papers that competed with them. And that sometimes meant competing with a Sun photographer named Jed Kirschbaum.

This was not always an easy thing to do. Jed didn't carry around a lot of lighting gear, because he was great at scrounging light from his environment. Later, when we were staffers together at The Sun, he told me that he always considered doorways to be his own personal giant soft box that he did not have to buy or carry around.

This was very smart. Most every location had a doorway, and it usually separated brighter from darker zones of light. Presto, your own personal giant soft box.

As a light source, a doorway was doubly great for a headshot. Because if you opened the doorway 45 degrees you had not only a soft, giant light source at a 45-degree angle, but also a ready-made background in the door panel itself.

And unlike a window, a doorway created a broad and tall light source big enough for a full-length portrait.

But doors aren't everywere. So eventually I figured out how to cobble together my own substitute for the giant, soft light of a non-existent doorway. And do so in a way that did not excessively impede my wallet or my gear bag.

Off to Home Depot and WalMart

So what we'll be making is a friction-fit "T" frame, supported by a light stand, and using that to support the white twin sheet that serve as our diffusion panel.

For the frame you'll need two items, both super cheap: a 5- or 6-foot section (however they sell them) of 3/4" PVC pipe, and a 3/4" friction-fit "T" connector. We'll be disassembling it for easy transport, so you won't even need any PVC glue.

For the diffuser, you'll need a white twin sheet. I suggest WalMart because the sheets are thin and cheap, both admirable qualities for our purposes.

Making Your Diffuser Panel

It really couldn't be easier. First, let's cut the PVC pipe.

Using pretty much any kind of saw (but hacksaws work great) cut 2- to 3-inch section off of one end of the PVC pipe. Next, cut the remaining long length into two equal pieces. (You don't have to be super exact. Just get it close.) That's all of the PVC cutting we'll be doing today.

Next, we'll prep the sheet.

We are going to cut a slit that will let you mount the sheet to the PVC frame without clamps. In the thickly folded hem that usually signals the head end of your sheet, cut a centered T-shaped slit as shown:

If your PVC is not too long for your sheet you won't even have to cut the ends of the hem, as you can assemble the PCV frame and diffuser sheet right from that center slit.

Putting it All Together

First, slide the small section of PVC into the bottom of the "T" joint. This will make for a better fit to mount the frame to the top of a standard 3/8" light stand fitting.

Second, slide the long PVC pipes into the hem from the center and assemble the frame as shown.

Finally, mount it to a light stand and you're good to go.

Using Your Diffuser Panel

So this thing is great for taking the light from a harsh speedlight and making it absolutely gorgeous. That is because it is so big that each square inch of the sheet is transmitting very little light energy, and that makes for a beautiful wrap and nice speculars.

Generally you'll use this indoors both for the low power of the speedlight and for the suceptibility to wind. But you can totally use it outdoors at dusk on a calm evening as well.

This is an open diffuser, so you have to account for your raw light overspray. Long story short, if you have a background lit by this light source, you'll want to position your flash and diffusor so that the raw light does not land within the frame.

That said, remember to back the flash up enough to get an even spill on the sheet. The the angles and distance will be a balancing act.

You may even want to widen your zoom setting to 24mm, and orient the flash head vertically to help the beam pattern match the shape of the sheet.

(You can make these diffusers more contained with respect to raw spill light, but that is a little more complex and we'll get to it in a future post.)

If you are outdoors at dusk and the post sunset sky is your backdrop, no worries, Just mind your angles to ensure that raw overspray from your flash does not encroach if you are using a backdrop.

For Moishe, above, I am using the backdrop my friend Sara painted for me. Which brings up a good point: If you have a backdrop (or a nice wall, but a backdrop is better) you can use a single speedlight in just about any disused room and create beautiful portrait light in no time flat.

This was exactly the case above, as Moishe dropped by a lighting class we were having in a meeting space at Midwest Photo, and I pulled him in for a quick dozen frames. With a light source this big (bigger, even, than a 60" octa) it's hard to go wrong.

A Couple of Tips

First, get the source as close as possible to your subject. This will help in several ways:

• It'll look fantastic. The wrap and apparent size will create very flattering light.

• It'll be more efficient when used up close. This is always a factor when lighting with speedlights.

• It'll help you control your angles as far as oversprayed raw light hitting the background.

Second, I like to shoot right at the trailing (shadow side) edge of the sheet. Or even to cut a slit nearish to the trailing edge, and shoot through that as shown:

This helps my single light to wrap into the shadow side better—almost like a bit of on-axis fill against my key light.

Third, this light makes an ideal on-axis fill for taming (or cooling) the shadow areas of a multi-light portrait. Because of its size, you can place it right behind you and shoot from in front of it. Gorgeous. (This can also be a nice on-axis key light setup, especially in black and white against a white wall and overexposed.)

Finally, for transport, take one long section apart. Just leave the T-connector and bottom pigtail pipe attached to the other piece. Then use the sheet to wrap it all up together. It transports super easy, wherever you are carrying your light stands.
__________

These things are super easy to buy, make, carry and use. They give you a versatility and look that you simply cannot get with your normal-sized umbrellas and/or softboxes. We'll definitely be using them further along in the Lighting Cookbook.

As far as DIY light mods go, this is as close to a no-brainer as it gets.

FROM: Strobist Lighting Cookbook, Odds and Ends

Let's block ads! (Why?)


Strobist https://ift.tt/2J3Z0qu

Sourced by Time Trap Photography sharing the best photography tips, news and tricks throughout the industry. Time Trap Photography is dedicated to freezing those special moments in life that can be revisited and admired for generations to come. - Shannon Bourque
Please visit our main site for booking availability and rates.


"Time


Receive valuable industry knowledge delivered free to your email each day.


"Time

$10 Ebay Find is Actually a Picture Worth $2 Million of Jesse James

7:02:00 AM

You always read about the occasional story where someone buys an antique only to discover it is worth way more than originally thought or even the occasional purchase of a home with a hidden treasure in the attic.

Luck comes in all forms, and for one Ebay shopper looking for vintage photographs, Lady Fortune delivered a once in a lifetime gift.

The photo in question was a 19th century tintype of the famous western US outlaw Jesse James though no one knew it at the time. After purchasing it, the buyer discovered the photo was not only of Jesse James, but an extremely rare one at that – hence, the huge valuation.

Image via Pixabay from Pexels.com.

Justin Whiting, a resident of Spalding in the United Kingdom, landed upon the photo in 2017 when he was browsing Ebay. He noticed the picture looked very similar to one he found in a book. Feeding his passion for everything about American western outlaws, Justin went on ahead and clicked the buy-it-now button, securing the photograph for $USD 10.

“I noticed the picture for sale — it was $10. It was a bit blurry on the site but when I got it, it was a lot clearer,” Whiting said, “I thought to myself: ‘Gee wizz, this could be a real photo!’ I’ve been obsessed with American outlaws for years and read lots of books and study their faces.”

California-based 19th-century photo expert Will Dunniway confirmed the photo’s authenticity, noting it was a picture of Jesse James at the age of 14.

Dunniway said to Fox News, “It was an easy match since it was compared to a longtime known image of the young Jesse James at 14…Justin’s image, however, was the same pose taken the same day by the same photographer […] [It’s a] one-of-a-kind original that most likely was handled by the teenaged Jesse James himself.”

Jesse James is an extremely famous outlaw known for robbing banks, trains, and stagecoaches throughout the American West.

Let's block ads! (Why?)


Light Stalking https://ift.tt/2GlTzBy

Sourced by Time Trap Photography sharing the best photography tips, news and tricks throughout the industry. Time Trap Photography is dedicated to freezing those special moments in life that can be revisited and admired for generations to come. - Shannon Bourque
Please visit our main site for booking availability and rates.


"Time


Receive valuable industry knowledge delivered free to your email each day.


"Time

How to Start Building Your Photography Filter Kit

5:32:00 AM

At its very heart, landscape photography is about capturing light on a sensor (or film, if you’re still shooting the old-fashioned way). Photography filters provide a unique way to control and modify that light to create some stunning images like the one you see below.

But how do I go about building my photography filter kit?

If you are just starting to think about getting filters, the process can be confusing due to the many options that are available. In this article, I attempt to explain what factors to consider when you start to build your filter kit.

Understanding Filters

The first thing you need to learn about filters is what they do and how they affect your images. This helps determine which filters to purchase and how to use them effectively to capture photos like this one from Iceland.

A circular polarizer is the first filter I would purchase. This filter reduces or removes the glare from a reflective surface caused by scattered light. While there are plenty of  circular polarizer effects software presets, there is no way for software to accurately reproduce the effects of a circular polarizer. You can see the effect of a circular polarizer in the image below.

  • Without Circular Polarizer, Haleakala National Park, Maui, Hawaii (HI), USA

  • With Circular Polarizer, Haleakala National Park, Maui, Hawaii (HI), USA

ND filter is my second choice. This filter cuts down the light entering the camera and allows you to slow down your shutter speed. We use this filter to produce the silky smooth effect in the water as seen in the image below.

Iceland

An ND filter allows you more options to explore creativity as seen in this video.

If your Photoshop skills are exceptional, you may be able to manually produce a few ND filter effects. However, this takes a lot of time and effort and is, at best, an approximation of what a real filter can do. An ND filter comes in different strengths. For someone who is just starting out, I suggest one between 4 and 6 stops. If you can afford it, I suggest picking up two ND filters – one between 4 to 6 stops and a 10-stop  filter.

Graduated Neutral Density (GND) filters can be used to reduce the dynamic range of the scene you are photographing. They also allow you to capture proper details in both highlights and shadows. Today, HDR software can very effectively replicate the effects produced by this filter. If you are on a budget, this is one filter that you can skip. If you were going purchase this filter, I suggest purchasing a 3-stop soft GND filter. This is one of our most used filters. Here are couple of images taken using the GND filters…

  • Napili Beach, Maui, Hawaii (HI), USA

  • Vestrahorn, Iceland

Type of Filters

GND and ND filters can be square or rectangular filters or circular filters. We highly recommend that you start building your filter kit using square filters. You must also purchase a filter holder and a carrying case but this allows you to extend your filter kit as needed. A filter holder can also accommodate different size lenses with just a step-up ring. We typically purchase a filter holder to fit the lens with the largest front element and then get step-up rings for smaller lenses.

How to Purchase

If you decide to go this route, you must purchase a circular polarizer that works with your filter holder without producing vignetting on your widest lens. It is best to purchase a filter kit from a single vendor as it is easier to ensure that different parts fit together properly. If you decide to combine filters from different vendors, do your research to ensure that all the elements properly fit together.

If you are in the market for a new filter kit, we have partnered with Benro Filters to design the Visual Wilderness Filter Kit to get you started. You can order it using the link below and get 10% off.

10% Off Visual Wilderness Filter Kit by Benro Filters

About Author Jay Patel

I could startoff like this – “Seeds of Jay Patel’s appreciation for beautiful places were planted early in his childhood….” but it would get boring really fast. I will just sum it up and say that I am a Landscape and Wilderness Photographer who loves to capture dramatic light. My photographs have been published in various magazines, calendars and advertising materials throughout the world.
Patience is a virtue...unless you are chasing your dreams

Let's block ads! (Why?)


Visual Wilderness https://ift.tt/2pJYWEm

Sourced by Time Trap Photography sharing the best photography tips, news and tricks throughout the industry. Time Trap Photography is dedicated to freezing those special moments in life that can be revisited and admired for generations to come. - Shannon Bourque
Please visit our main site for booking availability and rates.


"Time


Receive valuable industry knowledge delivered free to your email each day.


"Time

About Us

Time Trap Photography is dedicated to freezing those special moments in life that can be revisited and admired for generations to come. - Shannon Bourque

The lens in focus

“Life is like a camera. Just focus on what’s important and capture the good times, develop from the negatives and if things don’t work out, just take another shot.” — Unknown

TIME TRAP PHOTOGRAPHY COPYRIGHT 2016