Tuesday, September 1, 2020

kwerfeldein wächst! Das neue Team.

10:18:00 PM

Gestern habe ich Euch erzählt, was es ab sofort alles Neues bei kwerfeldein zu entdecken gibt und geben wird. Natürlich kann ich all die neuen Formate nicht allein bewältigen. Mir steht dafür ein ganzes Team großartiger Menschen zur Seite, die ich Euch heute vorstellen möchte.
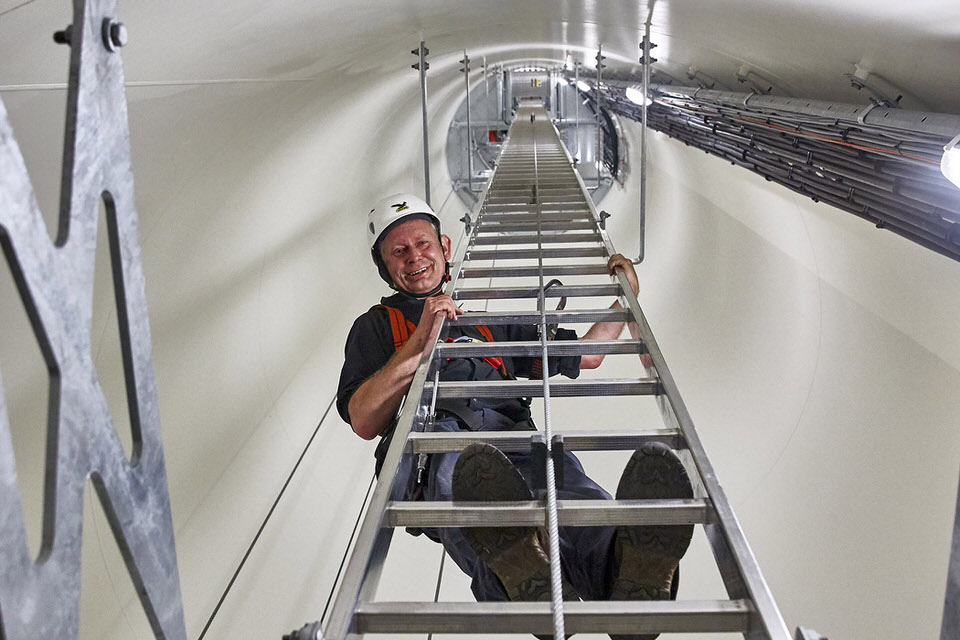
Mann steht mit Helm auf einer Leiter in einer Röhre

Christian Ahrens © Silvia Steinbach

Christian Ahrens

Beruflich ist Christian als Industriefotograf unterwegs und ich habe ihn dazu auch schon im Magazin ausgefragt. Wenn man ihn besucht, bekommt man den besten Cappuccino der Welt serviert und wenn man ein Problem hat, hilft er. Ungefragt.

Und falls Christian einmal nicht selbst helfen kann, dann kennt er ganz sicher jemanden. Netzwerken ist seine große Stärke und das macht er nicht um des Netzwerkens willen oder für Profit, sondern weil er gern unter Menschen ist, neue Perspektiven und Ideen sucht und einfach ein richtig toller Mensch ist.

Für kwerfeldein wird er sich ab sofort um die Vortragsreihen kümmern. Er weiß, welche Themen aktuell sind und organisiert tolle Sprecher*innen. Ich könnte mir niemanden vorstellen, der besser für diesen Job geeignet ist. Herzlich willkommen!
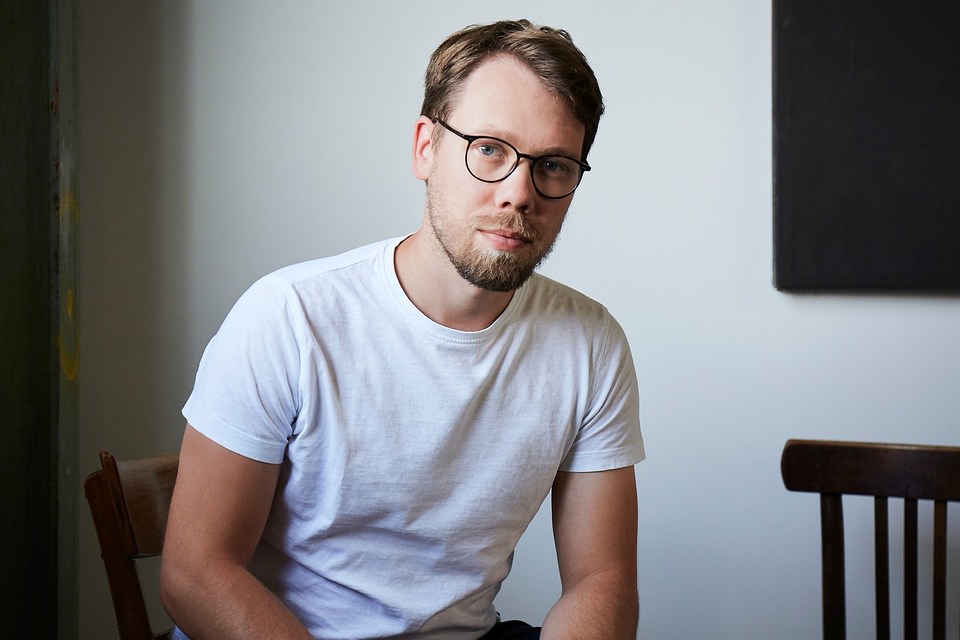
Männerportrait indoor

Sebastian H. Schroeder

Sebastian H. Schroeder

Sebastian ist Fotograf und Dozent. Ich habe ihn bei einer Bildbesprechung kennengelernt und mir sofort insgeheim gewünscht, er wäre früher einer meiner Lehrer gewesen. Dummerweise ist er jünger als ich und der Gedanke daher höchst unrealistisch.

Sebastian hat ein unglaubliches Talent, Lerninhalte zu vermitteln und Probleme so anzusprechen, wie es sein muss: Nicht in Watte gepackt, aber auch nicht so, dass man sich dumm fühlt. Er ist verständnisvoll und holt einen dort ab, wo man steht. Ohne Bloßstellung und ohne Süßholzraspeln.

Und seine Parodien von Peter Lindbergh sind unvergessen. Wer sie einmal live sehen möchte, sollte zu einer der Bildbesprechungen kommen, die er ab jetzt unter dem Namen kwerfeldein führt und die früher unter dem Label „OpenTable“ stattfanden. Zudem führt er unseren neuen Podcast „Blick von außen“ – ehemals OpenTable-Podcast.
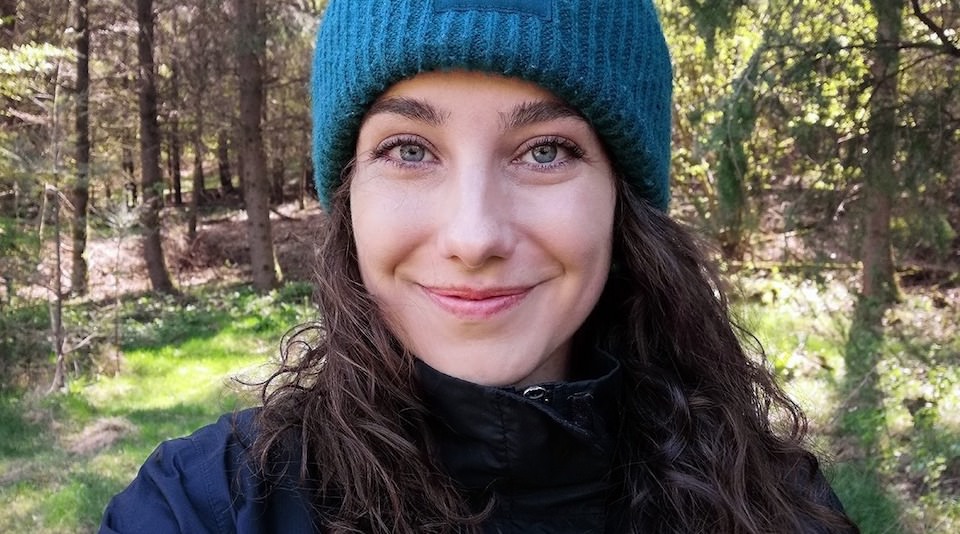
Salomé Weber

Salomé Weber

Salomé ist Medienwissenschaftlerin und interessiert sich für jegliche Art von visuellen Medien. Doch tief in ihrem Herzen ist sie davon überzeugt, dass die Fotografie den schönsten Weg bietet, um die Welt zu entdecken. Ich habe sie ebenfalls als regelmäßige Besucherin der Bildbesprechung von Sebastian kennengelernt und sofort sympathisch gefunden. Leider verschwand sie kurz danach nach Neuseeland – wer kann es ihr verdenken?

Jetzt, nach über einem Jahr voller Abenteuer, ist sie zurück und arbeitet als Social-Media-Managerin. Wenn sich jemand mit neuen Medien auskennt, dann sie. Wer wäre also besser geeignet, um uns in Sachen Instagram, Facebook und Co. zu unterstützen? Ich freue mich wahnsinnig, dass sie uns dabei hilft.

Christopher Horne

Christopher Horne

Ich weiß nicht, ob ich Christopher jemals ohne Kamera in der Hand gesehen habe. Am Ende eines gemeinsamen Tages bekommt man so immer wunderbare Erinnerungen und kleine, unbemerkte Momente zugeschickt und wundert sich ein wenig, wann er das denn gemacht hat.

Zudem ist er wunderbar spontan, neugierig und begeisterungsfähig. Ideale Eigenschaften, um gemeinsam einen Nachrichtenpodcast zum Thema Fotografie aufzuziehen, oder? Ich bin super gespannt auf die gemeinsame Arbeit und unglaublich dankbar dafür, dass er mich in meinen wilden Ideen immer begeistert unterstützt.

Nora Hase

Nora Hase

Ebenfalls im Team des Nachrichtenpodcasts begrüße ich herzlich Nora, die ich auch durch die Bildbesprechungen kennenlernen durfte. Sie hat mich mit ihren starken Arbeiten damals sehr begeistert und ich musste nicht lange überlegen, sie ins Team aufzunehmen.

Sie hat im letzten Jahr das Studium der Fotografie beendet und bringt so eine frische Sicht auf die aktuelle Fotografie und ihre Möglichkeiten mit ein.
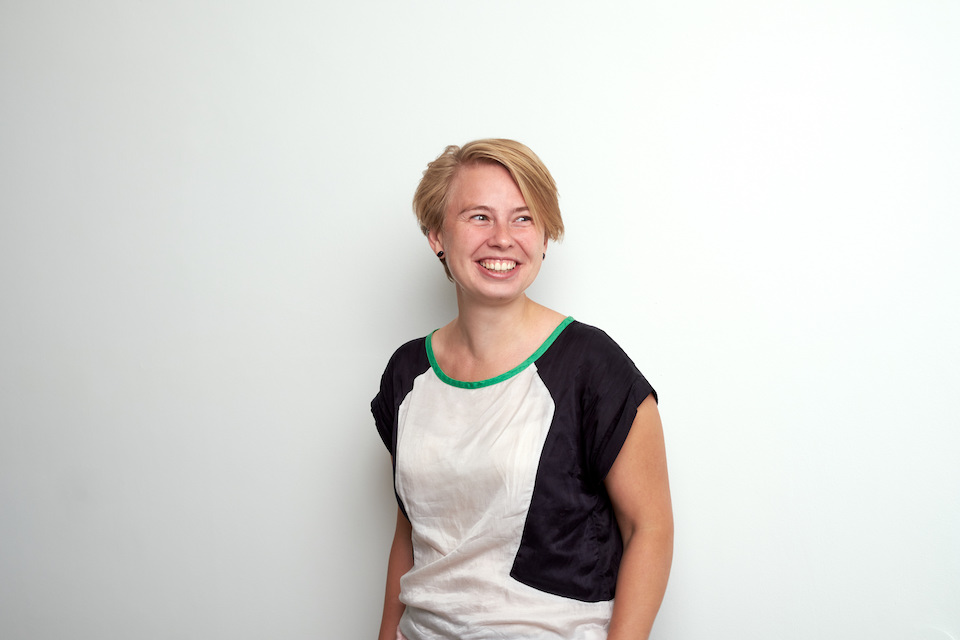
lachende Frau

Monika Luśnia

Monika Luśnia

Monika unterstützt den Nachrichtenpodcast mit Recherchen im Hintergrund und holt uns mit ihrer ruhigen Art bei wilden Diskussionen über verschiedene Themen immer wieder auf den Boden zurück. Auch sie ist frische Studienabgängerin der Fotoakademie Köln und kann mir Autodidaktin so weitere Perspektiven aufzeigen.
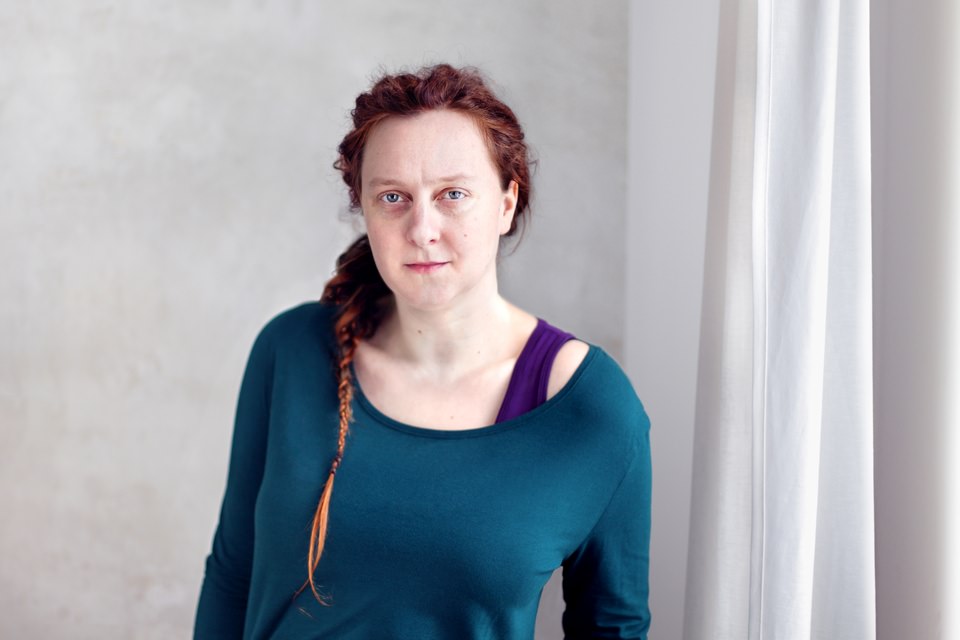
Frauenportrait

Aileen Wessely

Aileen Wessely

Aileen. Ich weiß gar nicht, wo ich anfangen soll, denn Aileen ist fast solange bei kwerfeldein wie ich selbst und ich wüsste nicht, ob es unser Magazin ohne sie noch gäbe. Wie oft hat sie mir Mut zugesprochen, gemeinsam mit mir geflucht und mir zu meinen naiven und spontanen Ideen die nüchternen und realistischen Seiten aufgezeigt.

Zudem hilft sie als selbstständige Programmiererin bei technischen Problemen im Magazin und korrigiert außerdem jeden Text, den ich hier verzapfe, bevor Ihr ihn lest. Ich denke, insgeheim hat sie eine Liste mit den lustigsten Schreibfehlern angefertigt, die sie irgendwann als Druckmittel gegen mich einsetzen wird.
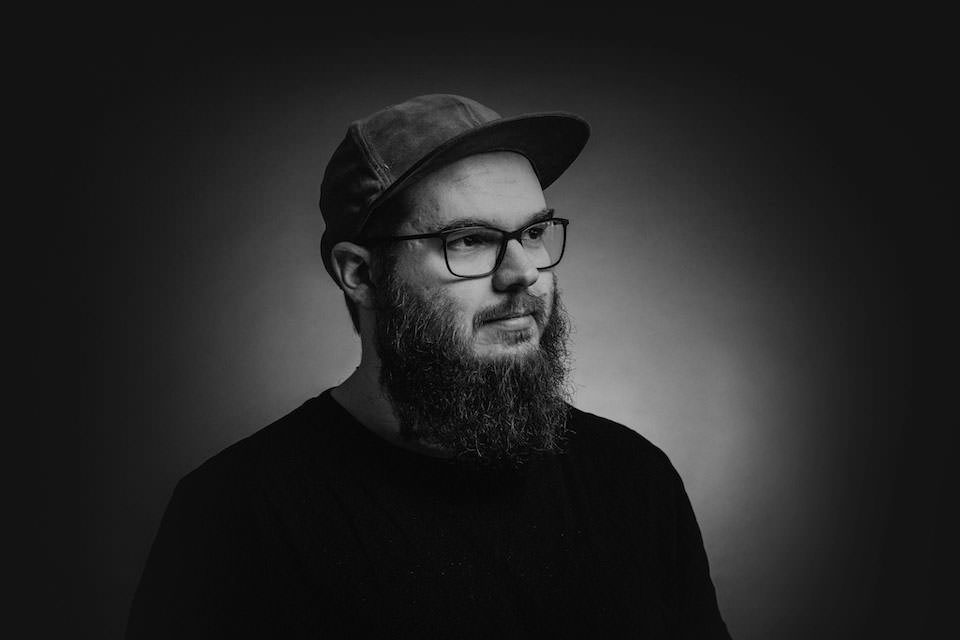
Männerportrait

Christopher Kreymborg

Christopher Kreymborg

Und dann gibt es natürlich noch unseren Mann in Neuseeland. Christopher ist Hochzeitsfotograf und hat in diesem Jahr beschlossen, Deutschland zu verlassen. Seit März wählt er unseren täglichen Ausblick aus einer Hängematte liegend zwischen Eukalyptusbäumen aus – so stelle ich mir das jedenfalls vor. Realistisch betrachtet, macht er es wahrscheinlich zwischen Windelnwechseln und mit zwei Kindern auf dem Arm.

Also helft Christopher gern und schickt Ihm tolle Aufnahmen zur Auswahl. Wie? Kommt in unsere Flickr-Gruppe oder taggt Eure Bilder mit dem Hashtag #kwerfeldein auf STRKNG.


Ihr habt Fragen an mich und das Team? Alle Kontaktinformationen findet Ihr auf der Redaktionsseite. Oder stellt sie hier in den Kommentaren und wir beantworten sie gern.


kwerfeldein – Magazin für Fotografie https://ift.tt/3hTUzPV

Sourced by Time Trap Photography sharing the best photography tips, news and tricks throughout the industry. Time Trap Photography is dedicated to freezing those special moments in life that can be revisited and admired for generations to come. - Shannon Bourque
Please visit our main site for booking availability and rates.



"Time


Receive valuable industry knowledge delivered free to your email each day.


"Time

Understanding Photoshop’s Blend Modes

8:49:00 AM

If you have dabbled a little with Photoshop, you will know just how powerful an editing tool it is. One of the many elements that contribute to this are layers. Photoshop layers allow the photographer to stack images, graphics and other elements on top of each other.

Perhaps the simplest form a layer can take is when we put text over an image. For example of we place white text on top of an image, Photoshop will automatically create a new layer. The original image will still be seen below the text.

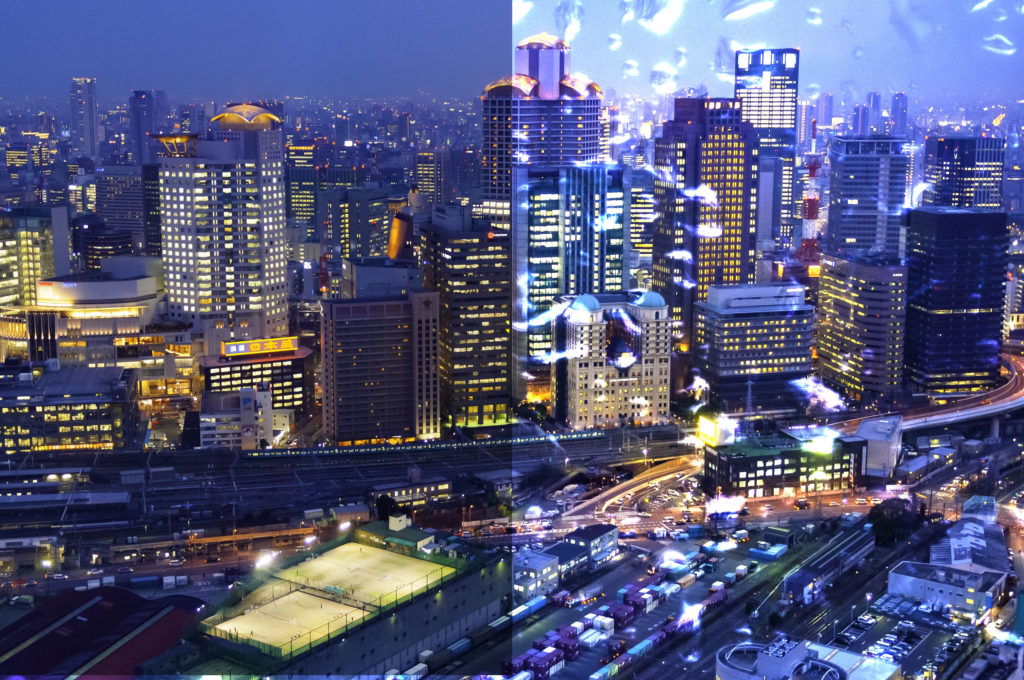
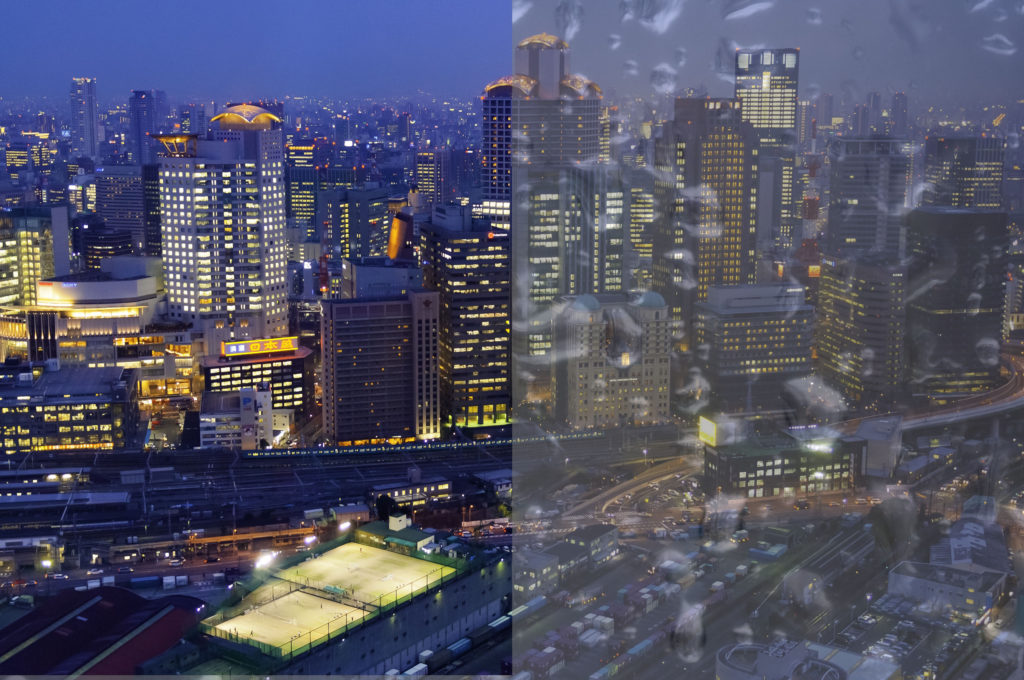
If however, we place another image over the top of our original image, the original will disappear. We could of course reveal the lower image by reducing the opacity of the upper image. However this will only give us a mishmash looking combination of the two. There is however a much more advance way or merging multiple layers together and that is the Blend Mode. Today we are going to take a look at it. 

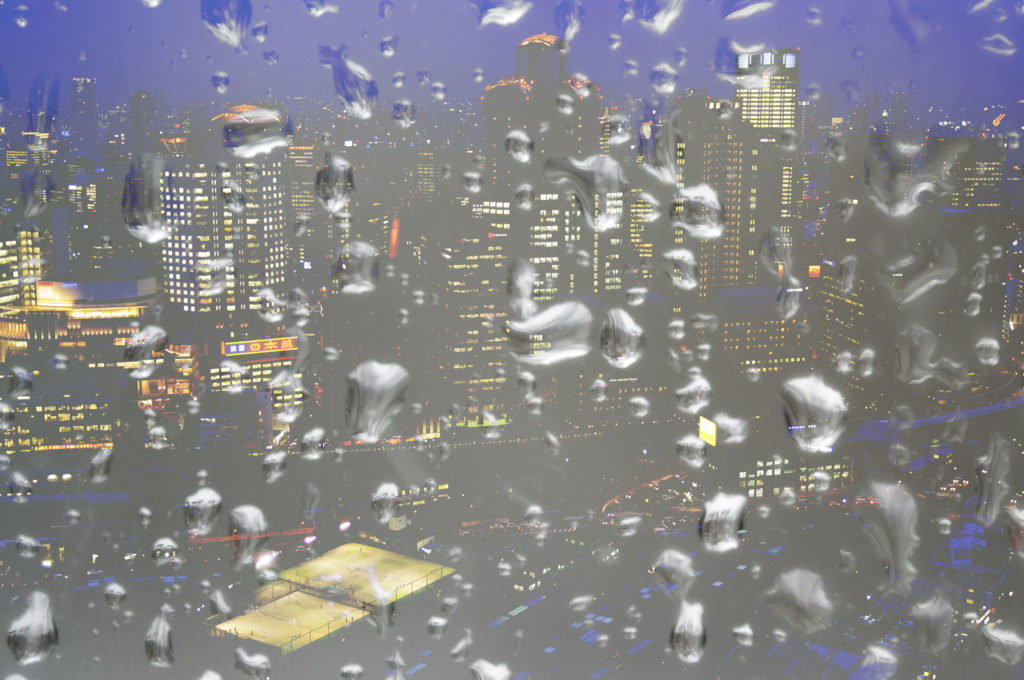
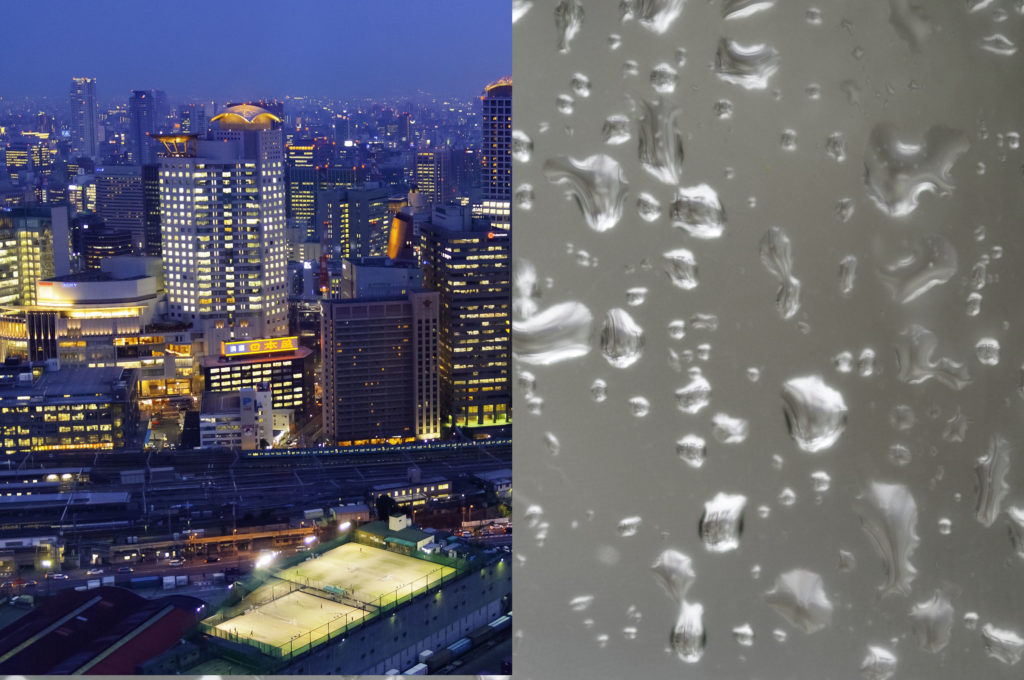
Rain texture overlying picture of Osaka
Reducing opacity will result in a mishmash combination

What And Where Is The Blend Mode Tool? 

A blend mode will merge the pixels of one layer with those of another in Photoshop. It does this pixel by pixel based on luminance, colour or saturation. You change the blend mode on the upper layer to merge it with the layer below. Blends, in most cases only work on the layer directly below.

They will have no effect on layers further below the two being adjusted. 

The blend mode is found in the Layers Palette. Click on a layer and you will see a dropdown box with a full list of blend modes available. As of June 2020 there are 27 separate types of blend, grouped into six distinct categories. Those categories are:

  • Normal
  • Darken
  • Lighten
  • Contrast
  • Inversion
  • Component

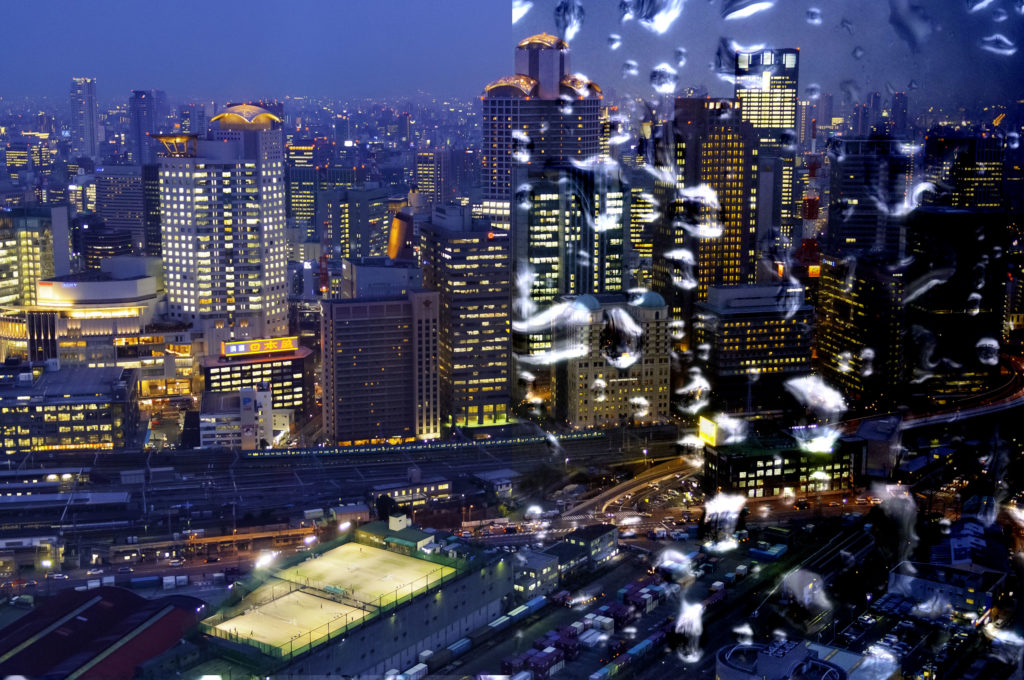
The default mode is Normal, when you use this, you will not see anything under the upper layer, unless you reduce opacity or fill. The other option in the Normal section is dissolve. This will merge the upper layer with the lower layer with a dither pattern. Again this will only show when you start to reduce opacity or fill. Lets look at what the other blend mode categories do.

Split screen of rain textures and cityscape
There are 27 blend modes, this is the Normal Blend

Darken Modes

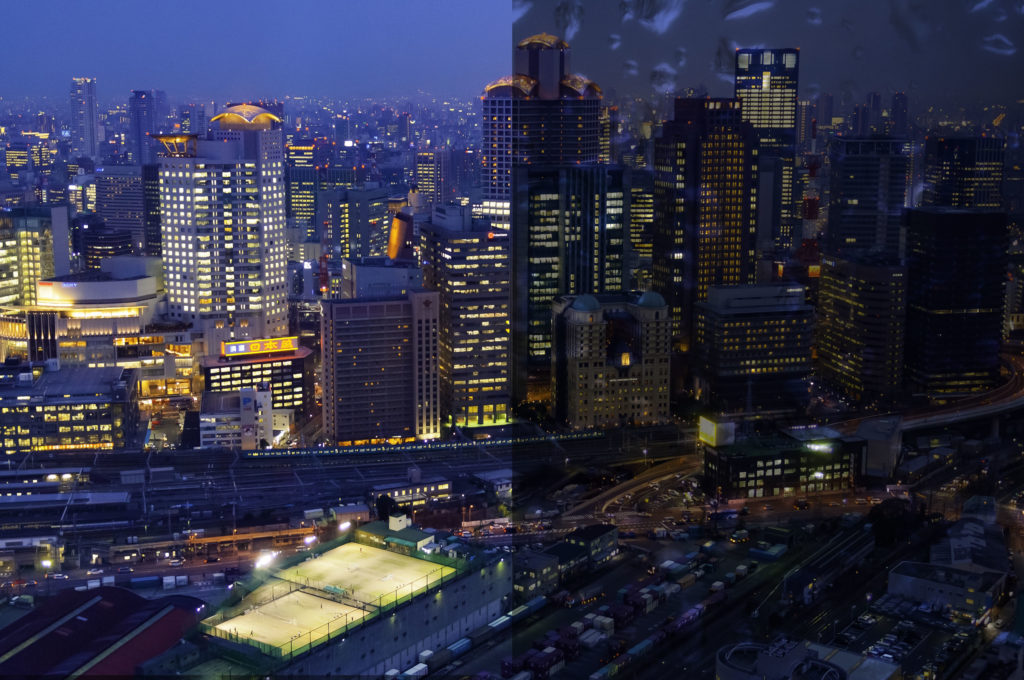
There are six separate modes within the darken category. These blends will make the overall image darker based on the density of the upper image. In the Darken Blend the pixels in the upper or blend layer are darker than those in the lower or base layer, they are kept. If they are are lighter they are replaced with the pixels from the base image.

Multiply will darken all coloured pixels but not white. Visually it it is like doubling the density of an image.

Cityscape demostrating multiply blend mode in Photoshop
Multiply is like halving the exposure levels

Color Burn will darken the most saturated mid-tone regions but not touch the highlights. It creates a dark deeply saturated look.

Linear Burn does a similar thing but with less effect on the saturation of the image. Darken Color works in a similar way to Darken but with less effect on the colour.

Lighten Modes

The Lighten blend modes are effectively the direct opposite of the Darken modes. In Lighten, if the pixels on the Blend layer are lighter than those on the base layer, they are kept in the image. 

In Screen blend mode the density of the image is effectively halved making the overall look much lighter. The exception is the blacks. Color Dodge lightens the most saturated mid tones regions but leaves the shadows alone. Linear Dodge further increase the brightness but with less effect on color saturation. Lighter Color is similar to Lighten but with less effect on colour pixels.

Cityscape demonstrating Color Dodge blend mode in Photoshop
Color Dodge lightens saturated midtones

Contrast Modes

The contrast modes blend images based on 50% grey. Pixels darker than 50% grey will be darkened. Pixels lighter than 50% grey will be lightened, depending on the blend mode used. . In the Overlay blend mode darker pixels will be made darker whilst lighter pixels are screened. This boosts contrast and saturation.

Soft Light provides a similar but less pronounced effect giving a softer overall feel. Hard Light uses Linear Dodge on lighter pixels and Linear Burn on darker pixels. The overall effect is a much harsher more contrasty and saturated image.

Vivid light is similar to Hard Light instead using Colour Dodge and Burn. This creates an even more harsh looking image compared to Hard Light.

Linear Light uses a 50% strength version of Lighten and Darken blends. The effect of this is an even more hight contrast image 

Cityscape demonstrating Lineaar Light Blend mode in Photoshop
Linear Light is a combination of lighten and darken blends

Pin Light uses the Darken and Lighten blend modes in a similar way to Linear. It tends to eliminate most of the images mid tone and leads to very surreal looking images. Hard mis reduces the image to primary and secondary colours with blacks and white. 

Inversion Modes

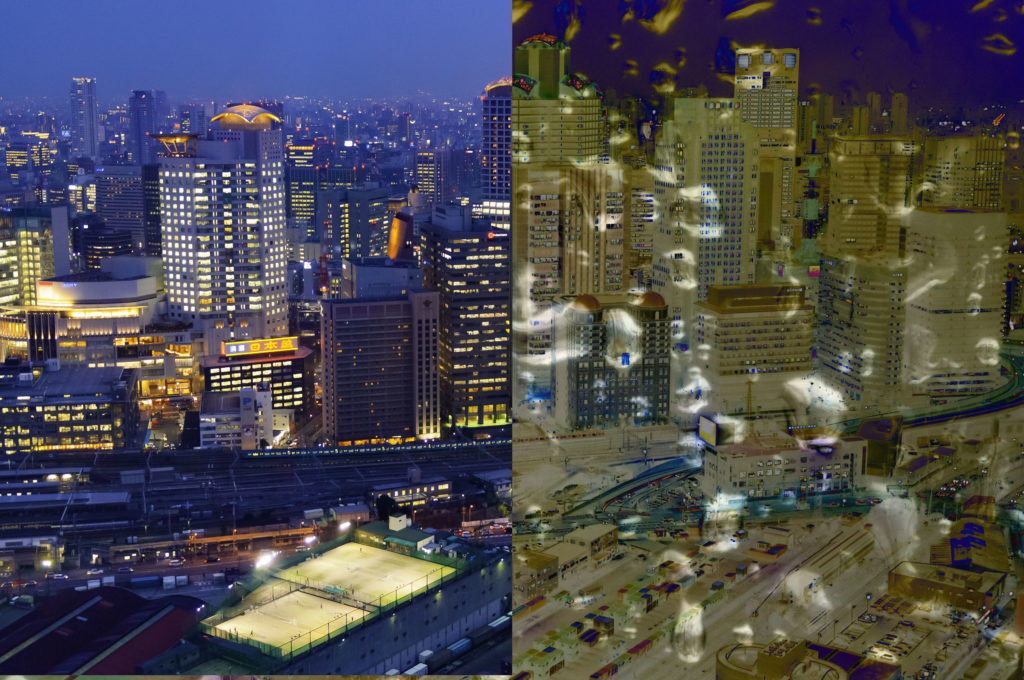
The Difference mode subtracts the difference between equivalent pixels on the blend mode and the base mode. The overall effect is to give an inverted, negative feel to an image. Exclusion is similar to Difference but with a flatter less contrasty look. 

Subtract has the effect of making an image virtually black with just saturated mid tone colors showing through. Divide will create an almost white image.

Cityscape demonstrating Difference blend mode in Photoshop
Difference Blend gives an almost negative feel to the image

Component Modes

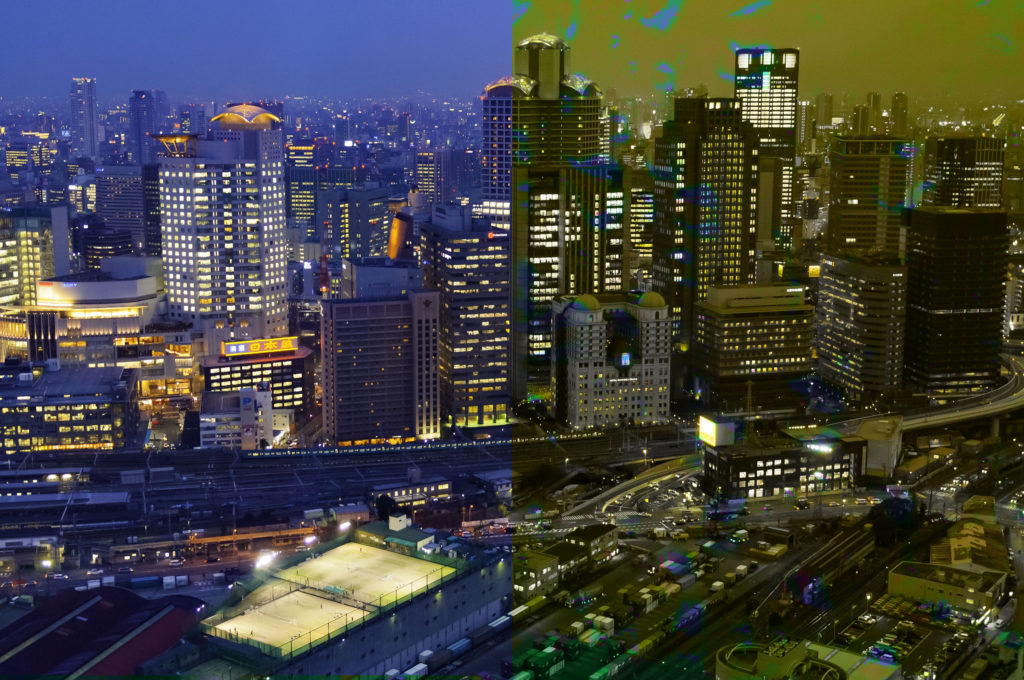
The Component blend modes work on the Hue, Saturation and Luminance of the images. In Hue blend mode the hue of the blend layer is maintained and the saturation and luminance levels are blended. Saturation maintains the saturation levels and merges hue and luminance. 

In Color blend mode the color is maintained on the blend layer whist the hue and saturation of both layers are blended. 

In Luminosity blend mode the blend layer maintains luminosity whilst hue and saturation are merged. 

Cityscape demonstrating hue blend mode
Hue mode maintains the hue of the upper layer

Using Blend Modes

Whilst the theoretical effect of a blend mode can be described, in reality it’s virtually impossible to know how two images are going to blend until you try them. Also you don’t have to use different images with blends modes. Using the same image with different exposure levels you can increase contrast, change color and a do a multitude of other edits, both subtle and heavy, all by working with different blend modes. You can also back of the effect of a blend mode using either the opacity or fill slider both to slightly different effect.

Raindrop textures blended over a cityscape using Lighten blend
You need to experiment with blends to find the most suitable one

Blend Modes are incredibly powerful yet relatively simple to use. The more you practice with different types of images and different blends, the more comfortable you will become with their power and versatility. Let us know in the comments below, what your favourite blend mode is. 

Let's block ads! (Why?)


Light Stalking https://ift.tt/3gOzR2v

Sourced by Time Trap Photography sharing the best photography tips, news and tricks throughout the industry. Time Trap Photography is dedicated to freezing those special moments in life that can be revisited and admired for generations to come. - Shannon Bourque
Please visit our main site for booking availability and rates.


"Time


Receive valuable industry knowledge delivered free to your email each day.

"Time

iPhone 12 Reveals Raft of New Camera Updates

6:49:00 AM

Apple is set to release another iPhone this October according to multiple reports on the Internet.

Dubbed the iPhone 12, this new iteration on the popular line is expected to have enhanced bells and whistles as is mandatory as well as some new camera features. Obviously the latter is what interests us the most as a photography blog.

So what is Cupertino cooking up for its next-gen smartphone camera? And how will it stack up against the competition?

PetaPixel reports the following features as revealed by Jon Prosser of Front Page Tech: Enhanced Night Mode, Advanced Noise Reduction, Enable Bit Depth Video, Enable Zoom Capabilities, and Enable LiDAR CA (for subject detection and autofocus features apparently).

Prosser even backs up his claims with screenshots showing the updated tech on iPhone 12.

You can view those by clicking here.

As many are speculating, the vast majority of the improvements coming to the iPhone 12 are based on tweaks and optimizations of the software itself. Then again, all of this is pure speculation at this point.

One thing that is more salient is that COVID-19 will impact the delivery of the iPhone 12 (just as it has everything else in 2020). While there will be some delay in getting iPhone 12 Pro and iPhone 12 Pro Max phones into the hands of consumers, this is expected to be largely resolved by the holiday season this year. That makes it perfect timing to compete with models from Samsung and others during one of the busiest consumer seasons of the year.

Does the new iPhone 12 sound like something that you would like to have? Let us know your thoughts on its new features in the comments section below.

Be sure to check out our other photography news articles here on Light Stalking by clicking this link.

[PetaPixel]

Let's block ads! (Why?)


Light Stalking https://ift.tt/3gUVcYo

Sourced by Time Trap Photography sharing the best photography tips, news and tricks throughout the industry. Time Trap Photography is dedicated to freezing those special moments in life that can be revisited and admired for generations to come. - Shannon Bourque
Please visit our main site for booking availability and rates.


"Time


Receive valuable industry knowledge delivered free to your email each day.

"Time

1. September 2020

4:18:00 AM

Das Bild des Tages von: Kerstin Kaufmann


kwerfeldein – Magazin für Fotografie https://ift.tt/3lCmjee

Sourced by Time Trap Photography sharing the best photography tips, news and tricks throughout the industry. Time Trap Photography is dedicated to freezing those special moments in life that can be revisited and admired for generations to come. - Shannon Bourque
Please visit our main site for booking availability and rates.


"Time


Receive valuable industry knowledge delivered free to your email each day.

"Time

About Us

Time Trap Photography is dedicated to freezing those special moments in life that can be revisited and admired for generations to come. - Shannon Bourque

The lens in focus

“Life is like a camera. Just focus on what’s important and capture the good times, develop from the negatives and if things don’t work out, just take another shot.” — Unknown

TIME TRAP PHOTOGRAPHY COPYRIGHT 2016