Tuesday, December 31, 2019

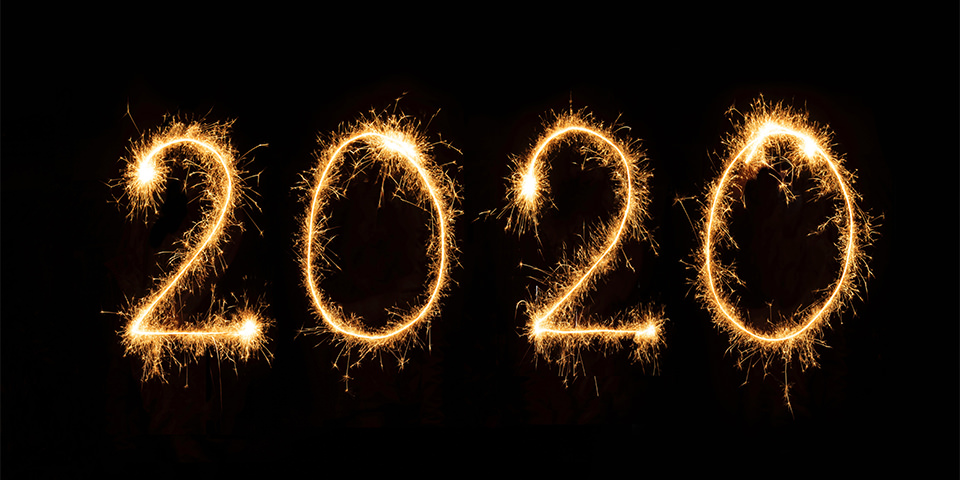
Zeig Dein wichtigstes Foto 2019
10:23:00 PM

Ich hoffe, Ihr seid gut ins neue Jahr gekommen. Vielleicht habt Ihr Euch vorgenommen, in 2020 mehr zu fotografieren, geplanter vorzugehen oder mehr zu experimenten. Aber lasst uns doch, bevor wir große Pläne in Angriff nehmen, noch einmal zurückschauen. Wie war Euer fotografisches Jahr 2019? Und vor allem: Auf welches Foto seid Ihr besonders stolz?

Ich möchte das für Euch wichtigste Foto von 2019 sehen und die Geschichte dazu lesen. Was macht das Foto so besonders? Zeigt es eine Euch wichtige Person, hat es Euch in Eurer fotografischen Karriere weitergebracht oder erinnert es Euch an einen schönen Moment? Erzählt mir davon!

Teilnahmebedingungen

  • Such Dein wichtigstes Foto heraus, das Du 2019 veröffentlicht hast.
  • Poste den Link dazu in einem Kommentar.
  • Beschreibe in ein paar Sätzen, warum Dir dieses Bild wichtig ist und wie es entstanden ist. Fotos ohne Beschreibung werden nicht berücksichtigt.
  • Mit dem Kommentar stimmst Du einer möglichen Veröffentlichung auf kwerfeldein zu.
  • Der Einsendeschluss ist am Sonntag, den 5. Januar 2020 um 21 Uhr.

Ich freue mich, mit Euch gemeinsam in Erinnerungen zu schwelgen und Bilder zu sehen, die für Euch ein ganzes Lebensjahr repräsentieren und immer in Erinnerung bleiben werden.

Am 8. Januar präsentieren wir Euch an dieser Stelle unsere ganz subjektive Auswahl aus Euren Bildern. Die spannendsten, berührendsten Geschichten und die gefühlvollsten, eindrucksvollsten oder einfach lustigsten Fotos.

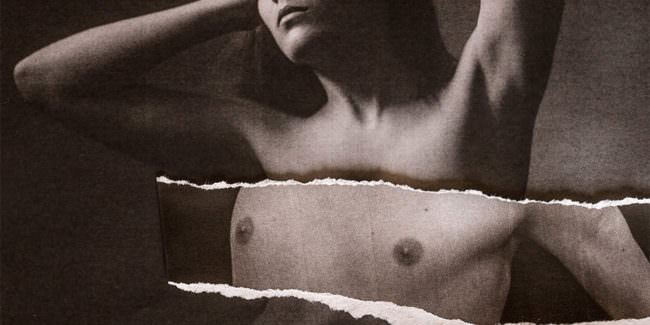
Das Titelbild stammt von Jude Beck. Vielen Dank dafür!


kwerfeldein – Magazin für Fotografie https://ift.tt/36a5PBT

Sourced by Time Trap Photography sharing the best photography tips, news and tricks throughout the industry. Time Trap Photography is dedicated to freezing those special moments in life that can be revisited and admired for generations to come. - Shannon Bourque
Please visit our main site for booking availability and rates.


"Time


Receive valuable industry knowledge delivered free to your email each day.


"Time

Say Goodbye to the Sony Alpha a7

9:58:00 AM

It’s the end of the road for Sony’s famed mirrorless Alpha a7 as both BHPhoto and Adorama now list the model as discontinued.

Image is of Sony A7 camera via Sony.com.

Though this isn’t shocking to anyone that has followed the news over the past year, the final exit for the a7 is still a poignant moment.

As Sony Alpha Rumors reports, the camera debuted back in 2013 and became a workhorse for many photographers around the world.

The fact that it is unlikely to be replaced with a new full-frame design probably doesn’t help anything, either.

Naturally, all of this is part of a broader realignment of optical manufacturers strategies to focus on the cameras that sell and, more importantly, make a bunch of money.

Even though the Alpha a7 is gone, Sony itself is still pressing out chips at record levels and is unable to keep up with demand, Sony Alpha Rumors reports.

All of this has to do with the amazing sales Sony and others are experiencing in the smartphone market.

The head of Sony’s semiconductor division, Terushi Shimizu, told Bloomberg, “Judging by the way things are going, even after all that investment in expanding capacity, it might still not be enough. We are having to apologize to customers because we just can’t make enough.”

“The camera has become the biggest differentiator for smartphone brands and everyone wants their social media pictures and videos to look nice. Sony is riding that wave of demand very well,” commented Bloomberg Intelligence’s Masahiro Wakasugi.

For the future, Sony is focusing on both increasing capacity as well as next-gen technology such as capturing images in 3D.

“This was the year zero for time of flight. Once you start seeing interesting applications of this technology, it will motivate people to buy new phones,” Shimizu added.

Did you use a Sony Alpha a7? What do you think of its discontinuation? Let us know your thoughts in the comments below.

Also, check out some of our other photography news articles on Light Stalking by clicking here.

[Sony Alpha Rumors]

Let's block ads! (Why?)


Light Stalking https://ift.tt/39vqi63

Sourced by Time Trap Photography sharing the best photography tips, news and tricks throughout the industry. Time Trap Photography is dedicated to freezing those special moments in life that can be revisited and admired for generations to come. - Shannon Bourque
Please visit our main site for booking availability and rates.


"Time


Receive valuable industry knowledge delivered free to your email each day.


"Time

How To Use A Prism For Creative Photography

5:59:00 AM

Prisms that you would have used in your science labs can be used as great accessories for creative photography. They create beautiful rainbow effects, light leaks and other “reflective” and “multiple” image effects depending on what type of prism is used and how you use them in front of the lens.

In this article, we will look at how to use a prism for creative photography. This method is also called “prisming” by some photographers.

What Is A Prism?

In optics, a prism is a transparent object made of glass or sometimes even plastic, that has polygonal bases parallel to each other and the other sides a parallelogram. The name given to the prism depends on the shape of its base – for example, a prism with a triangular base or an equilateral triangular base is called a triangular or equilateral prism which is the most common one used in basic lab experiments in high school and often in photography. 

What Happens To Light When It Passes Through A Prism?

Before diving into using prisms for photography, let's briefly look at what quality of the prism makes it a useful piece of accessory for creative photography!

Let us consider for example a white beam of light. We all know that white light is a combination of different wavelengths of light and each wavelength represents a particular colour of light. We also know that light gets refracted due to change in speed when it passes from one medium to another – for example a rarer to a denser or a denser to a rarer. In our case, it is from air to glass (when falling on a glass prism). 

So when white light falls on a prism at an angle, it is refracted and different wavelengths of light are refracted at different angles depending on the medium and angle of incidence and this is called dispersion. This dispersion causes a rainbow effect which is called the spectrum. It is this effect and other physical properties of the prism itself that we can use to make creative photographs.

Since prisms are able to bend/refract, disperse light and cause beautiful reflections and light leaks, they can be used to create impressive images without the need to use photoshop or other photo manipulation software. As photographers, we are always looking to make use of light and its amazing properties to create beautiful photographs and one interesting phenomenon to explore is using a prism in front of the lens to manipulate light.

Gear Required For Prism Photography:

  • Any camera, preferably a camera with an interchangeable lens that can be used in manual mode.
  • A prism of your choice that you can easily hold and rotate when photographing. Usually, a 6-inch prism is the most desired size as it can cover the lens completely and can also easily fit into your camera bag. This can be bought off Amazon or eBay at a cheaper price, but make sure you go for good quality glass.
  • Prime lenses are the best and focal lengths between 24 to 50mm should work perfectly fine, but focal length around 50mm up to 85mm or 135mm are the best as they help eliminate the prism being recorded in the image.

How Can A Prism Be Used For Creative Photography

When photographing using a prism, just place the prism in front of the lens and turn it the way you wish till you see desired results in the frame. Light bends through the prism before entering the lens and the results this can produce are pretty amazing and unpredictable most of the time.

Using a prism in front of the lens can produce creative distortions, prism-shaped flares, rainbow effects, reflections, etc. 

So, there are no rules on how you should be holding or placing the prism and hence use the available light and move/rotate the prism to create the look you want. Due to the refractive property of light, this can lead to creative photography and the possibilities are endless. 

Once you see something interesting in the viewfinder or screen, just click, because you may not get the same effect another time. The effects that you see are real (because they are created as a natural optical phenomenon) and change with each frame as it is most of the time impossible to recreate most effects.

Here Is What You Should Do:

  • Hold the prism in front of the lens. Placing it on the side or in the middle is dependent on what looks good for your final image.
  • Rotate, move (right or left, up or down) the prism depending on what you are looking to create. You need to learn the effects through trial and error.
  • Start by making small changes to the position, the orientation of the prism and look through the viewfinder to see how the light and other effects change in the scene due to reflections and refractions.
  • Depending on the position of the prism, edges of the prism with respect to the lens, angle of light falling on the prism, available light and other factors, you will see various effects like reflections, double exposure effects, light leaks, rainbow effect, distortions in your image. 
  • When you play around with the prism and different lens combinations, you will know what effect you can achieve for different prism positions, prism angles with respect to the lens, type of light, amount/angle of incidence of light, etc.
  • Experiment outdoors when you have enough sunlight. Once you get into grips with the tricks and effects you can achieve, move indoors or shoot under city lights at night and try various effects.

Note: Most of the time, holding a prism in one hand and the camera on the other while focusing and creating effects with the prism can be quite a tedious task to accomplish while looking through the viewfinder. So when possible, try to use live view so you can easily adjust the prism positions to get results that you are satisfied with.
When shooting posed portraits, try to use a tripod so you can have the camera fixed and then freely move the prism in front of the lens to get the desired effects. If you have a Depth of field preview button, make use of it, so you can see a preview of what you will exactly be photographing.

Camera Settings To Shoot Using A Prism:

  • Set your camera on Manual mode. 
  • Use a wide aperture so you have maximum light entering the camera and depending on what you are looking to achieve, open or close down the aperture further if required. Shooting at wider apertures will help eliminate seeing the prism or its edges in the actual image itself and help bring more focus to the main subject.
  • Keep the prism close to the lens as possible to avoid focus issues. You will need to remove your lens hood if you have it on so you can put the prism as close to the lens as possible.
  • When you introduce the prism in between the lens and your subject, your camera can struggle to focus. So it is best to use manual focus or back button focus to focus on the subject and then put the prism in front of the lens, to achieve the desired effect and then release the shutter button. Or, you can autofocus on your subject, then switch to manual focus and introduce the prism in front of the lens. 
  • If using autofocus, make sure you use single point autofocus because using multiple autofocus points will confuse your camera.
  • Use the lowest ISO value possible to avoid noise in the images.
  • Make sure you have a shutter speed fast enough to avoid any blur due to your subject moving within the frame. It is safe to stay faster than 1/250 of a second or (1/(2 x focal length)) taking into account crop factor for cameras with a crop sensor.
  • If you are happy to get the image and not worried about a particular part being in focus, for example for abstract photography, then use release priority so the shutter releases even if the image or a particular element is not in focus.

Important Tips To Keep In Mind:

  • Start with a triangular prism which is the most simple one and once you know how prisms work and what you can achieve with them, try various other prisms.
  • Use prism for any type of photography that you will be doing, for example, portraits, lifestyle, still life, landscape, weddings, nature, architecture, cityscapes, etc. 
  • Experiment with other glasses, CDs, other lenses from scientific labs like concave lenses, different types and shaped crystals, etc. Each one will produce different results.
  • If you are in a scene where you think the light isn’t in your favour and lacks that magic touch, just pull out the prism and use it to manipulate light in the scene. This way you can turn a boring scene into a very interesting one.
  • Use prisms to create abstract images.
  • Try prisms with artificial light as they can create interesting effects in your images besides the rainbow effect, natural light renders in the image.
  • Do not use prism for outdoor photography on overcast days as it can make the image look flat and dull without any interesting effects.
  • Adjust the distance between the lens and the prism to get different effects. You can also change your position relative to the source of light and look for different light effects.
  • Make sure you wipe the prism when needed to remove fingerprints due to holding it as it can ruin the image and reduce the quality of light entering the lens.
  • If you find it difficult to hold the camera in one hand and prism on the other hand when shooting images, depending on the situation, try and use a tripod or a monopod for help. If possible use live view to compose the images.
  • Always go for quality glass or crystal prisms because, just like how you require good quality lens glasses for sharp and beautiful images, you need to use quality glass for anything you put in front of the lens. Low-quality glass or plastic will not give you the beautifully refracted light like good quality glass will.

Tip: Do not stop with just the prism. The above tips and techniques can be applied to glass crystals and other glass or crystal ornaments. So do not stop yourself from experimenting with these as these can be found around the house or amongst old stuff in the attic.

Some Tricks You Can Try:

  • Since at a certain position the prism can divide the image into half rendering different effects on each half, make use of this feature creatively to create symmetric images where you have them in the scene you are photographing.
  • Instead of putting the prism in front of the lens, try to use the prism to shine a rainbow light on the scene or your subject and then photograph your scene or subject.
  • Use tricks with the prism to hide unwanted elements/objects in the scene. The flare or refraction/reflection effects the prism creates can be wisely used to remove distracting elements in the frame.
  • Create a kaleidoscopic effect by photographing through the base of the prism. The base of the prism should be facing the lens.

Are you looking for some inspiration to try something new in photography?

Here Are Some Images Created Using Prisms:

If you have photographed using prisms, please feel free to share your experience and tips in the comments section below. You can also share your images with the community here at Light Stalking

Further Resources:

Let's block ads! (Why?)


Light Stalking https://ift.tt/2rIyf77

Sourced by Time Trap Photography sharing the best photography tips, news and tricks throughout the industry. Time Trap Photography is dedicated to freezing those special moments in life that can be revisited and admired for generations to come. - Shannon Bourque
Please visit our main site for booking availability and rates.


"Time


Receive valuable industry knowledge delivered free to your email each day.


"Time

31. Dezember 2019

4:23:00 AM

Das Bild des Tages von: Walerija Weiser


kwerfeldein – Magazin für Fotografie https://ift.tt/39uvSpy

Sourced by Time Trap Photography sharing the best photography tips, news and tricks throughout the industry. Time Trap Photography is dedicated to freezing those special moments in life that can be revisited and admired for generations to come. - Shannon Bourque
Please visit our main site for booking availability and rates.


"Time


Receive valuable industry knowledge delivered free to your email each day.

"Time

Monday, December 30, 2019

Die zehn beliebtesten Artikel 2019

10:25:00 PM

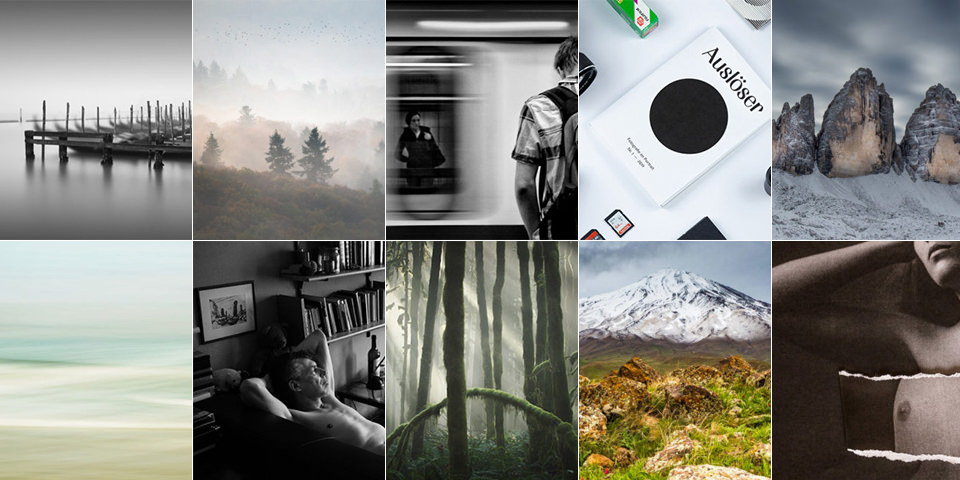
Bevor wir die Zwanziger Jahre betreten, möchten wir noch einmal zurückschauen. Wir haben in den Statistiken gewühlt und die zehn beliebtesten Artikel von 2019 herausgesucht. Beliebt im Sinne von Klickzahlen, denn alles andere ist schwierig zu bewerten. Aber es sind tatsächlich auch einige unserer persönlichen Highlights in den Top 10, was uns sehr freut.

Auffällig ist, dass dieses Jahr die Natur- und Landschaftsfotografie besonders gut angekommen ist. Aber auch kritische Artikel, die etwa Instagram-Zensur und ethische Fragen behandeln, finden sich in dieser kleinen Zusammenfassung wieder. Viel Spaß damit!

Fokussieren in der Landschaftsfotografie

Das Fokussieren in der Landschaftsfotografie ist ein viel diskutiertes Thema. Ziel ist es natürlich immer, möglichst scharfe Landschaftsfotos zu schießen. Aber wie bekomme ich eine ausreichende Schärfe auf meinen Landschaftsfotos und wo setze ich am besten den Fokus bei Landschaftsaufnahmen? Diese Frage ist nicht ganz so einfach zu beantworten. → weiterlesen

100 % Landschaftsfotografie – Tipps und Tricks

Meine fotografische Karriere habe ich als klassischer Landschaftsfotograf begonnen. Und auch wenn ich mich als Vortragsreferent und Autor in den letzten Jahren mehr und mehr mit dem Thema abenteuerliches Storytelling beschäftigt habe, so kehre ich doch immer wieder gern zurück zu meinen landschaftlichen Wurzeln und damit meiner wahren fotografischen Leidenschaft. → weiterlesen

ZEN$UR auf Instagram

„Warum regst Du Dich denn so auf? Es ist doch nur eine App.“ – Und die, die das zu mir sagen, haben Recht. Nur ist diese App, glaubt man den neuesten Zahlen, heutzutage eine Milliarde Accounts schwer und mit 500 Millionen täglich aktiven Mitgliedern die größte Social-Media-Plattform der Welt: Instagram. Und da breiten sich Ungerechtigkeiten aus wie Lauffeuer, genauso wie im echten Leben auch. → weiterlesen

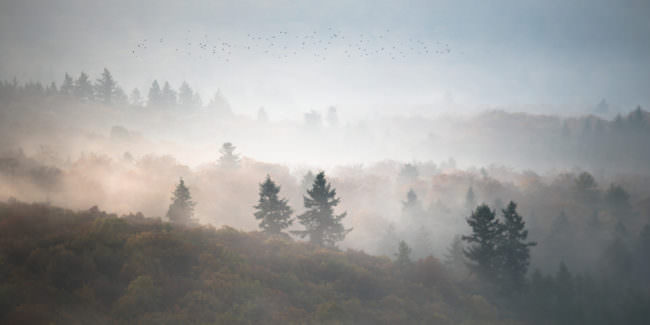
Neblige Landschaft

Naturfotografie nebenan

Die meiste Aufmerksamkeit* zieht man heutzutage oft auf sich, wenn man Natur- und Landschaftsfotografie dort macht, wo die Motive möglichst spektakulär sind. Das ist auf mehrfache Art und Weise schade. → weiterlesen

Internationale Landschaftsfotografie des Jahres 2018

Der Award „The International Landscape Photographer of the Year 2018“ wurde erst vor ein paar Tagen bekanntgegeben. Wir haben das vergangene Jahr eigentlich schon fast vergessen, aber bei diesen Bildern ist es auch völlig egal, wann sie aufgenommen oder präsentiert wurden, denn sie sind zeitlos. Sie zeigen unsere Welt von ihrer schönsten Seite. → weiterlesen

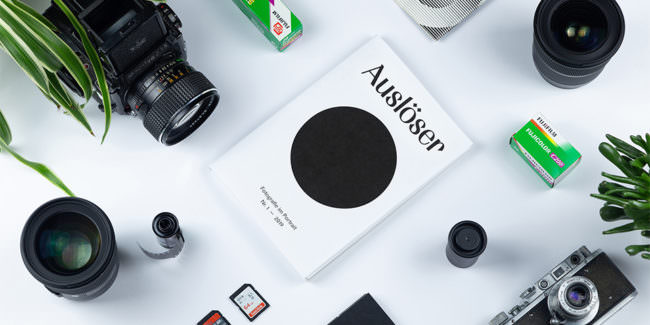
Auslöser – Das andere Fotomagazin

Ich bekomme regelmäßig neue Magazine für Rezensionen zugeschickt. Viele davon sind gut, aber selten bieten sie wirklich etwas Neues. Umso überraschter war ich, als ich das Magazin Auslöser aus Wien in den Händen hielt. Dabei ist das Konzept gefährlich einfach, aber so gut umgesetzt, dass es wunderbar funktioniert. → weiterlesen

Die Kunst der Schwarzweißfotografie

Ronny Behnert ist bekannt für seine schwarzweißen Langzeitbelichtungen. Manche von Euch kennen ihn vielleicht noch von seinem Artikel „Einmal Sylt und zurück“. Dieses Mal erzählt er uns, wie man das perfekte Schwarzweißfoto macht. → weiterlesen

Streetfotografie: Gedanken zu ethischen Zwickmühlen

Das kennt man so nicht von zu Hause: Ein aufgeregtes Getümmel aus zahlreichen jungen Wähler*innen versammelt sich am Tag der Wahlen zum Student Representative Council vor und auf dem Campus der American University Beirut. Mit schweren Geschützen bewaffnete Männer behalten das Geschehen vor den Toren der Universität im Auge. → weiterlesen

Portraits and Nudes

Astrid Susanna Schulz fotografiert Menschen jeglichen Alters, Geschlechts und mit verschiedenen Körperformen. Ihr Fokus liegt auf dem Portrait. Denn auch, wenn die Menschen auf vielen ihrer Bilder keine Kleidung tragen, steht ihr Gesicht, ihre Persönlichkeit im Mittelpunkt. → weiterlesen

Welche Fotos lassen sich gut verkaufen?

Ich habe kürzlich beschlossen, einige meiner Fotos auch zum Verkauf anzubieten. Die Auswahl fiel mir jedoch gar nicht so leicht, denn natürlich möchte ich Bilder wählen, die auch Potenzial haben. Aber welche Bilder verkaufen sich eigentlich besser als andere? Welche Motive hängt sich mein Nachbar über sein Sofa oder meine Ärztin in ihre Praxis? → weiterlesen

Hattet Ihr in diesem Jahr einen Lieblingsartikel bei uns? Verratet uns gern, welcher es war!


kwerfeldein – Magazin für Fotografie https://ift.tt/2QwSvAZ

Sourced by Time Trap Photography sharing the best photography tips, news and tricks throughout the industry. Time Trap Photography is dedicated to freezing those special moments in life that can be revisited and admired for generations to come. - Shannon Bourque
Please visit our main site for booking availability and rates.


"Time


Receive valuable industry knowledge delivered free to your email each day.

"Time

Anker Reveals New Flash Just for the iPhone

8:53:00 AM

Smartphone makers aren’t the only ones racing to make cameras more and more powerful but also accessories manufacturers are joining in on the game.

Of course, Apple’s dedicated “Made for iPhone (MFi)” program all but guaranteed that this would happen.

Take Anker for example.

The company recently revealed plans for an iPhone-specific external flash for iPhone 11 and 11 Pro Models with an estimated retail price of $USD 50.

As far as flashes go, that’s really not that bad but the iPhone 11 and 11 Pro exclusivity isn’t that consumer-friendly.

Not only are those Cupertino’s latest and greatest models, but they’re also pretty darn expensive themselves.

And this is the first in a series of planned accessories for the iPhone that will bear the “Made for iPhone (MFi) label according to PetaPixel.

The website reports that the external flash will connect via the iPhone’s lightning port and should be compatible with not only the default system camera but also camera apps that the user might download. The way it is being marketed, it sounds like the Anker external flash will offer both ease of use and a plug-and-play functionality.

Anker is promising 10,000 shots per charge and it will have a lightning port for recharging.

The Anker external flash, naturally, will provide a superior option to the built-in flash but probably won’t match really pricey external flashes for dedicated cameras.

Nonetheless, one small step for smartphones, one giant leap for smartphone photography?

If you’re curious, it should arrive next month, though we can’t find any listings for it yet.

What do you think? Does an external flash from Anker for iPhone 11 and 11 Pro interest you? Let us know your thoughts in the comments below.

Also, check out some of my other photography news articles on Light Stalking by clicking here.

[PetaPixel]

Let's block ads! (Why?)


Light Stalking https://ift.tt/2u4JwiW

Sourced by Time Trap Photography sharing the best photography tips, news and tricks throughout the industry. Time Trap Photography is dedicated to freezing those special moments in life that can be revisited and admired for generations to come. - Shannon Bourque
Please visit our main site for booking availability and rates.


"Time


Receive valuable industry knowledge delivered free to your email each day.

"Time

What can Telephoto Lenses do for Landscape Photographers

4:33:00 AM

For the first half dozen years of my career as a landscape photographer I was completely, utterly, and unapologetically addicted to wide angle lenses. Like many landscape photographers influenced by the late, great Galen Rowell I was smitten by any photo that featured a punch-you-in-the-face foreground subject, compelling leading lines, huge mountains in the background, and a fiery sky to top it all off. I was so in love with this kind of photography that for a long time I virtually equated “wide angle photography” with “landscape photography.”

Altiplano, Chile captured with a Telephoto Lens by Josh Cripps

Altiplano, Chile. 14mm, f/16, 4 sec, ISO64 by Josh Cripps

Over the past few years as I’ve let go of certain expectations and learned to explore all different kinds of opportunities I’ve found myself using telephoto lenses more and more for my landscape work. In fact, it’s fair to say that my telephoto has actually become my favorite lens for landscape photography.  Now, I am as hopelessly addicted to it as I have been to my wide angle. Here are the reasons why.

Landscape photos are more personal

Yosemite Falls details captured with a Telephoto lens

Yosemite Falls. 200mm, f/8, 1/4000 sec, ISO200 by Josh Cripps

As a well-known landscape photographer said recently (and I’m paraphrasing): “wide angles leave very little to the imagination.” Wide angles by their very nature include a vast amount of the scene in front of you. This works wonderfully for creating an immersive, “feel like you’re there” experience for the viewer. Additionally, it tells them explicitly what the scene was like. Wide angles leave little room for imagination to ponder what’s happening just outside the frame, or how the photo fits into the larger environment. Often there’s little or no mystery to them. And to top it off, if you line up 8 photographers next to each other, all with wide angle lenses, you’re probably going to end up with 8 pretty similar photos, with maybe some small differences in framing and foreground choice.

Laga Sorapis, Italy by Landscape Photographer Josh Cripps

Laga Sorapis, Italy. 135mm, f/16, 1/5 sec, ISO64

Telephoto lenses by contrast only allow you to pick out a small vignette from the entire scene. It gives you an opportunity to say, “of all the things around me right now, this is what I want my viewer to know happened. This is what I want the viewer to look at.” It’s unlikely that another photographer will notice the exact same small vignette as you, which means that telephoto shots are often a more personal reflection of our vision of a scene.

Why I'm Addicted to Telephoto Lenses for Landscape Photography Blog Article by Josh Cripps

Lone tree, the Palouse. 92mm, f/16, 1/250 sec, ISO100

In addition, the field of view of telephoto shots is so small it almost forces the viewer to contemplate the photo within the scene as a whole. What was going on outside the frame, or how does the photo fit into its environment? Without the explicit, obvious clues common to wide angle shots, images from telephoto lenses can create a deeper discussion and a deeper level of contemplation within the viewer.

Telephoto lenses pose more of a challenge

Landscape photography with telephoto lens by Josh Cripps

Croda da Lago, Italy. 95mm, f/8, 1/2 sec, ISO64

Now, I won’t say that wide angle landscape photography is easy. Far from it. In fact, to create a masterful wide angle shot requires as much compositional insight and creativity as you can muster. But to a certain extent, wide angle photography can be a little more forgiving. From a technical standpoint you have a little more leeway with your depth of field and focus. The very nature of wide angle photos gives them immense depth. Small changes to the composition still allow the overall photo to retain the same feel. And from an artistic standpoint they’re well-liked: as long as your photo hits the basic tick marks of foreground subject, leading lines, background subject, and pretty light in the sky, then it’s probably going to be a nice-looking image.

Using Telephoto Lenses for Landscape Photography by Josh Cripps

Minaret Vista star trails. 200mm, f/8, 31 min 7 sec, ISO100

But everything about a telephoto requires you to be more precise and painstaking. If your focus and aperture aren’t spot-on it will be obvious in the final image. For example, a small change to the composition might cut off a critical element or allow too much dead space in the photo. Depth isn’t automatic; instead you have to work much more creatively to breathe depth into your photos by finding layering, contrasts, or atmosphere. And more often than not telephoto compositions don’t contain the same easy crutches as wide angle photos: no powerful foreground subjects and no vast sky filled with epic clouds mean you really must work the scene. All the interest in the photo comes from elements it contains and the way your composition aligns them. It’s a great challenge, and an extraordinarily satisfying one when you meet it.

Landscape photographers can capture more unique photos

Sierra Nevada mountains captured Telephoto Lens

Smoky sunrise, Sierra Nevada mountains. 160mm, f/8, 1/60 sec, ISO64

There are few landscape photographers these days creating imagery with telephoto lenses. As I see it it’s an empty playground; most of the kids are busy having fun in the wide angle sandbox. And there’s absolutely nothing wrong with that. I still deeply love wide angle photography. However, if you are looking for a space where you can explore your photography without a lot of preconceived ideas about what’s possible, then telephoto landscapes are for you.

  • Landscape photo using telephoto lens by Josh Cripps

    Lago Sorapis, Italy. 70mm, f/16, 1/20 sec, ISO64

  • Landscape Photography with telephoto lens by Josh Cripps

    Wax Palms, Colombia. 70mm, f/11, 1/320 sec, ISO 64

It’s a space where the photos aren’t obvious, where maybe you can make people stop and ponder a little more deeply, and where you can make images that are uniquely yours and yours alone.

Got any more reasons why landscape photographers would love shooting with telephoto lenses? Let me know in the comments!

About Author Joshua Cripps

Joshua Cripps started making remarkable photos while he was still in the womb. His first significant image, titled Sonogram, was praised for its graininess, deliberate blurring of details, and gritty black and white mood. Earning two thumbs up from his parents, this photo only hinted at things to come. Since then Josh has won countless awards and accolades, including more than one “Certificate of Participation,” dozens of “Good Sportsmanship” plaques, and the coveted “Busy Bookworm” award. His mantel long ago collapsed under the weight of gold-painted, plastic trophies.

Currently Josh spends over 700 days every year in the field seeking out the finest landscapes on earth. He has a mighty beard and sings in a rich baritone. Hiking at least 45 miles to capture every photo, Josh ensures that every image he crafts represents the very heart of the wilderness. While you were reading this Joshua Cripps did 93 push-ups, won more awards, and became internationally re-renowned.

Let's block ads! (Why?)


Visual Wilderness https://ift.tt/2QuPX6p

Sourced by Time Trap Photography sharing the best photography tips, news and tricks throughout the industry. Time Trap Photography is dedicated to freezing those special moments in life that can be revisited and admired for generations to come. - Shannon Bourque
Please visit our main site for booking availability and rates.


"Time


Receive valuable industry knowledge delivered free to your email each day.

"Time

About Us

Time Trap Photography is dedicated to freezing those special moments in life that can be revisited and admired for generations to come. - Shannon Bourque

The lens in focus

“Life is like a camera. Just focus on what’s important and capture the good times, develop from the negatives and if things don’t work out, just take another shot.” — Unknown

TIME TRAP PHOTOGRAPHY COPYRIGHT 2016