Nature photography subjects that are either completely dark or completely white has potential to produce some stunning photos. However, if you have ever attempted to photograph bright or dark subjects, you know that this is not as easy as it sound. There are several factors that make it difficult to photograph subjects that are mostly white or mostly black. Here are some of the challenges you may run into and some ideas on how to over come them.
Camera Exposure
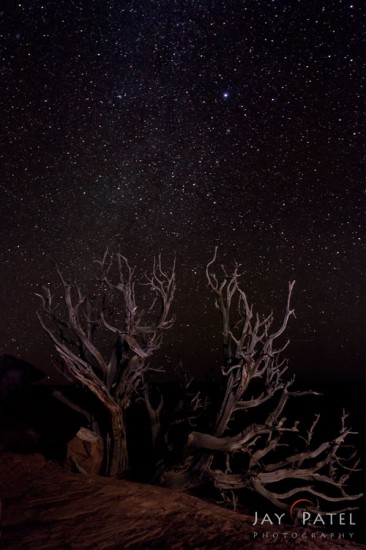
The camera’s built-in algorithms nearly always get the exposure wrong when the subject is all white or all black. If ambient light is too low, the camera can’t meter properly. When I was taking this photograph in Capital Reef National Park on a moonless night, the camera could not accurately measure the exposure. I wanted to show the Milky Way as it is visible to the human eye. So, I used the histogram to determine the proper exposure without the help of the meter. I made a guess at the setting that might work and took a single shot. Then I checked the histogram to see if the stars were bright enough – or too bright. I had to take several shots to determine the proper exposure.
Another challenge a scene like this poses is lighting the foreground object. There is enough light to capture the stars, but not enough light to capture the foreground. I used a headlamp to paint the foreground with a small amount of light. Once again, I used the histogram to decide how much light was right for painting the foreground. I wanted to add just enough to make the foreground visible, but not so much that the foreground appeared to be obviously artificially lit.
You can also use residual light from the sunset or even moonlight to light the foreground. Here is an image from Coyotte buttes where I combined moonlight and an artificial light to light the foreground. Most of the foreground is lit using moonlight, but I added a slight artificial light to illuminate the foreground. In the photo from Hawaii Varina used the light from the lava to capture this scene long after the sun set.
Focus Setting
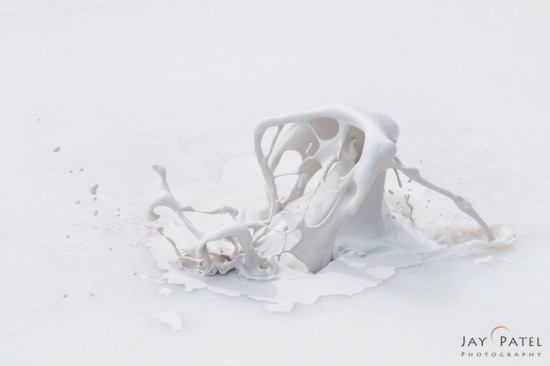
High or low key subjects are often characterized by low contrast. Accurately focusing is often difficult when you don’t have high contrast edges to work with. This shot from Artist Paint Pots in Yellowstone National Park was a challenge for focus.
In order to get the shot I wanted, I set the camera’s focus to the correct distance using auto focus setting. I then switched to manual focus mode to lock the focus. Once it was locked, I could take several shots of exploding mud bubbles and hope to catch one with interesting patterns.
One of the things that most camera manuals leave out is the fact that focusing in your camera is not instantaneous. It takes finite amount of time for camera to lock on to your subject. The exact amount of time depends upon a number of things including the subject you’re trying to capture, ambient light, your camera’s focus sensor, the maximum aperture of the camera lens, and more. If you fire a shot before it’s focused, you come away with nothing more then out of focus blurry images. Using auto focus setting on low contrast nature photography subject like this one often result in long focusing times. So it is important to take into consideration this extra focusing time when trying to photography high key low contrast nature photography subjects.
How much Contrast is enough?
Once you overcome the challenges of exposure and focus, it’s time to think about post-processing. Low contrast photographs are characterized by soft textures, and subtle shadows and highlights. It can be difficult to create with impact when the light is less interesting… so it’s easy to get carried away in post processing and add contrast to your low contrast nature photos.
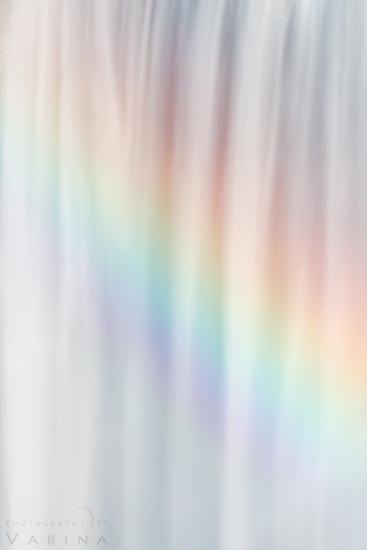
Default software settings often pump up the contrast to bring out rich colors and details. With a low contrast image, increasing the contrast can actually make a photo less appealing. For this shot of Skógafoss in Iceland, Varina actually reduced the overall contrast slightly for a more nature look.
Adding contrast in post processing can bring out a lot of detail in your nature photos. However, applying it globally is usually counter productive for nature photography, especially in already high contrast situations like sunrises or sunsets. Decreasing it can also make a photo look flat, lifeless, less realistic. I’ll use the same photo for several of the examples to come to see how different a single image can look with a number of adjustments applied. When it comes to contrast, I rarely adjust the “contrast” slider and instead opt to use the shadows, highlights, blacks, and whites sliders to adjust areas more specifically.
White Balance in Post Processing
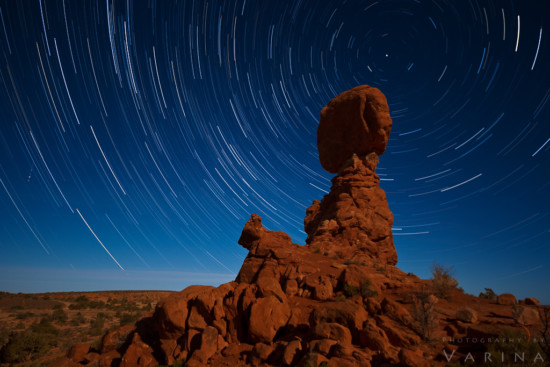
And then there’s white balance. This can get a little tricky… especially with wide-angle photography. The scene we’re working with here is actually relatively evenly lit, thanks to the full moon that painted the balanced rock with light. Beautiful. The problem is that the white balance for the sky is different than the white balance for the foreground. For this shot, Varina choose one white balance for the sky – making sure that the blue looked clean and natural. She chose a different white balance for the foreground, letting the color in the rocks take center stage. After processing the star-trails (that’s a whole different issue), she used layers and masks to fix the color of the rocks.
So, the next time you go photographing either a very bright or very dark nature photography subject, keep these ideas and techniques in mind and you will be sure to come away with some stunning photos. Feel free to share your struggles when photographing bright or dark subject in the comments below.
Visual Wilderness https://ift.tt/2yF5dIt
Sourced by Time Trap Photography sharing the best photography tips, news and tricks throughout the industry. Time Trap Photography is dedicated to freezing those special moments in life that can be revisited and admired for generations to come. - Shannon Bourque
Please visit our main site for booking availability and rates.

Receive valuable industry knowledge delivered free to your email each day.


No comments:
Post a Comment
Thank you so much for your comment. A moderator will review and approve all relevant posts. We appreciate your support and encourage you to stay with us by subscribing to our email updates. Where you can easily pick and choose what photography subjects interests you. Subscription link: http://bit.ly/photo-sub