Old photos can be very valuable from the emotional point of view. They are family treasures and tangible connections to long-gone events and people. Because of their importance, it is very useful to learn about restoring old photos properly.
With Photoshop and Lightroom, anyone who’s interested in restoring old photos can do it with a few basic tricks we’re going to share in this article.
Scanning Old Images
The first step in this process is scanning the old images.
You should make a quality scan with a flatbed scanner. It takes time to do it properly but it’s very important not to skimp on quality, as the scan lays the foundation for the rest of the restoring process.
The main key to a good scan is pretty simple – you need to establish the correct resolution!

What is the Ideal Resolution?
You should use 300dpi as a guidepost and calculate the appropriate resolution for any scan.
For instance, an 8×10-inch print scanned at 300dpi will produce a file that measures 2400×3000 pixels in total. A smaller print such as a 4×6-inch print may benefit from a higher-resolution scan (higher than 300dpi) in order to be made larger. Consider scanning really smaller prints at 1200dpi or more to ensure maximum quality and the ability to upsize.

Colour Or Black And White?
A colour scan is usually the best solution for any kind of old images. The colour information can be helpful for restoring sepia prints or those with faded colours. In case your scanner offers an automatic colour adjustment, make sure to experiment with it – you might be surprised with the results! Of course, in case you end up with awkward colours turn this automatic adjustment off and make necessary colour adjustments in Photoshop and Lightroom.
Don’t forget to choose TIFF format for maximum image quality.

Removing And Reparing Damage
There is no easy shortcut when it comes to repairing damage in old images. Removing the dust, debris and damage takes time and patience. This is especially true if you need to reconstuct missing parts of an image.
Combining Various Tools
The best way to repair damage is to open the image in Photoshop and zoom in close. After you have found various problematic areas, use tools such as the Clone Stamp, Spot Healing Brush, Patch Tool and Content Aware Fill in order to eliminate wrinkles, rips and awkward color spots. This can be a tedious process and you don’t have to do it all at once.
You can start with faces and work out from there. Faces are the most important parts of old images and you should edit them very carefully. The Spot Healing Brush is ideal for repairing small blemishes on faces. Feel free to experiment with the type of brush you use – you shouldn’t use the same brush for different types of blemishes. Choose among Content Aware, Create Texture and Proximity Match to see what works best for your image.
Using a soft brush edge at 100% opacity and flow can solve many issues and help various imperfections blend seamlessly with the surroundings.
In case you need to fix larger imperfections you can use Content-Aware Fill Tool instead of Spot Healing Brush.

Restoring Accurate Color
Colour photos require a different type of restoration compared with black and white images. Even when old colour images are stored in ideal conditions, the organic colours in them break down over time. Because of this, old colour photos become less vibrant and various colour shifts occur. Working with colour repairs can be frustrating, but luckily Photoshop’s automatic contrast and colour controls can make faded colour photos look great.
Using Auto Color
Auto Color in Photoshop is the simplest fix and it usually works pretty well. Photoshop will analyze your image and try to correct the color balance. In the best-case scenario, this fix looks great and it’s all the repair that you need. In the worst-case scenario, it looks very bad and it should be undone. Typically, Auto Color makes some improvement but you need to fine tune it manually.

Using Color Balance
Using Color Balance and Hue/Saturation Adjustment Layers will help you finalize restoring accurate color. For simple color shifts, Color Balance is an easy way to adjust sliders and add or subtract from an overall color cast.
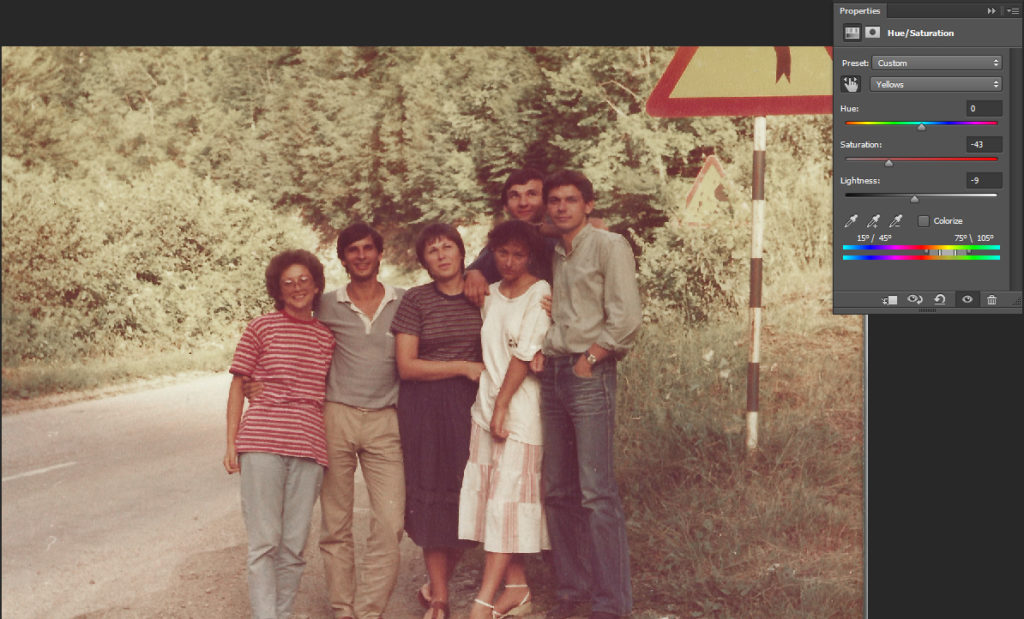
If you need more control, you can experiment with Hue/Saturation Adjustment and choose Master in the dropdown of the Properties palette to change overall hue and saturation or to adjust the saturation, luminosity and saturation of any specific color found in the scene. You can do the same in Lightroom too, using HSL/Color Panel.
In case you’re unsure of exactly what slider might work best for your specific case, you can click on the finger icon in the Properties and drag on any color in the scene – Photoshop will adjust the sliders.

Additional Edits
After you have repaired damage and restored accurate colors in your old images, you can dedicate yourself to the finishing touches.
If the image lacks contrast, you should adjust it with a Curves Adjustment Layer. There’s a big chance that your image needs some sharpening as well – experiment with different sharpening tools such as Unsharp Mask, Smart Sharpen or High Pass Filter until you find the best solution.
To learn more about restoring old images, check out the links below.
Further Reading:
Light Stalking https://ift.tt/3hLVZeL
Sourced by Time Trap Photography sharing the best photography tips, news and tricks throughout the industry. Time Trap Photography is dedicated to freezing those special moments in life that can be revisited and admired for generations to come. - Shannon Bourque
Please visit our main site for booking availability and rates.

Receive valuable industry knowledge delivered free to your email each day.


No comments:
Post a Comment
Thank you so much for your comment. A moderator will review and approve all relevant posts. We appreciate your support and encourage you to stay with us by subscribing to our email updates. Where you can easily pick and choose what photography subjects interests you. Subscription link: http://bit.ly/photo-sub