A telephoto lens can open up a world of opportunities for your landscape photography. With longer focal lengths, like 70mm and beyond on a full-frame camera, a photographer can zoom into a scene and isolate interesting details within a grander, more expansive landscape. But, because longer lenses have a larger physical presence and greater susceptibility to camera movement, some specific field practices are important to get sharp files.
These techniques are even more important since landscape photographers often work in challenging, windy conditions and in low light — two factors that can conspire to make consistently getting sharp files a challenge for photographers new to using telephoto lenses. These 6 tips for better field techniques can help you address these challenges and increase your success when using a longer lens, even in challenging conditions.
Use a Sturdy Tripod when using a Telephoto Lens
Because landscape photographers often photograph in low light, a sturdy tripod and ballhead are essential tools when using a telephoto lens for landscape photography. A common rule of thumb for hand holding a lens is this calculation: to get a sharp photo, you need a shutter speed of 1/focal length. So, if you are using a lens that is 200mm long, you need a shutter speed of at least 1/200th of a second or faster to get a sharp file. I can’t remember the last time when I used a shutter speed that fast while using a long lens, so a tripod is essential if you want sharp files when photographing in low light.
Since landscape photographers often hike and explore with their gear, choosing a tripod set-up is often a game of trade-offs in terms of sturdiness and weight. When purchasing a tripod and ballhead, look carefully at the manufacturer’s capacity rating and be sure to select a set-up that can handle your longest (or heaviest) telephoto lens but will also not weigh you down to the degree that you will not want to use what you purchase. Once you have your tripod set-up, use it consistently and set it up correctly, with the legs planted firmly on as solid of a surface as the conditions allow and all the knobs/locks fully tightened.
Use a Remote Release
While it is easier to use the built-in timer on your camera, a remote release is a much better tool when using a telephoto lens. Remote releases come with two primary benefits. First, using a remote release means that you do not have to touch your camera and not touching your camera can help result in sharper files. Second, using a remote release allows you to time your exposure without having to wait a few seconds for the built-in timer to go off. Being able to time your exposure can help you click the shutter at a decisive moment, like right when a wave crests over rocks, or during a lull in the wind. For most cameras, remote releases come in both corded and wireless varieties. Although the corded variety can become frayed over time, I find them more reliable than their wireless counterparts. Again, once you have a remote release, use it consistently.
Pay Attention to the Wind
Since longer camera lenses are physically large, even a slight breeze can result in blurry files. If you are using a telephoto lens on a windy day, pay attention to the patterns of the wind. You will often find that even on very windy days, short lulls will give you enough time to take a few exposures. By being careful about when you choose to click the shutter, you can increase your chances of getting a sharp file.
If you have an electronic level built into your camera, it is a handy tool for determining how wind might be affecting your photos. For my camera, I can display the electronic level in live view and on windy days, I can see it jumping around. If the level is jumping around, I know that I need to take extra steps to ensure that I will come home with a sharp file. With this information, I can do things like carefully timing my exposure during lulls in the wind or adjusting my settings as discussed below.
Adjust ISO Setting
If you are using a camera that handles higher ISO setting well, remember that adjusting your ISO setting is a great tool to help shorten your shutter speed. This kind of adjustment is especially helpful if you are photographing in windy conditions or if your tripod is set up on unsteady ground, like sand dunes or a beach. Let’s say you are photographing in windy conditions and are getting a proper exposure at f/16, 1 sec, and ISO 100. Since you likely do not want to change your aperture because you want to maintain depth of field, your shutter speed and ISO are the adjustable variables. By bumping your ISO setting up to 400, you can reduce your shutter speed to ¼ of a second. In windy conditions, this simple change to get to a fast shutter speed can mean the difference between sharp and blurry files.
Use your Camera’s LCD to check Sharpness
In photography, there are few things that are more disappointing than getting home and realizing that a photo that looked great on the LCD has a fatal technical flaw. For me, this sometimes happens with photos I took using a telephoto lens in windy conditions. After a few too many of these disappointments, I started taking more time to study my files in the field. With modern digital cameras and their high quality LCDs, taking a few minutes to zoom in and look at each corner of a file to make sure it is sharp and in-focus can increase your success when photographing in difficult conditions. If you find that you are not getting a sharp file, take the opportunity to adjust your settings in the field, like discussed above in the ISO/shutter speed example. I would much rather take the time in the field to make sure I have one sharp file than come home with 15 files that are all blurry due to camera movement.
Take multiple Camera Exposures in Breezy Conditions
Even though I use a digital camera, I try to think like a film photographer. I try to be deliberate about my choices in the field and minimize the number of exposures I take. When using a telephoto lens, however, I often take more exposures than I would with a wide angle lens, especially if the conditions are changing fast and I do not have time to carefully check my photos as I recommend above. Because even a gentle breeze can reduce the steadiness of a telephoto lens set-up, especially when I am hiking and using a lighter-weight tripod set-up, I always take multiple camera exposures of the same scene to help increase the chance that I will have a sharp file once I get back home.
Be Creative for very Windy Conditions
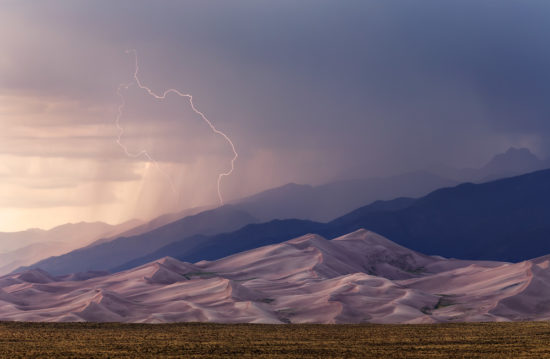
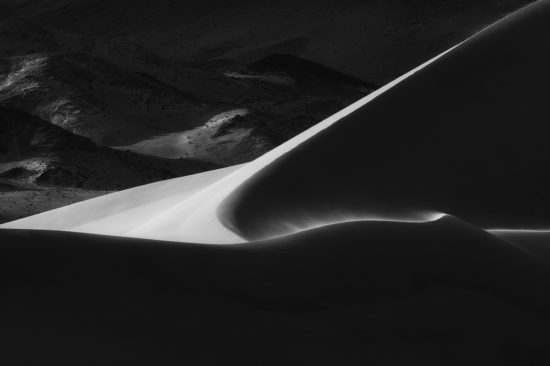
I sometimes photograph in crazy conditions, like the visit to the sand dunes captured in the photo below, because wind can create unique opportunities. The same wind that creates the frills of blowing sand makes photography exceedingly difficult. In these cases, getting a sharp photo requires all of these steps plus other interventions that sometimes work and sometimes don’t.
For example, if you have a steady hand, placing firm pressure on the top of your camera lens with one hand and then using your remote release with the other can help steady your camera lens enough to get a sharp photo. Lowering your tripod closer to the ground, the spreading the legs widely, and using your body to block gusts can also help steady your camera under certain conditions.
By improving your telephoto workflow in the ways discussed above, you can come away with more consistent results, sharper photos, and can be confident in your techniques when photographing in unsettled weather accompanied by wind. If you have any additional tips on using a telephoto lens in the field, please share them below. We would love to hear from you.
Visual Wilderness https://ift.tt/3hSaj64
Sourced by Time Trap Photography sharing the best photography tips, news and tricks throughout the industry. Time Trap Photography is dedicated to freezing those special moments in life that can be revisited and admired for generations to come. - Shannon Bourque
Please visit our main site for booking availability and rates.

Receive valuable industry knowledge delivered free to your email each day.




No comments:
Post a Comment
Thank you so much for your comment. A moderator will review and approve all relevant posts. We appreciate your support and encourage you to stay with us by subscribing to our email updates. Where you can easily pick and choose what photography subjects interests you. Subscription link: http://bit.ly/photo-sub