Lightroom – We Have Come A Long Way
Lightroom used to be the image management part of Adobe’s photography apps. Photoshop was very much the editing app. Times have changed, and I would say that 90% of what most photographers need in an app is now achievable in Lightroom Classic.
Perhaps one of the most useful functions and a relatively late addition to Lightroom is its masking tools. As photographers, we often tweak color or exposure in select areas to help take the viewer's eye to a specific part of the image. Those select areas require masking to prevent us from wandering outside the area we are working on. Over the years, Lightroom’s masking tools have become increasingly powerful. The interface in which they are used has also subtly changed. Today we are going to delve into Lightroom’s amazing masking tools and how to use them. Will will be including the latest April 2023 update that added tone curves to the tools.
The Lightroom Classic interface has changed around a bit in the last couple of years. The masking tools now have a completely dedicated section to themselves that manifests as a pop-out when selected. It is the right-hand side of the editing tabs found underneath the histogram in the Develop Module. On an image with no masking, a window opens underneath the icon. Here you will find the three main masks at the top, namely Subject, Sky, and Background. Each does exactly as the name suggests, although you may have to edit the mask to get it perfect.
Beneath the three main masking tools are six further icons for, Objects, Brush, Linear Gradient, Radial Gradient, Range, and a new addition, People. Let’s take a brief look at these basic masking tools.
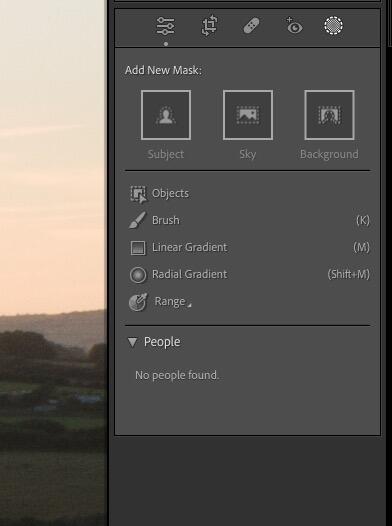
- Subject. Clicking on the subject tool will analyze the scene and identify what it believes to be the main subject in the image. This can vary from extremely accurate to wildly wrong. However, if it is not working, you can delete it and use other tools.
- The brush works much as a Photoshop brush does. You can paint the mask onto the image and define the brush size, feather, flow, and density. It also allows you to Auto Mask, automatically detecting the contrast between your intended selection and the background.
- Sky. The sky tool is a pretty accurate mask and will pick out any well-defined sky from an image. Where it can go wrong is if the horizon is a little misty
- Background. This masking tool will attempt to isolate everything except the main subject. Again the success of this depends on how well the subject is defined.
- Objects. This allows you to paint over a subject, and AI will attempt to define what you are masking. Useful if the Subject mask is not working well.
- Linear Gradient. One of the originals, this tool allows you to draw a graduated mask and define the graduation level. Very useful for adding drama to skies or drawing the eye to a subject.
- Radial Mask. This allows you to draw an ellipse around an area to mask it. You can define the degree of feathering.
- Range. Range masking allows you to pick either a luminance or color level. Lightroom Classic will then attempt to find similar levels and add them to a mask.
- People. This masking tool will attempt to identify people in your image based on the database of faces that it has built up. Once a recognized person has been masked, a range of further masking options appear. These allow you to select certain areas of that person, such as hair, facial hair, facial skin, and other elements of the subject.
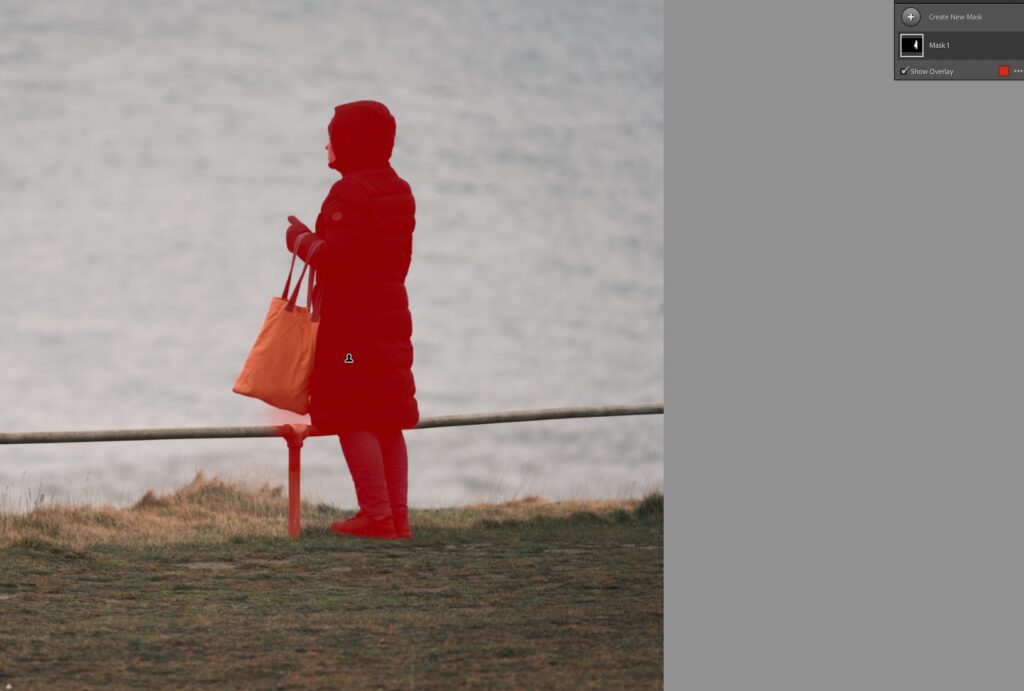
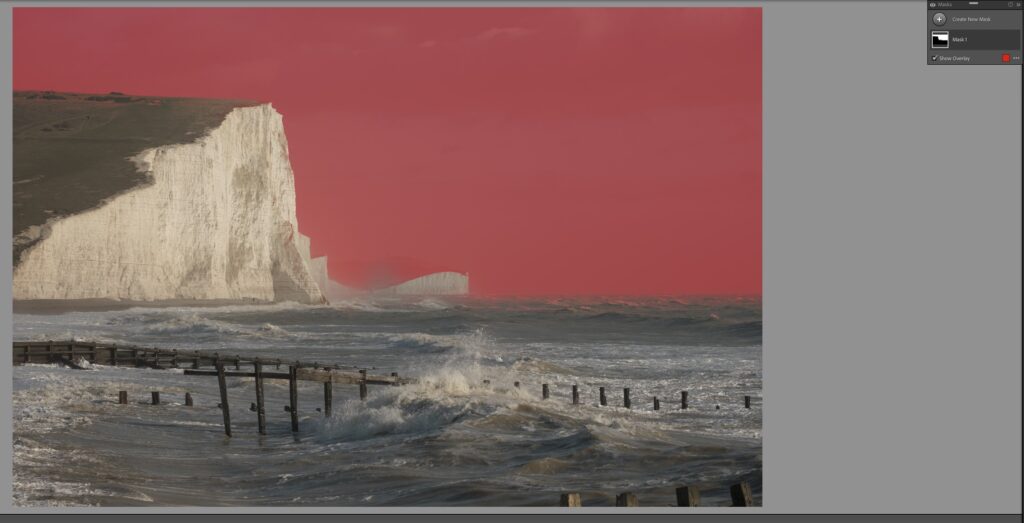
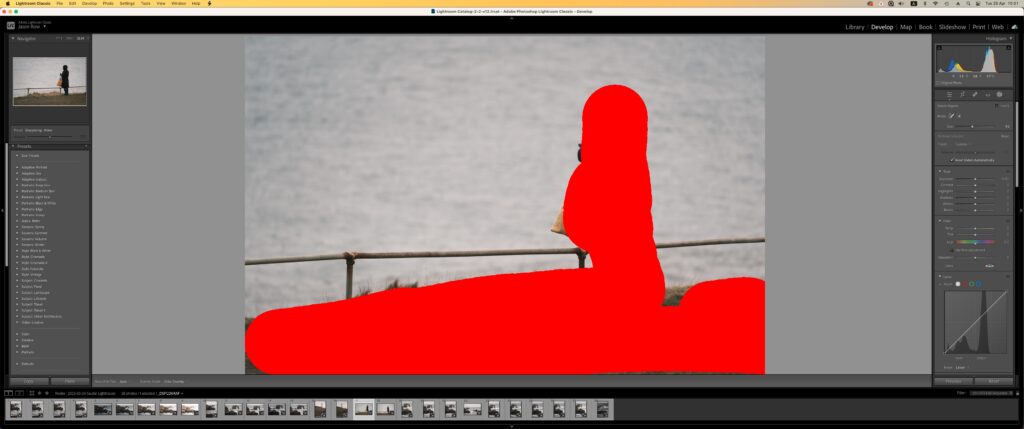
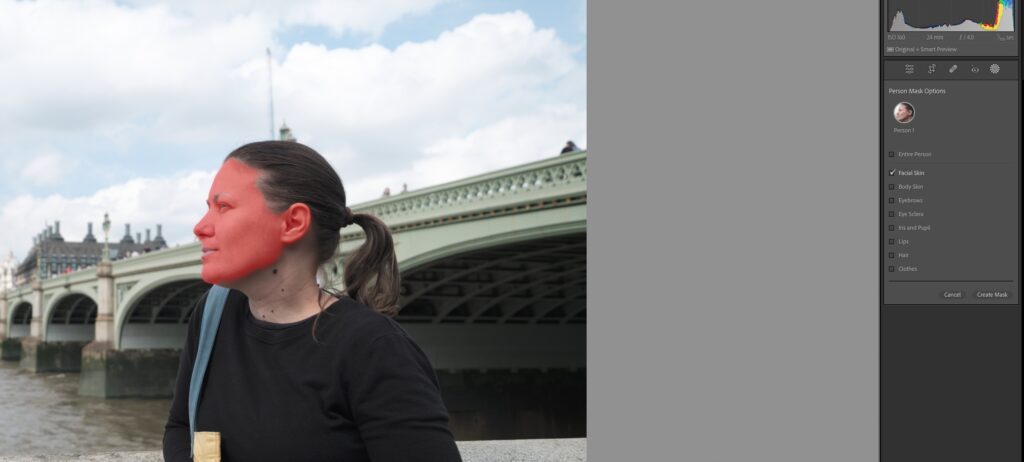
Each of these masking tools has a range of further editing options once applied. These are based on many of the tools found within the Develop Module and range from basic exposure correction – blacks, whites, highlights, and shadows, through Color, Presence, and Detail tools. All of these work in exactly the same way as they would on an unmasked image. The most recent and useful addition is the Tone Curve, allowing us to manipulate both exposure and color within our mask finely.
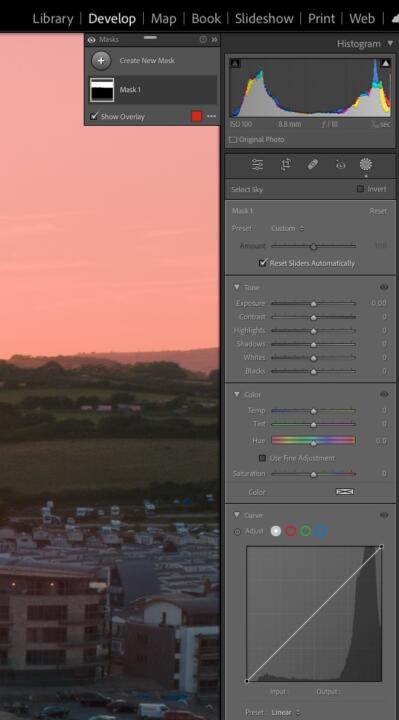
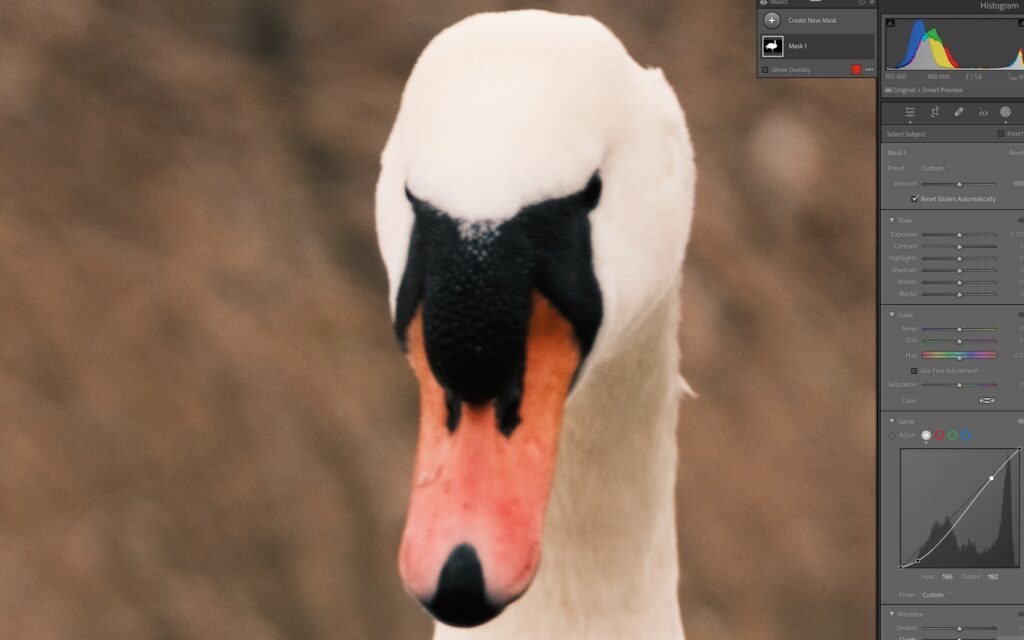
Once applied, each mask also has a number of advanced options available to help refine and redefine the mask. Let’s look at them now.
When you add your first mask, a small pop-up will appear to the left of the histogram. This will show you all of the masks that you have applied and allow you to manipulate them further. By left-clicking the three dots to the right of the mask's name, we see a range of new options. Let’s break them down.
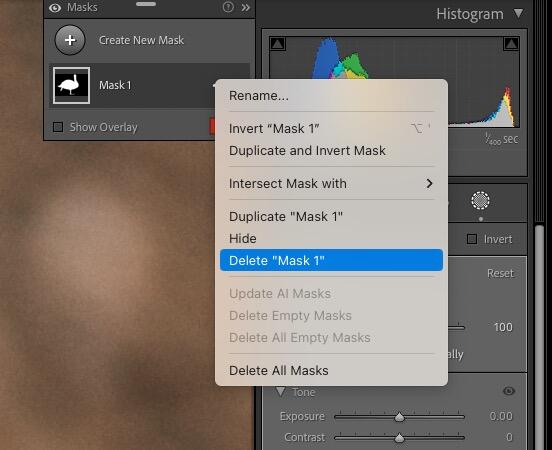
Rename is useful if you are planning to apply multiple similar masks to an image. It helps you differentiate between them. Invert is a very handy function that enables you to entirely reverse the mask, say from sky to foreground or subject to everything else. Duplicate and inverse copies the selected mask and then reverse it. Again a very useful tool.
Intersect is a very useful function that allows you to avoid combining masks over each other. For example, you may have a subject jutting into the sky. If you have created a graduated mask for that sky, it will also cover the subject. By selecting the subject mask, intersecting with and inverting the selection, your subject will not be part of the graduated mask.

The next three options allow you to Duplicate, Hide or Delete masks. These are all self-explanatory. Below that, we have some new AI options. These are primarily designed to edit presets that use predictive AI, such as Adaptive Sky or Adaptive Subject.
Summary
Lightroom’s masking tools have become incredibly powerful and quite complex. We now have the power to easily isolate specific parts of the image, such as the sky subject and background, using AI. We can then further refine those masks and intersect them with other masks. With masking tools such as the Brush and Radial, we can select very small specific parts of the image to work on.
Hopefully, this walkthrough of their capabilities will enable you to explore their potential further. If a mask has not worked the way you would have liked, you can simply delete it and try a different option.
Further Reading:
Light Stalking https://ift.tt/l0uVMLm
Sourced by Time Trap Photography sharing the best photography tips, news and tricks throughout the industry. Time Trap Photography is dedicated to freezing those special moments in life that can be revisited and admired for generations to come. - Shannon Bourque
Please visit our main site for booking availability and rates.

Receive valuable industry knowledge delivered free to your email each day.


No comments:
Post a Comment
Thank you so much for your comment. A moderator will review and approve all relevant posts. We appreciate your support and encourage you to stay with us by subscribing to our email updates. Where you can easily pick and choose what photography subjects interests you. Subscription link: http://bit.ly/photo-sub