
Having been to Norway, well north of the Arctic Polar Circle during winter, when hours of daylight are short and temperatures are low, I became quite aware of the fact that those conditions are far from ideal, both for our bodies and for our equipment. Before leaving on that trip, I made a list of precautions to take so that long hours spent while trying to capture stunning night photos would not make me feel miserable, or worse be wasted by equipment failure. With this article, I want to share some night photography tips I’ve learned shooting at night in cold climates that have helped me make the most of the experience.
Keep your Batteries Warm
Cold temperatures can reduce the capacity of batteries. Keep your spare batteries on yourself, such as inside an inner jacket pocket, in order to keep them warmer. I always carry extra batteries with me while travelling to colder climates because cold winter nights tends to drain the batteries a lot faster than warm summer nights.

Polar Night, Norway
Use a Headlamp (with a Red Light)
A headlamp is a very useful accessory because it keeps both of your hands free to do whatever you want. Current LED headlamps can be very powerful though, which can sometimes be a problem. If your eyes are getting used to the darkness, shining a bright light on the back of your camera or on the snow-covered ground will blind you for a few seconds.
Many headlamps come with a red, dim light that can be used instead of the bright, white one. This light allows you to still see clearly at a short distance, but it does not impact your night vision.

Night photographer with headlamp at night in front of starry sky in winter
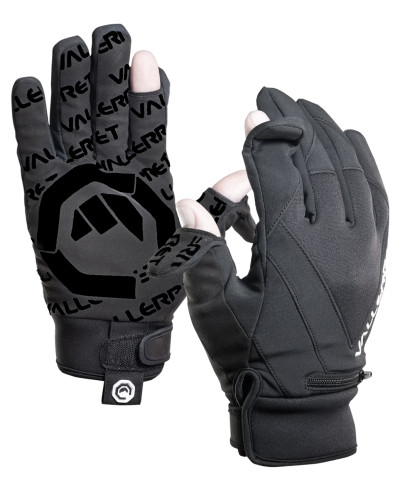
Use Fingerless Gloves
Keeping your hands warm is essential to surviving cold temperatures during long night photography sessions, but thick gloves make it impossible to operate most camera controls. The solution is to use gloves with removable fingertips, like these ones from Vallerret. For added protection and to avoid touching metallic and cold camera parts, you can wear thin lycra or silk gloves underneath.
Learn to Operate your Camera in the Dark
You can use a headlamp as suggested above, a flashlight, or even your smartphone to illuminate the back of your camera. However, sometimes constantly turning the light on and off can be a chore and having a light constantly on may be a nuisance for nearby night photographers. Being able to quickly and confidently operate your camera in pitch black darkness can alleviate much of this. Can you switch the camera to playback mode, zoom in, and pan in order to check focus accuracy?
Train yourself to access and change the most common settings without looking at the camera. Go to a dark room or put the camera under a blanket and regularly exercise your finger memory.

Fjordgard at Blue Hour
Watch Out for Condensation on the Front Element
Whenever you are transitioning from a cold environment to a warm, moist one (such as coming in from outside), moisture can condense quickly on cold items such as the camera body or lenses. This moisture can take a lot of time to evaporate, especially when it is inside a lens. I’ve had more than one shot ruined because, in humid climates, condensation was forming on the front element of my lens. Even if condensation is hard to see through the viewfinder, it has the potential to make a whole night of shooting go to waste. Check the lens frequently and wipe it with a soft, dry cloth from time to time.
To avoid this, put your cameras and lenses inside zip-able bags before going inside, then let them warm up gradually before taking them out again.

As Night Falls by Ugo Cei
Even during summer months night photography can be difficult due to number of reasons. Due to lack of light it can be really difficult to expose and focus after the sun has gone down. Here are basic tips that night photographers can use throughout the year:
Keep an eye on Focus
Beginner night photographers often struggle with getting the right focus setting. Your camera’s auto focus setting may not always work in the dark, but a flashlight or headlamp should give you the light you need to get everything in sharp focus. Once the camera focus is set make sure that take a test shot and zoom way in to check so you don’t find yourself with a bunch of blurred photos when you’re done!
Camera Exposure
Night photographers should pay attention to their histogram. And remember that you are working with very dark tones, so you should see a peak on the left side of the histogram. So don’t expect a neat “bell curve” for your histogram. You probably won’t see much on the right side of your histogram unless you really go crazy with the light painting. It may also be difficult to preview the histogram in Liveview setting on back of your camera. In this case take a test shot and check your histogram in the play back mode. You may have to adjust camera exposure based on this histogram.
I don’t recommend relying too much on the camera’s exposure meter, which could be easily fooled by night scenes, especially with snow on the ground and possibly bright points of light. On a clear night of full moon, a good starting point to capture a moonlit landscape is f/8 at 20 seconds, ISO 800. Take a test shot, verify your histogram and adjust accordingly. Always use manual mode, so the exposure won’t change as you change your framing and zoom in or out.

A clear winter night in the desert, lit only by the full moon
Experiment with Light Painting
Long exposure are ideal for night photographers to experiment with light painting. After you release our camera shutter use your headlamp to paint a foreground object. Light painting during night photography requires some experimentation. Sometimes light painting will some were too bright, and some were too dark. Just keep experimenting until you get something you like!
Here are some night photos on Visual Wilderness that uses light painting to paint the foreground object:
-

Night photography with light painting at Coyotte Buttes
-

Night photography with light painting, Australia


Use a wide-open Aperture
And use rule of 500 to set your shutter speed. A longer shutter speed that the one suggested by rule of 500 will result in short star trails. Night photographer almost always have to use a high ISO to get the aperture and shutter speed for the photos they are capturing. This means that you will need to do some post processing to clean up noise due to high ISO setting.

Landscape photography of Northern Lights in Egilsstaðir, Iceland
Some of my best images were taken during winter nights, as I just love the kind of atmosphere that can be created by blue, starry skies and snow on the ground. There is no reason to miss those opportunities for creating great photographs just because you are not well prepared and equipped. I hope that, by using the suggestions I have shared in this article, you too will be able to do the same.
About Author Ugo Cei
Ugo Cei is a fine-art travel and landscape photographer from Italy. If you were to ask him what he does, he would say that he is an educator who helps photography enthusiasts sharpen their skills, so that they can take amazing pictures.
He does this in various ways. First of all, by providing a wealth of free content here on Visual Wilderness and on his own website.
He leads photography tours and workshops to some cool destinations, including Scotland, Venice, Cappadocia, Oman, Greece, Kenya, and others.
He co-hosts and publishes a weekly podcast about travel photography, The Traveling Image Makers. Every week, they pick the brains of famous and not-so-famous travel photographers to learn what it means to travel for the love of photography and photograph for the love of travel.
Visual Wilderness https://ift.tt/36EevRm
Sourced by Time Trap Photography sharing the best photography tips, news and tricks throughout the industry. Time Trap Photography is dedicated to freezing those special moments in life that can be revisited and admired for generations to come. - Shannon Bourque
Please visit our main site for booking availability and rates.

Receive valuable industry knowledge delivered free to your email each day.


No comments:
Post a Comment
Thank you so much for your comment. A moderator will review and approve all relevant posts. We appreciate your support and encourage you to stay with us by subscribing to our email updates. Where you can easily pick and choose what photography subjects interests you. Subscription link: http://bit.ly/photo-sub