Have you heard of the shooting stars? Have you seen them? If you are someone who looks at the night sky quite often, chances are that you have seen a few of them and these shooting stars as we generally call them are not at all stars but meteoroids entering the earth's atmosphere at a very high speed. In this article we will look at what meteors are and how to photograph a meteor shower the next time there is a peak. There is also a link to a video that shows how to stack the meteor images while post processing to create beautiful meteor effects.
Attention: Grab your free cheat sheet for Milky Way photography! Click Here
Meteor showers occur quite often throughout the year and so there is a good chance you can photograph some meteors if you are in a reasonably dark sky region.
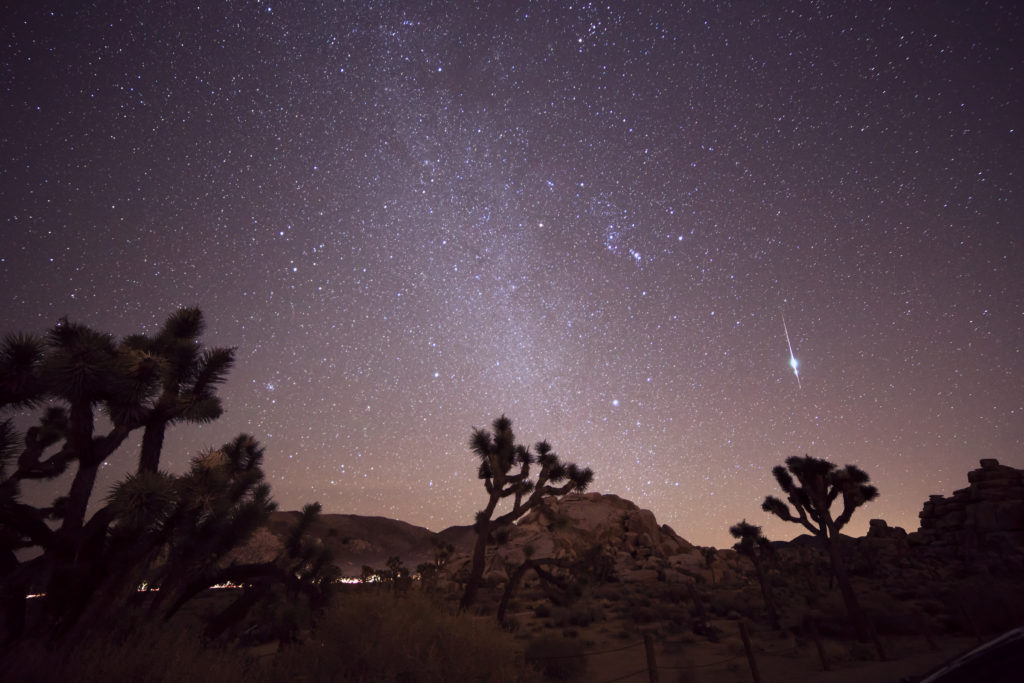
Note: We have more meteor showers coming up this year – Orionids in October, Leonids in November and the Geminids in December. So keep an eye on the dates!
What Are Meteors?
Meteors are bright objects we often see shooting across the sky at night and we also call them shooting stars or falling stars. Meteors are dust and debris from either asteroids or comets moving at a very high speed. When they enter the earth's atmosphere at this speed, they rub against the other particles in air and the heat generated as a result of this friction vaporizes them (burns them) and this is what we see as bright streaks shooting across the sky. Bigger particles can produce huge fireballs and some meteors that do not burn completely can fall to the earth.
The occasional meteors we usually see are the stray particles entering the earth's atmosphere, but there are times when you can see quite a lot of meteors in the sky and these events are called meteor showers.
What is a meteor shower? Continue reading to find out!
Why Does A Meteor Shower Occur?
Comets and asteroids leave behind trails of dust and other particles or debris along their path. These are called meteoroids and can be of varying sizes from tiny dust grains to small rocks. The Earth is revolving at a very high speed compared to these particles and when it enters a trail of these leftover particles, meteor showers occur. During this time, you can see dozens to hundreds of meteors per hour starting from one point in the sky radiating in all directions and the number depends on the amount of debris left in the comet or asteroid's path.
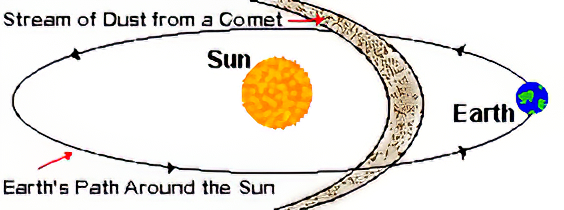
Meteor showers are named after the constellation they appear to originate from so it is easy for sky watchers and astronomers to find them. For example, the famous Perseid meteor shower seems to originate from the Perseus constellation, the Geminids from the Gemini constellation, the Orionids from the Orion constellation and so on.
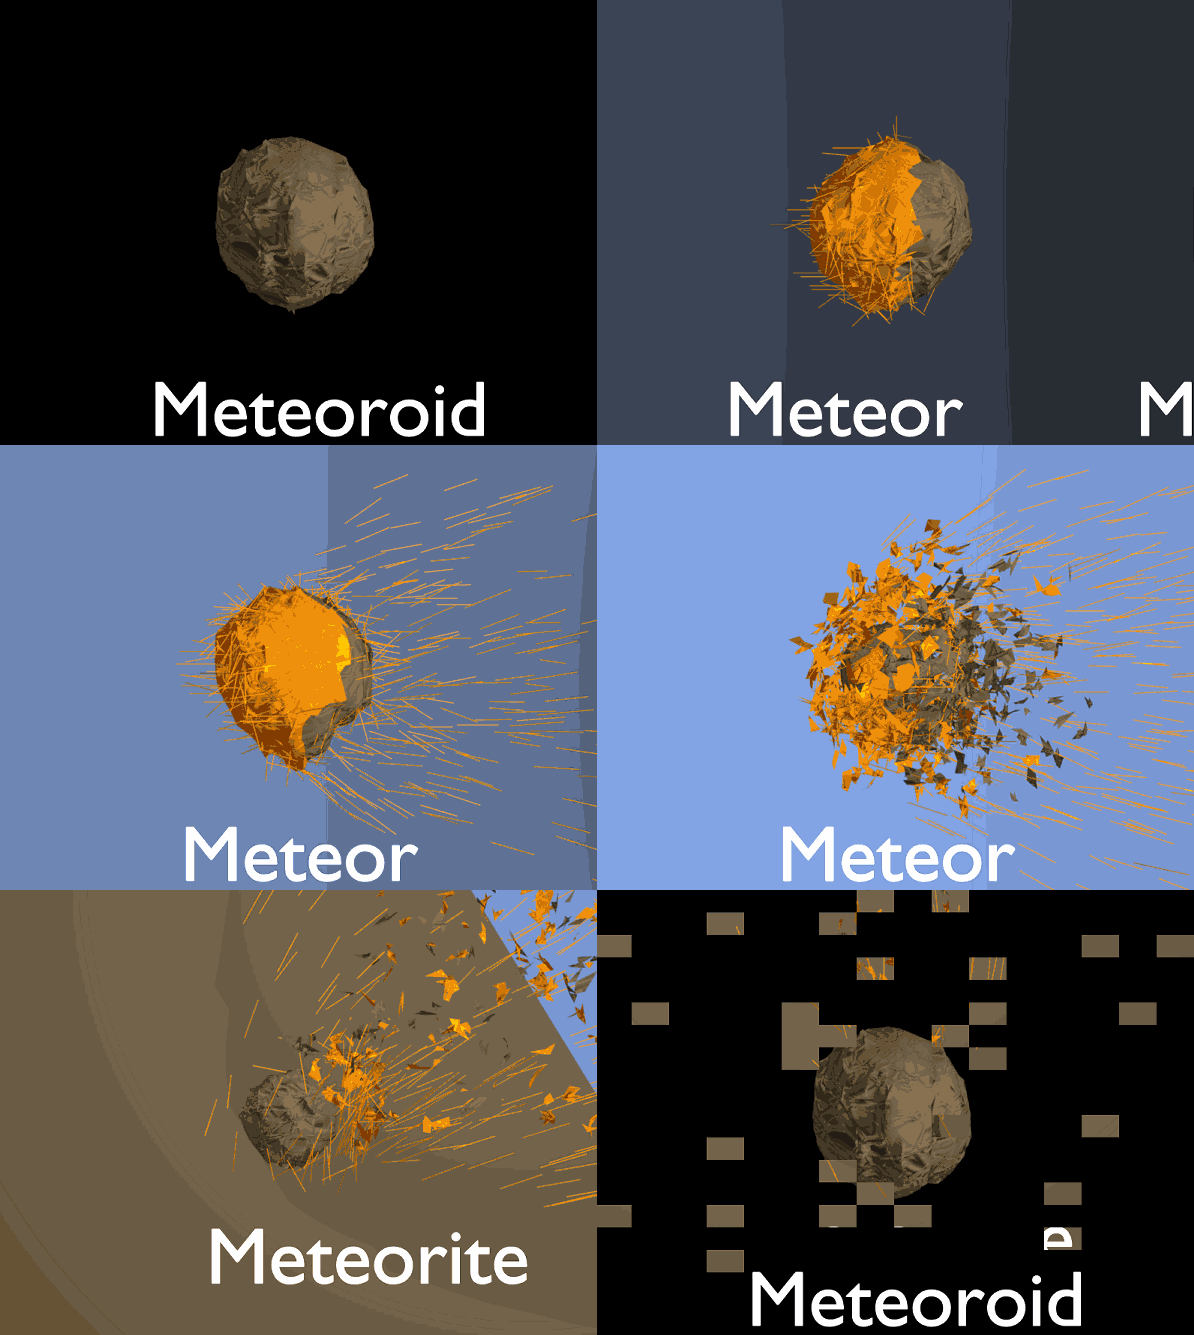
If you are confused about meteoroids and meteors, read the following to know the difference.
Meteoroids, meteors and meteorites – what is the difference?
- Meteoroids – particles or debris in space left by comets and asteroids
- Meteors – meteoroids when they enter the earth's atmosphere at high speed, burn up due to friction and that is what we see as shooting stars and these are called meteors
- Meteorites – any meteoroid that does not burn completely when passing through the atmosphere can hit the surface of the earth and it is called a meteorite
Photographing meteor showers can be an exciting and interesting thing for photographers and it requires a lot of patience as these objects appear all of a sudden in any part of the sky, are quite fast and disappear in a fraction of a second. But if you follow a few tips, know what to expect and how to photograph them, then you are in for catching at least a few of them in a night when the meteor shower is at its peak.
The following information will provide you with all the tips you need to successfully photograph a meteor shower!
Some Terms You Need To Understand
- Radiant: Radiant for a meteor shower is the point in the sky from which the meteors appear to radiate. Knowing this helps you to choose the right location. Remember that meteors can shoot from any point in the sky other than the radiant, so pointing the camera at an angle from the radiant should work fine too.
- Zenithal Hourly Rate (ZHR): ZHR for a meteor shower is the maximum number of meteors an observer can see during peak activity when the radiant is overhead and the viewing conditions are great.
Meteor Showers That You Can Photograph Throughout The Year
The most common meteor shower that we have heard of is the Perseid meteor shower but there are many other meteor showers that put up a beautiful show in the night sky throughout the year. These meteor showers happen around the same time every year, so it is good to have a meteor calendar app or follow a reliable website.
Note: Most websites have generic information related to peak dates and times. If you are looking to photograph the meteor shower around the peak time, you need accurate information for your location.
Here are the various meteor showers that happen throughout the year:
- Activity dates for 2020-21: We are already towards the last quarter of this year, so dates for the remaining meteor showers for 2020 and the upcoming ones for 2021 are listed here.
- Peak dates for 2020-21: The dates and time for peak activity are listed here in GMT or UTC. You can calculate for your local time or use one of the apps or websites below to look up date and times for your location.
- Number of meteors per hour or Zenithal Hourly Rate: This is the maximum number of meteors one can expect during the peak time, but in reality you need to expect a lower number as this depends on your location, moon phase and viewing conditions.
- Constellation they seem to originate from: This is the constellation where the meteor radiant will be located. So point your camera in this direction.
- Debris from which comet or asteroid: Gives the name of the comet or asteroid debris that earth moves into, creating the meteor shower.
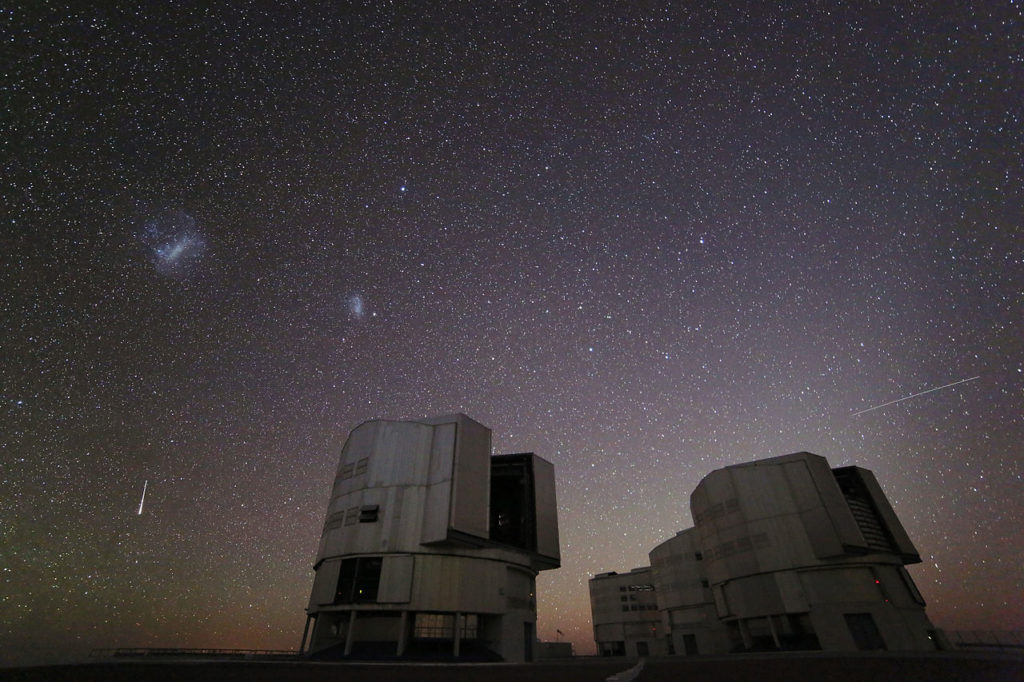
Note: All information below are in GMT. In order to find the peak dates and times for your specific location, you can use the websites and apps below this table.
| Name of Meteor Shower | Meteor Shower Activity Days (this is an estimate) | Peak Date and time for 2020/21 in UTC | Zenithal Hourly Rate (ZHR) | Constellation | Debris from |
| Quadrantids | End of December till first two weeks in January | Night between 3rd to 4th January, 2021 | 110 | Now defunct constellation Quadrans Muralis | Asteroid 2003 EH1 |
| Lyrids | Mid till end of April | Night between 22nd and 23rd April, 2021 | 18 | Lyra | Comet C/1861 G1/Thatcher |
| Eta Aquarids | Between last week of April till end of May | Night between 5th and 6th May, 2021 | 40 to 50 | Aquarius, named after the brightest star of the constellation, Eta Aquarii | Comet 1P/Halley |
| Delta Aquarids | Between mid July till the third week of August | Night of July 28 | 10 to 25 | Aquarius, named after the Delta Aquarii | Comet 96P Machholz |
| Perseids | Mid July till late August | Night between 12th and 13th August, 2021 | 100 to 110 | Perseus | Comet 109P/Swift-Tuttle |
| Draconids | 6th till 10th October, 2020 | Night between 08th and 09th October, 2020 | 5 to 10, but can be hundreds if the parent comet is nearby | Draco | Comet 21P/Giacobini-Zinner |
| Orionids | Start of October till first week of November | Night between 20th and 21st October, 2020 | 20 | Orion | Second meteor shower created by Comet Halley |
| Leonids | Second week till last week of November | Night between 16th and 17th November, 2020 | 15 | Leo | Comet 55P/Tempel-Tuttle |
| Geminids | First till third week of December | Night between 13th and 14th December, 2020 | 120 to 150 | Gemini | Asteroid 3200 Phaethon |
| Ursids | Late December | Night between 21st and 22nd December, 2020 | 10 | Ursa Minor | Comet 8P/Tuttle |
Websites And Apps For Meteor Shower
- timeanddate.com – Gives you a list of the upcoming meteor showers along with time and date for your location. Have a look at the full meteor shower calendar here. You can look up for your location or any other location if you are planning ahead for a different location.
- seasky.org – This site has the calendar of celestial events for years starting from 2014 till 2030.
- PhotoPills: You can use the Meteor Shower Pill in the PhotoPills app and look for detailed information on all meteor showers (big or small) plus the moon phase well ahead of time.
- MeteorActive: This app gives accurate meteor activity forecast with hour-by-hour estimate
- Cleardarksky.com: It will help you with clear sky charts
- Darksitefinder.com: It will help you find dark locations near you so you can have a clear view of the night skies.
- MeteorShowerCalendar for iOS and Android: This app displays a list of the upcoming meteor showers along with notifications.
- Sky Guide app for iOS and Star Walk 2 for Android: These apps will help you look at the location of the constellations in the night sky so you can locate the meteor shower radiant.
Best Place To Watch And Photograph Meteor Showers
Watching and photographing meteor showers require the same conditions and locations that you need for all types of night sky photography. This is something that we repeatedly mention in all night sky photography articles.
- Firstly, you need to choose a location away from the city lights, a location with minimal light pollution because light pollution can wash out faint meteors and make your images look bad with the city lights illuminating the scene with an orangish brown glow.
- Depending on the size of your city, you may have to travel anything between 20 to 70 miles away to avoid light pollution. Use the Dark Sky Finder website to locate dark skies near where you live.
- If you live in a rural location, your backyard or a short drive will provide you with dark skies.
- Choose an open area where you have a full view of the sky without any obstructions because meteors can shoot from any direction. It is better to do location scouting and check for obstructions in the direction of meteor shower. If you are looking to include some foreground details in the images, this will help you get an idea of how you can compose your image.
What if you cannot get to a dark sky location?
If you cannot get to a dark area, stay where you are find a place away from street lights and other lights that can interfere with your frame. Position your camera in the darkest place you can find around you and photograph the meteor shower.
What can you do if there is bad weather on the peak night?
If the weather is bad on the night when the meteor shower peaks, it is better to plan for the nights before or after the peak nights when there are fewer meteors but you can still photograph some of them.
Here Are Some Tips For Watching And Photographing Meteor Shower:
- Meteor Shower Dates: Most meteor showers take place over a few days when the earth moves through the debris left by comets or asteroids, but there is a peak time and date when the number of meteors per hour will be the highest. Make sure you keep an eye on space news, meteor calendars or make use of apps like Meteor Active, PhotoPills or Meteor Shower Calendar to know the peak time and date.
- Time of Meteor Shower: Time of a meteor shower peak can be a close prediction and not always accurate. Each source may state a different time, so have a look at a few sources online and decide on the best time for your location. If the peak time is during the daytime for your region, view the shower the night before and after the peak time as the peak stretches over a day or two and then there are moderate showers a few days before and after the peak days.
- Know About the Meteor Shower: Before heading out to photograph the meteor shower, you need to know about the meteor shower itself for successful seeing and photographing.
- Which Meteor Shower? Knowing the meteor shower that is taking place will help you locate the radiant, know the peak time/s, the number of meteors per hour and for how many nights you will be able to see the shower. These vary with each meteor shower.
- Meteor Shower Rate: This is nothing but the Zenithal Hourly Rate (ZHR). Remember that if during the peak time the sky is not completely dark (has daylight), you are in a light polluted area or if the moon is bright up in the sky, you will be able to see very less number of meteors.
- Duration of Meteor Shower: The duration of the meteor shower depends on the width of the trail containing the comet or asteroid debris. The meteor shower starts when earth enters the area containing the debris, peaks when it passes through the thickest area of the debris and then stops when earth leaves the region containing the debris.
- Since the earth passes through these regions on the same days every year, the specific meteor showers occur almost on the same dates every year. However the moon phases for the peak dates, change every year.
- Know the Shower's Radiant Point and rising time: Like we discussed above, meteor showers are named after the constellation from where they appear to be originating, so look for the location of the relevant constellation in the sky.
- You can make use of an app like Star Walk or Sky Guide to locate the constellation in the sky, but you can see meteors shooting up into the sky from the horizon in that direction even before the constellation rises up in the sky.
- You will be able to see a lot or the maximum number of meteors when the radiant is high up in the sky.
- Know the Phase of the Moon: The moon although one of the most beautiful objects in the night sky to see and photograph, can be an enemy for viewing and photographing the meteor shower. Gibbous and full moons can make the sky very bright, so if the moon is going to be up in the sky, make sure it is not more than 25% illuminated in order to see a decent number of meteors. Even in very dark skies a bright moon in the sky can wash out the faint meteors. If the moon sets before the radiant rises, then that's great!
- Viewing Tips: Most of the meteor showers peak after midnight until dawn, but again this varies with each meteor shower. It is advisable to watch meteor shower using the naked eye so that you have a greater field of view that aids with watching more meteors. Using a pair of binoculars or a telescope can limit the field of view.
- Remain Patient: Patience is paramount with meteor showers because even during the peak shower, you may be able to see only one meteor per minute. So you will need to be outside shooting for a long time. Also, you do not know when a meteor will shoot through, so keep your fingers crossed that the camera is taking a photograph that has a meteor or two in it. Some faint meteors that we are unable to see may be recorded by the camera and vice versa.
- Other Tips:
- Watch and photograph the meteor shower from a dark location for a few hours on the peak night and the nights before and after the peak. This will give you the best chances of seeing and photographing quite a few meteors.
- Keep a few spare charged batteries and formatted memory cards.
- Dress warmly and take warm drinks and snacks to get through the night. Have a flashlight if you are travelling to a dark sky area away from home, keep a blanket, a foldable chair to relax, insect repellants and enjoy the show.
Gear Required
For photographing meteors, just like how you would for night time photography, you will need to make long exposures.
- You will need a camera that can shoot in manual mode. Manual mode is the best choice when photographing the meteors since you will need full control over the settings. Some point and shoot cameras allow for manual mode, but for good image quality, a DSLR or a mirrorless camera would be the best choice.
- A wide angle lens so you have more area of the sky in the frame. Since the meteors are unpredictable, it is good to photograph a wider frame so you have a greater chance of capturing meteors in your shots. Also if your lens has a larger aperture between f/1.4 to f/2.8, then it will allow more light and help photograph meteors neatly at low iso values.
- Note: A wider focal length will help you shoot at longer exposure times when following the 500 rule and will have a greater chance of recording a meteor.
- A sturdy tripod that can hold your camera and lens combination and avoid shakes caused by wind or breeze. Since you need to take long exposure shots, a tripod is a must.
- A remote or cable release so you can avoid any blur due to camera shake when releasing the shutter. If you do not have one, then use the in-built timer delay feature. Some cameras have Wi-Fi capabilities and allow releasing the shutter with the help of a smartphone app, but make sure you do not lose much battery life using this feature.
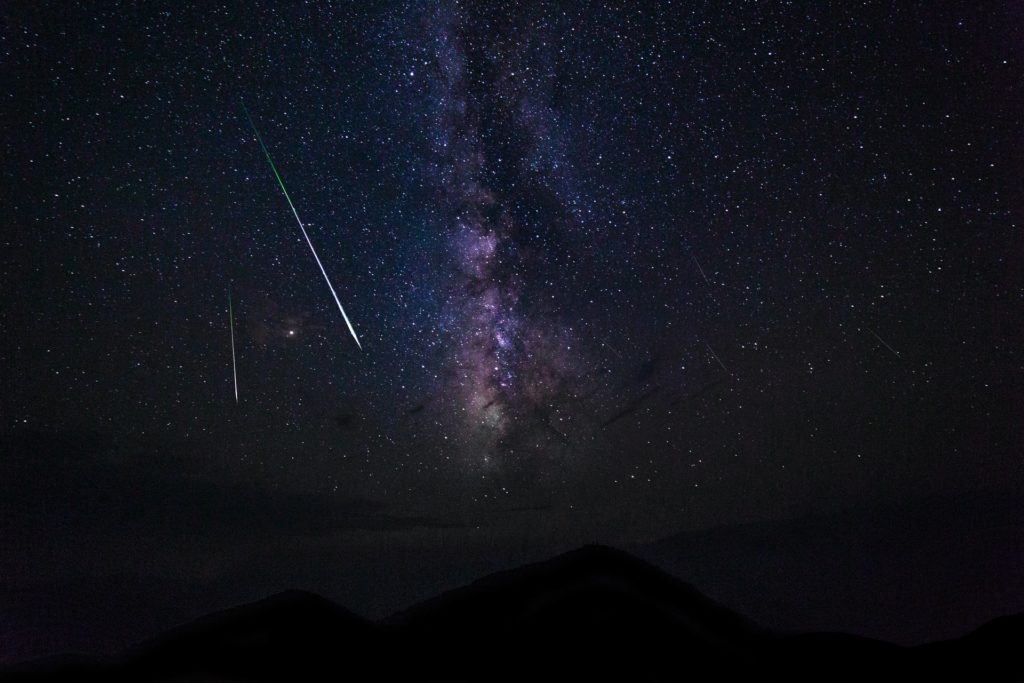
Camera Settings
- Shoot in raw format.
- Remove any filters on the lens to avoid flares, ghosting, etc.
- Turn off image stabilisation on both the lens and camera.
- Set the white balance manually (between 3400K and 4000K) or use a suitable preset. If you are unsure, use auto white balance and make adjustments when post processing.
- Since the camera can struggle to focus in low light, you will need to put the lens on manual focus and manually focus on a bright star in the sky. Manually focusing on live-view is the best choice. Take a test shot, zoom in at 100% and review for sharpness. Make any minor adjustments for focus if necessary.
- You now need to calculate the exposure time for the shots. During the long exposure you will be capturing the stars in the sky besides the meteors. You do not want the stars to trail but be sharp pin points in the image. The best option is to use the 500 rule for calculating the exposure.
- Divide 500 by the effective focal length and you have the exposure time.
- For a full frame camera, if you are using an 18mm lens, then exposure time = 500/18 = 27.77 = 28 seconds
- For an APS-C camera, for example with a crop factor of 1.5, you will need to take the crop factor into account. So, exposure time = 500/(1.5 x 18) = 500/27 = 18.5 = 19 seconds.
- Divide 500 by the effective focal length and you have the exposure time.
- You will need to use wide aperture values so you can have your iso as low as possible to avoid much noise in the image. Moreover wider apertures will help to record even some faint meteors. Since you have set the focus to infinity, you can use a wide open aperture and still get sharp images.
- If you have an f/1.4 or f/1.8 lens, and you are concerned about sharpness in general, then you can close down to f/2 or f/2.8 depending on which aperture value will give you the best results.
- Depending on the shutter speed and aperture values, you will need to choose an optimal iso value. This depends on the shutter speed, aperture value you have chosen + the light in the location, your camera and lens combination, and so you will need to try iso values from 640 up till 2000 or even 3200. Take a test shot with iso 800 or 1600 and see what you get. If the image is too bright (over exposed) then decrease the iso. If the image is underexposed, increase the iso a bit. Take test shots, make adjustments and do test shots till you get the desired exposure/results.
- Make sure you turn off low light and high iso noise reduction features as these will take a lot of time in between shots and you will miss a lot of meteors in that process. Learn more about this feature in the article – Should You Turn Noise Reduction On Or Off For Astrophotography?
- Use continuous shooting mode and fire off a few shots using a remote or cable release, in intervals, depending on the buffer capability of your camera.
- If your camera has an inbuilt intervalometer, you can set it to fire off a few shots over an hour or two at specific intervals of a second or two. This way you have a good chance that a few frames will have a meteor streaking across the sky.
Capturing The Shots
- Reach the location early: It is good to reach the location before sunset to locate the radiant.
- Set up the camera: Set up your camera and lens on a tripod following the settings given above.
- Point your camera towards or near the radiant of the meteor shower in the sky: We already discussed that the meteor showers get their names from the place in the sky they seem to be originating. So, for example, if you are photographing the Perseid meteor shower, the meteors will seem to originate from the Perseus constellation. Using the Star Walk or Sky guide app, locate the constellation in the sky and point your camera towards that direction. Doing this will make the meteors look like they are coming towards the camera, and the trails will be quite short.
- In order to capture longer trails, the trick is to position the camera at an angle of about 45 degrees to the right or left of the radiant which means the radiant is positioned to one side of the frame at about one third of the frame or towards the edge.
- Also check the path of the radiant in the sky over the next one or two hours so you can frame in such a way that the radiant is in the frame throughout the shoot.
- Composition: Composing the image depends on your choice. You can just photograph the meteors in the sky or you can add interesting foreground elements to make the image more meaningful and visually pleasing. You can add distant trees, mountains or other structures in the location to bring some context to the image, but make sure that you give more space to the sky.
- Capturing the images: Before you start taking a series of images, make sure you take a test shot to check focus, composition and white balance. Make adjustments if necessary and take test shots till you are happy with the shot. Once you are happy,
- Set the camera to bulb mode if the exposure times are longer than what your camera will allow. For some cameras it is 30 seconds.
- If you are using the intervalometer, set the exposure time and shooting interval between two shots. Keep the shooting interval between 2 to 5 seconds as these are long exposure shots.
- Take as many shots as possible to capture the maximum number of meteors – possibly about 2 hours or more.
- Keep an eye on the battery charge and space in memory card.
- Sit back and enjoy the show when your camera is clicking away.
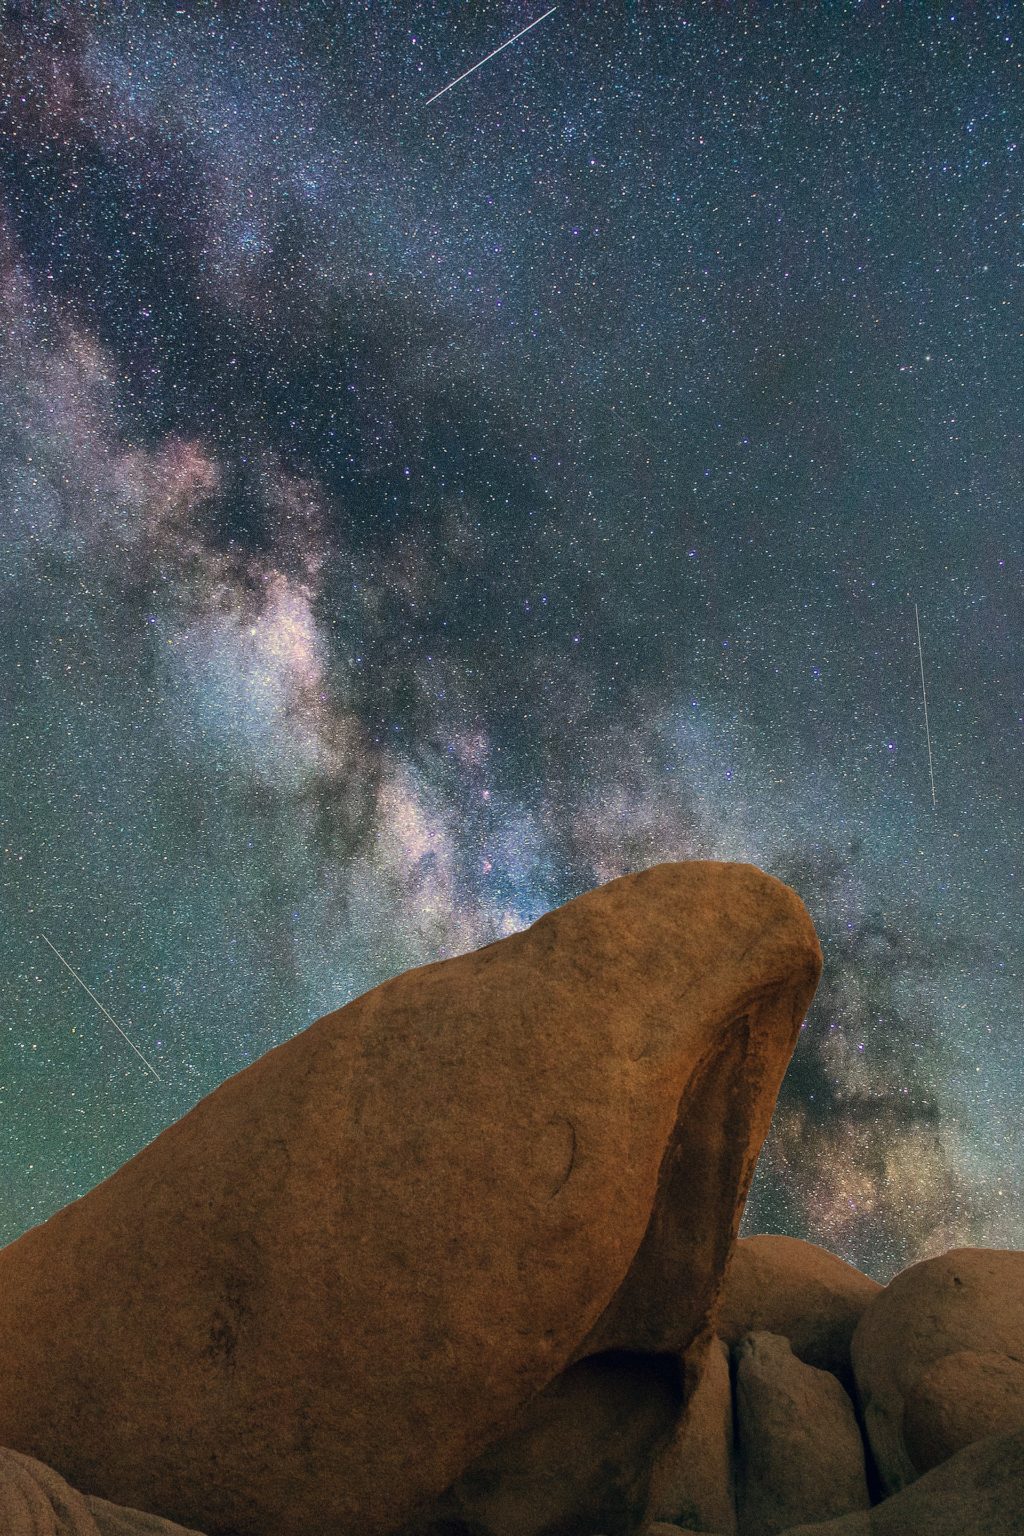
Note: You may have seen images online with multiple meteors in a single frame. Most of these images are a composite of several images combined to one photo, so you get the meteors from several frames into a single one. This is more like photographing and stacking for the star trails, but you need to look for star alignment here instead of the trails.
Post Processing Meteor Shower Images
Post processing the meteor images can be a time consuming and quite complicated process if you want to make a composite out of the images so you have a lot of meteor streaks in one image. Here are the steps that you need to follow:
- Go through all your meteor images and choose the ones that have meteors in them. Make sure they are not satellite, ISS or airplane trails.
- If you are looking to edit a single shot, go ahead and make basic adjustments if necessary, like white balance, straightening, cropping, exposure, contrast, whites, blacks, shadows, highlights, clarity, vibrance and sharpness. Use the dehaze tool to give the image a punch if you see slight haziness.
- If you want an image with a combination of star trails along with meteors from the images you captured, you can use a simple application like StarStax to stack the images. It just takes a few seconds.
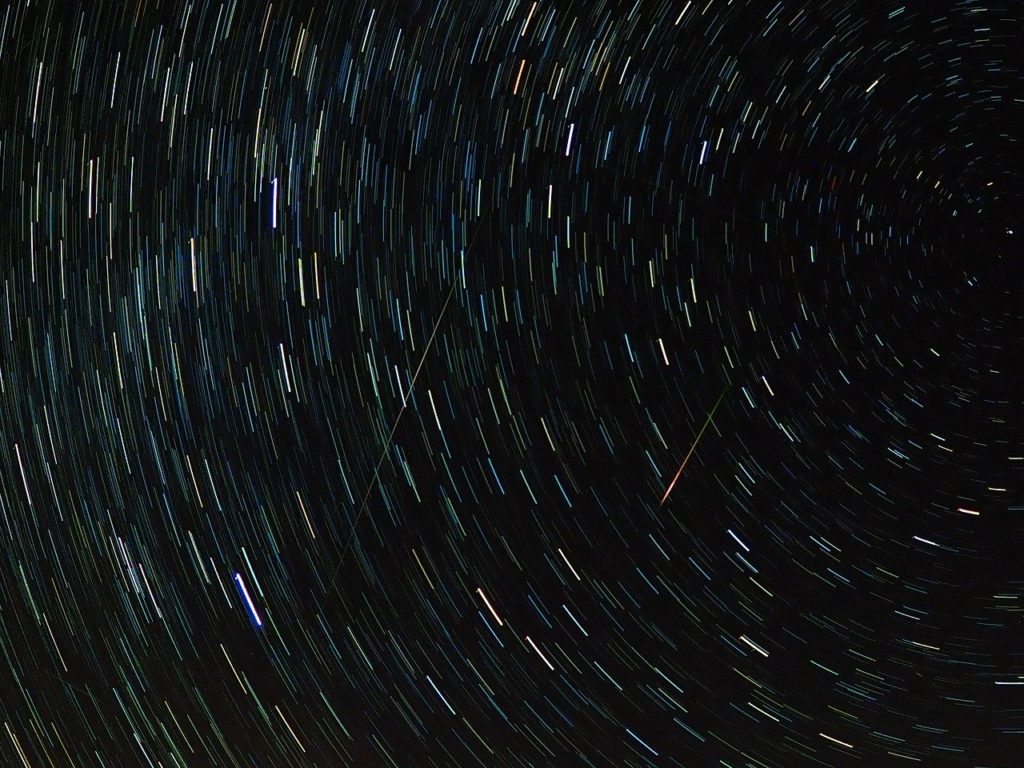
- If you are looking to stack the images, you will need to use an application like Photoshop and this will be a time consuming and complicated process.
- You need to apply the same edit settings to all the meteor photos that you are looking to stack.
- Now select one of the best images with the best meteors and best foreground details as the background frame.
- Now open the other images as layers and stack them. Mask out all areas except the meteors in each layer.
- If you want all the meteors to point at the radiant, you will need to find a reference point on your base image which usually is a prominent star or the Polaris if it is in your frame. You will then need to rotate each layer about that reference point to align the stars so the meteors are pointing to that point, and use masking to reveal just the meteors from each layer.
- Here is a very detailed video by David Kingham that shows how to create a composite meteor shower photo.
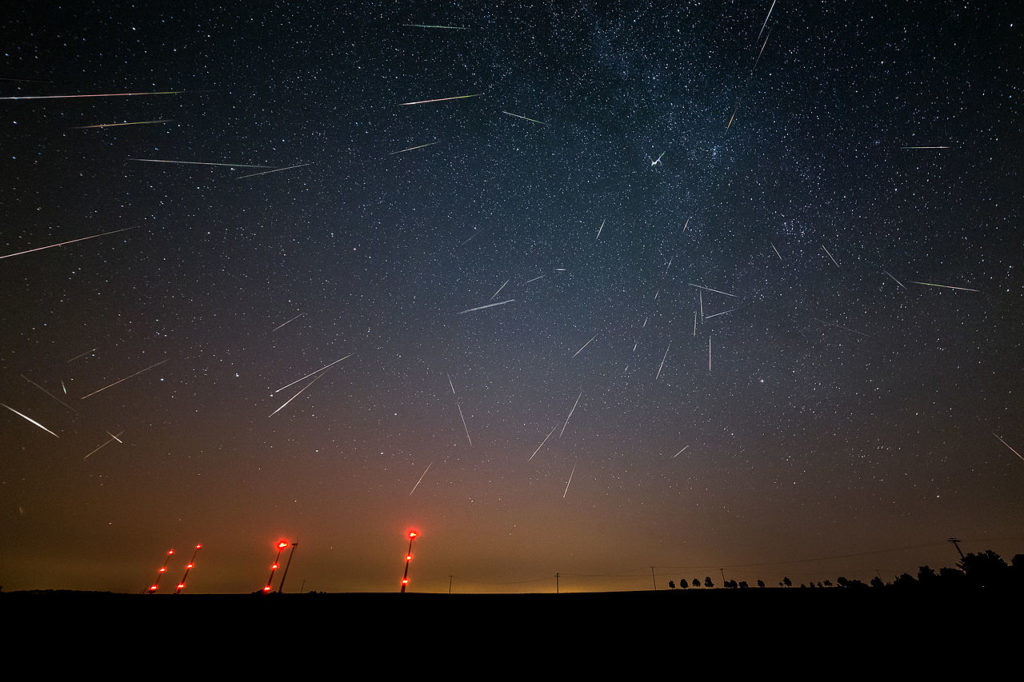
Photographing meteors can be fun and very rewarding, but do not forget to relax and enjoy the show as well. Nothing can compare to witnessing these events as they happen in the night sky.
Have you photographed a meteor shower before? If you have some tips to share with us, please do in the comments section below. Also, if you capture meteor showers you would like to share with our community, post them here!
Further Resources:
Light Stalking https://ift.tt/3k7J5cf
Sourced by Time Trap Photography sharing the best photography tips, news and tricks throughout the industry. Time Trap Photography is dedicated to freezing those special moments in life that can be revisited and admired for generations to come. - Shannon Bourque
Please visit our main site for booking availability and rates.

Receive valuable industry knowledge delivered free to your email each day.


No comments:
Post a Comment
Thank you so much for your comment. A moderator will review and approve all relevant posts. We appreciate your support and encourage you to stay with us by subscribing to our email updates. Where you can easily pick and choose what photography subjects interests you. Subscription link: http://bit.ly/photo-sub