Lightroom has been with us a very long time now, but how many of you are aware that it also catalogs video? Even if you are not a hybrid stills/video shooter, the chances are that you have accumulated more than a few video clips in your time. They might be simple family videos or perhaps you took them because video simply worked better than a photo for that particular scenario.
If you are not a big video shooter, you might tuck those video clips away at the back of a dusty hard drive never to be seen again. After all, why splash out on expensive editing software if you are not going to make full films? Why buy even more expensive cataloging software if all you shoot is a few clips a month?
This is where Adobe Lightroom steps up to the plate.
How to Import Video Into Lightroom
The good news is that importing video into Lightroom is as easy as it is for photos. Simply open the import dialogue, select the folder to import from, and decide whether Add, Move or Copy the videos into your catalog.
As with stills, Add will import the video into the library but keep it in the original folder. Move will move the clips from the original folder to Lightroom’s default catalog folder. Copy keeps the original files in the folder but makes copies inside the Lightroom folder.
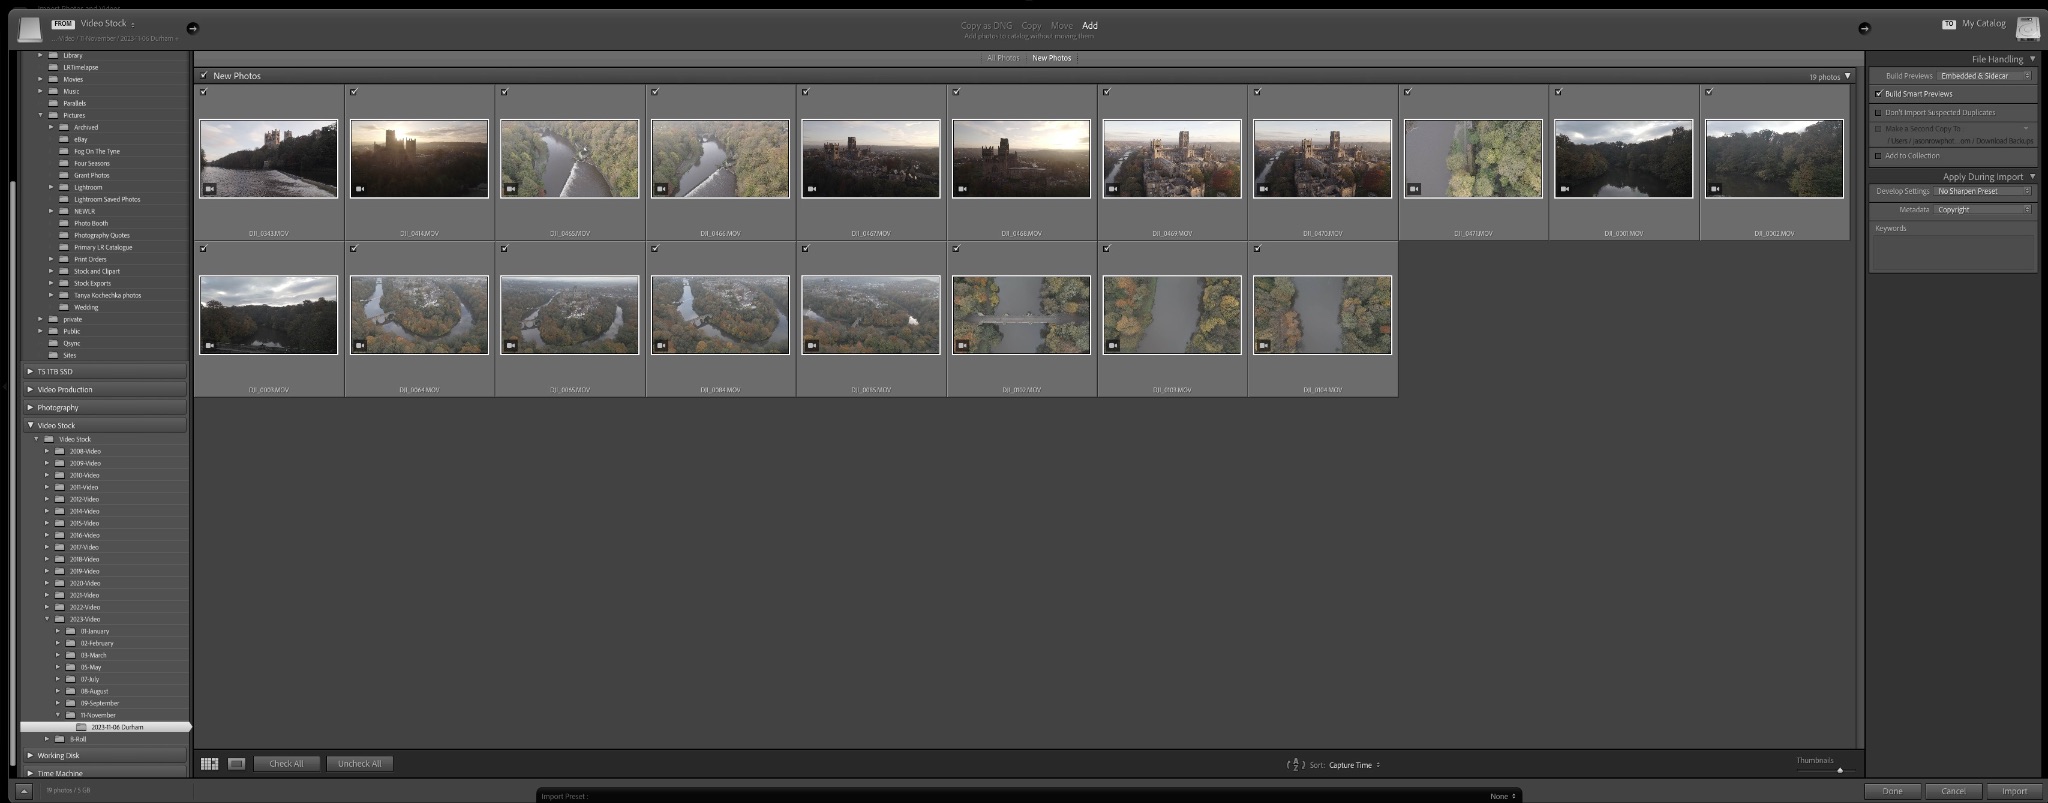
Be aware that video clips are significantly larger than still images and moving or copying them inside your Lightroom catalog could quickly wipe out your hard drive space. As with importing stills, you can apply metadata and color presets to your files. Whilst applying metadata is a good idea, it’s best not to apply color presets. Most video is not the equivalent of RAW stills. In fact, it’s more akin to quite fragile JPEG files. Due to this, applying presets can very easily introduce noise or even banding to your clips.
You can rename your video clips as well as add keyword data on imports.
Lightroom will import AVI, MP4, MOV, and AVCHD formats and various extensions within those formats. It will not import RAW video or some of the higher-end production formats.
What Can I Do With Video In Lightroom?
The first thing I would say is to manage your expectations. Lightroom is not a full-featured editing suite, you will not be able to piece together multiple clips into a timeline and output a video. You can however do quite a lot outside of editing.
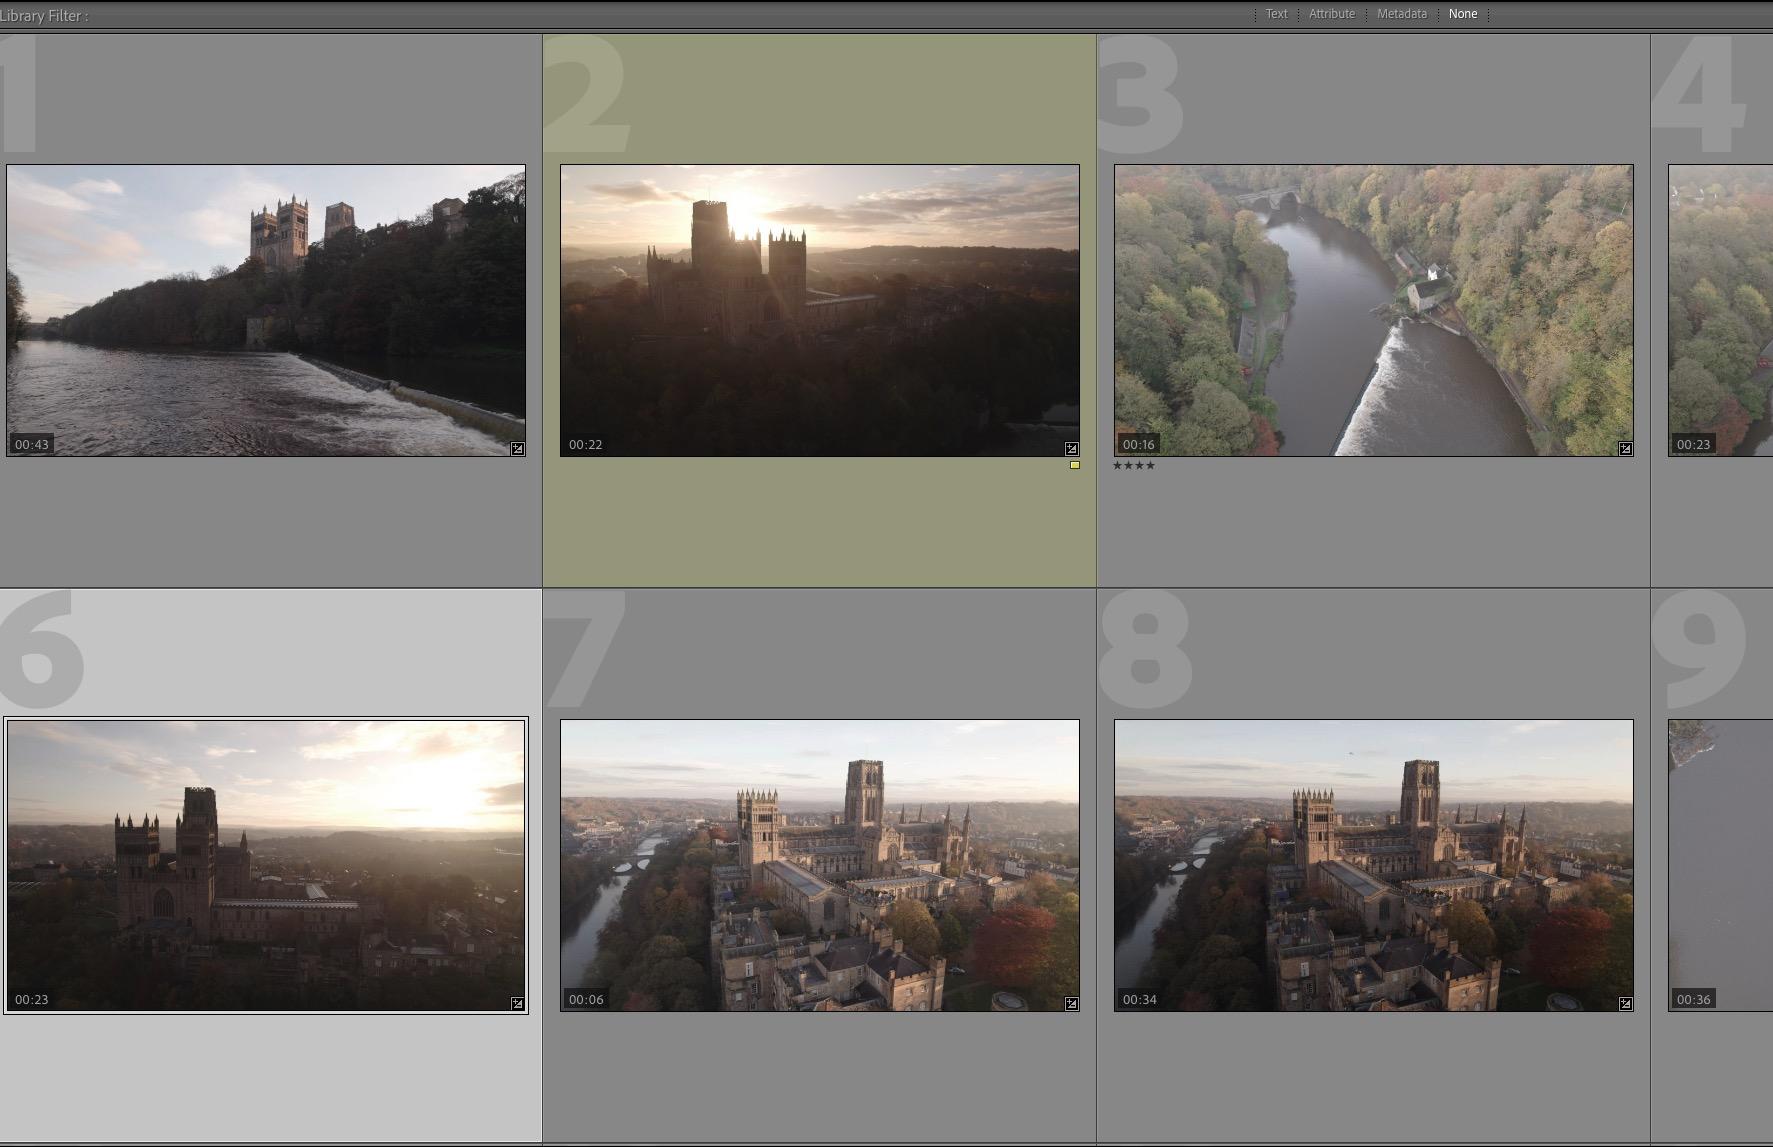
The first thing you can do is to catalog. You have the full range of Lightroom’s cataloging tools to work with. You star rate your clips, color code them and flag them. You can further add captions, keywords and descriptions. You can add them to collections, move them to different folders, rearrange the order, and delete them.
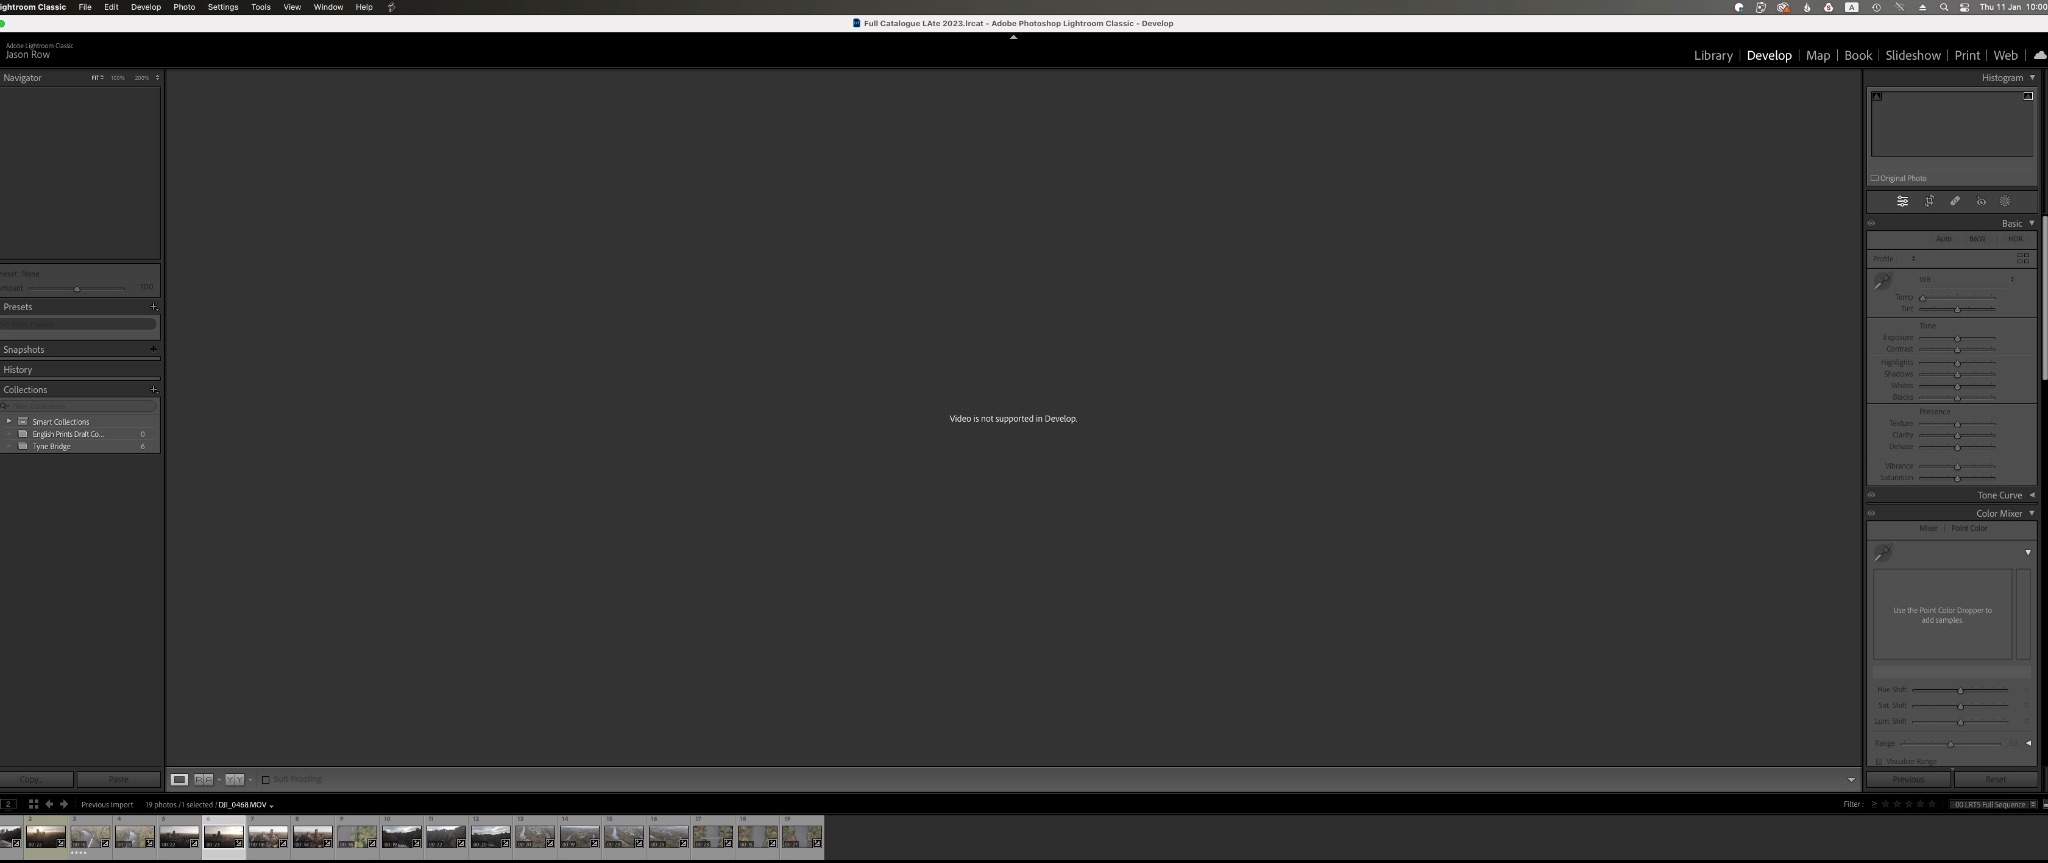
However, click on the Develop Module tab and you will quickly see Lightroom’s limitations. You will see a message saying Video Not Supported In Develop. However, there are some correction controls available.
To use them we must return to the Library Module.
How to Color Correct Video in Lightroom
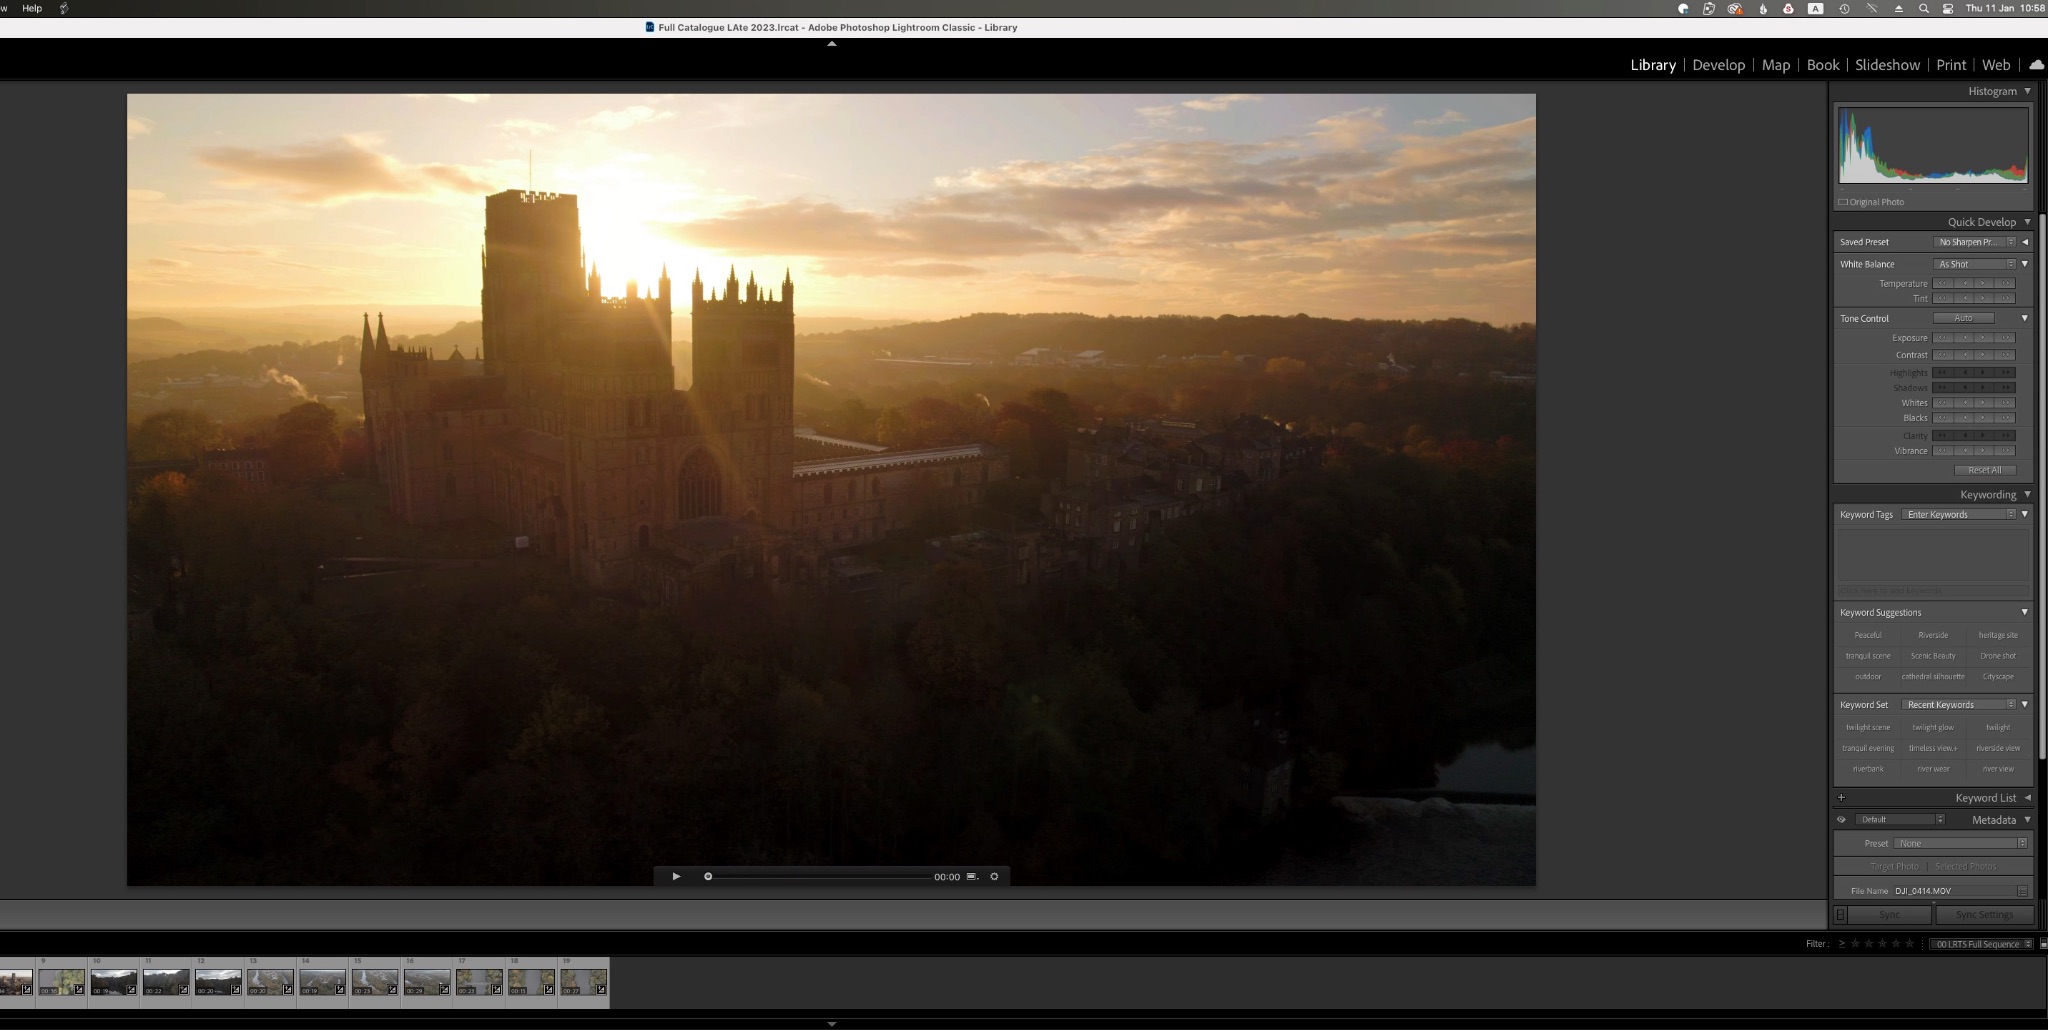
Back in the Library module just underneath the histogram, you will find a few basic but useful controls. They are button-style controls rather than sliders, meaning they do not give you fine levels of control.
However, for some basic adjustments, they are fine.
At the very top, you can add a color preset, followed by a basic white balance control. This allows you to change the color temperature and tint. Be aware, however, that changing the white balance on video files is like changing it on JPEG photos. You are not actually changing the WB, merely adding color shifts to the video file.
Below this, we have button controls for Exposure, Contrast, Whites, Blacks, and Vibrance. These can be adjusted in relation to the histogram to give some punch and color to your clips. It's all very basic but usable.
Exporting Corrected Video Files
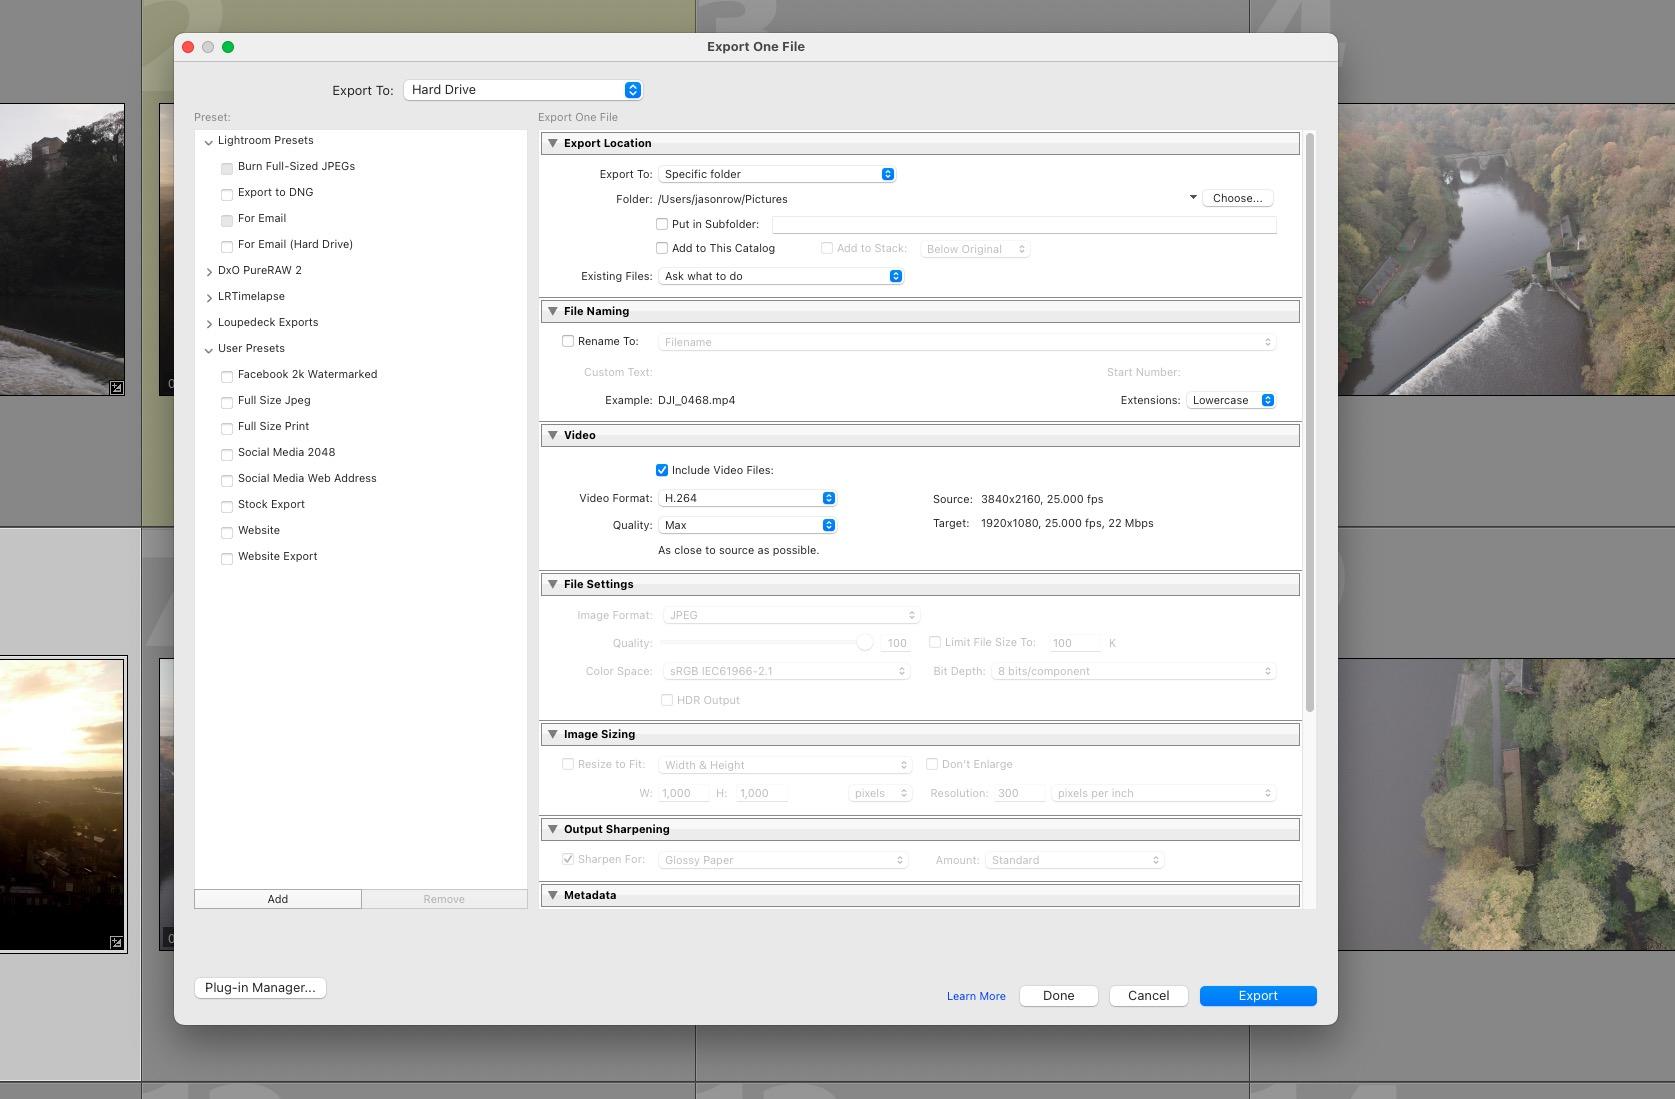
Again the export options are quite basic. You can export the video clip in its original format using the H.264, DPX, or original codecs. You can choose from a few preset compression levels from Max to Low depending on what the final destination will be. That’s really about it for Lightroom’s editing and export capabilities. Let’s take a look at some of the pros and cons of using Lightroom for video.
Lightroom For Video -The Pros
The most obvious pro is its cataloging abilities. We can import video files in the same way as stills, rate and organize them.
Another pro is that many of us already have a Lightroom subscription. This means we have access to a powerful video management tool without the need to pay for a dedicated app.
Whilst basic the editing tools do allow you to make basic corrections to your clips. You can correct exposure and contrast as well as make basic color and saturation corrections.
Because of the integrated nature of Lightroom, you can combine stills and videos into the same collections and folders. This can be very useful for media management.
Lightroom For Video – The Cons
Lightroom is not, and probably will never be a video editing app. Adobe has invested too much in Premiere Pro (a further subscription is required) to put too much capability in Lightroom.
The editing controls are very very basic, there’s no fine control, no saturation/hue controls, and no color wheels for grading.
Depending on where your video files are stored, Lightroom’s playback can be very jumpy and inconsistent. This obviously depends on both the speed of the computer and the drive the files are stored on. However, it does not make for a pleasurable experience. Unlike with dedicated editing suites, there is no way to encode the video to smaller files or proxies in order to run better.
The export controls are extremely limited with no fine control over compression and limited export codecs.
Lightroom for Video In Summary
Lightroom is best suited to occasional video creators who are looking to keep tabs on where their footage is. The basic correction tools are ok for quick edits and output to social media but not for serious production work.
Where Lightroom could be useful is in cataloging and preparing footage ready for a large video edit. The many tools at hand allow the editor to sort footage easily and export that original footage into suitable folders. With apps such as the amazing Davinci Resolve available for free, Lightroom could definitely be used as part of a cost-effective video workflow.
Light Stalking https://ift.tt/ikjlnF6
Sourced by Time Trap Photography sharing the best photography tips, news and tricks throughout the industry. Time Trap Photography is dedicated to freezing those special moments in life that can be revisited and admired for generations to come. - Shannon Bourque
Please visit our main site for booking availability and rates.

Receive valuable industry knowledge delivered free to your email each day.


No comments:
Post a Comment
Thank you so much for your comment. A moderator will review and approve all relevant posts. We appreciate your support and encourage you to stay with us by subscribing to our email updates. Where you can easily pick and choose what photography subjects interests you. Subscription link: http://bit.ly/photo-sub