Saturday, March 31, 2018

Huawei’s New P20 Pro Smartphone Comes Equipped with Night Vision

7:08:00 AM

Huawei’s latest headset, the P20 Pro smartphone, is turning heads for more reasons than just its design.

The P20 Pro is capable of taking pictures in near dark conditions without the use of a flash according to a BBC report.

It does this by taking an exposure of six seconds to get the maximum amount of light into each shot, among other things.

Image via Huawei.

Using what it captures, the phone then employs sophisticated AI to sharpen the image and produce something is clear. Normally when photos are taken this way the image can be blurry.

Huawei has bold dreams for its phones and brand. The company hopes to become the world’s leading brand of smartphone but recent setbacks in the United States have made that dream more difficult to achieve.

Currently behind Apple and Samsung, Huawei’s beautifully designed phones are no longer being sold by wireless carriers in the United States, one of the world’s largest markets for smartphones.

Huawei is really banking on the P20 Pro’s camera capabilities in its marketing, aiming for a similar status as Samsung’s Galaxy S9 product line.

The P20 Pro features three lenses that each do something different with the main sensor having a 40 megapixel resolution. There’s also a 20 MP black and white sensor for monochromatic pictures and to provide depth information. The lastis a 8 MP telephoto hardware-stabilized 3x zoom lens that is capable of 5x zoom when using software-based digital zoom. The P20 also sports object-recognition technology to auto adjust settings.

Canalys consultant Ben Stanton praised Huawei for attempting to get ahead of the competition in terms of features and hardware but noted that it was difficult to tell the quality of the various photos apart when viewing them side by side, noting that Huawei has a steep hill to climb to overtake Apple and Samsung. The good news for photographers is that smartphone cameras are getting increasingly powerful to such a level that there is near parity among competing headsets, giving consumers an array of options to consider outside of camera performance.

The new P20 Pro is expected to retail for $USD 1,115, less than both the Apple iPhone X and the Samsung Galaxy S9.

Image via Huawei.

Let's block ads! (Why?)


Light Stalking https://ift.tt/2GqznT2

Sourced by Time Trap Photography sharing the best photography tips, news and tricks throughout the industry. Time Trap Photography is dedicated to freezing those special moments in life that can be revisited and admired for generations to come. - Shannon Bourque
Please visit our main site for booking availability and rates.


"Time


Receive valuable industry knowledge delivered free to your email each day.


"Time

31. März 2018

4:03:00 AM

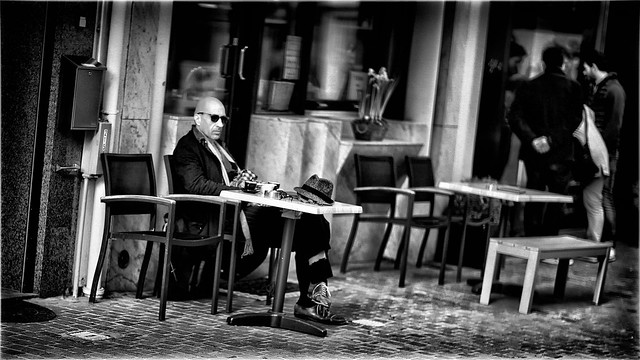
Das Bild des Tages von: Mundl Photographie


kwerfeldein – Magazin für Fotografie https://ift.tt/2GqDpqe

Sourced by Time Trap Photography sharing the best photography tips, news and tricks throughout the industry. Time Trap Photography is dedicated to freezing those special moments in life that can be revisited and admired for generations to come. - Shannon Bourque
Please visit our main site for booking availability and rates.


"Time


Receive valuable industry knowledge delivered free to your email each day.


"Time

Fotografische Crowdfunding-Projekte #2 2018

12:07:00 AM

Unsere Crowdfunding-Serie geht für 2018 in die zweite Runde und auch heute möchten wir Euch wieder ein paar Fundstücke für Fotograf*innen präsentieren. Diese haben wir auf Indiegogo, Startnext und Kickstarter gefunden und wir denken, dass sie etwas Unterstützung verdient haben.

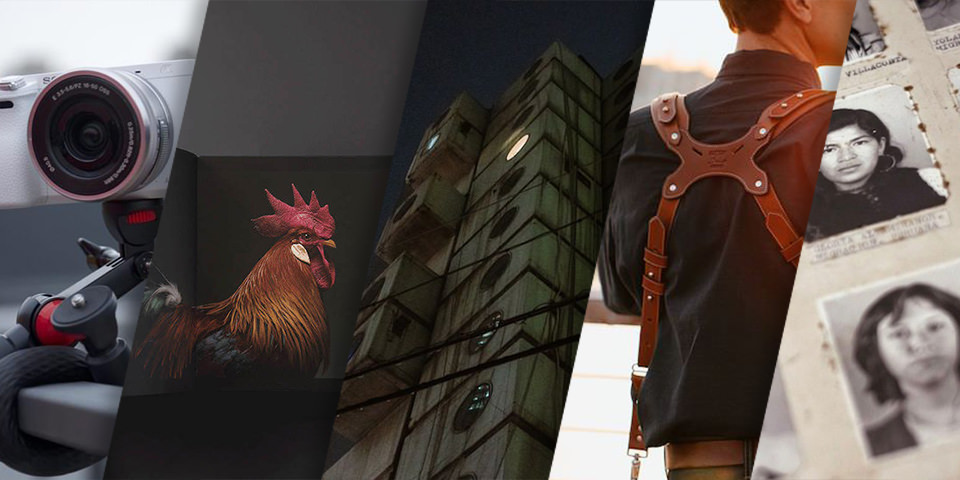
Neben zwei ganz praktischen Sachen für Eure Kameras findet Ihr heute gleich drei Fotobücher aus ganz unterschiedlichen Genres. So sollte wirklich für jede*n etwas dabei sein, egal ob Ihr ein neues Reisestativ sucht, einen neuen Kameragurt braucht oder Euch gern dunkle Städte, Portraits oder Hühner anseht.


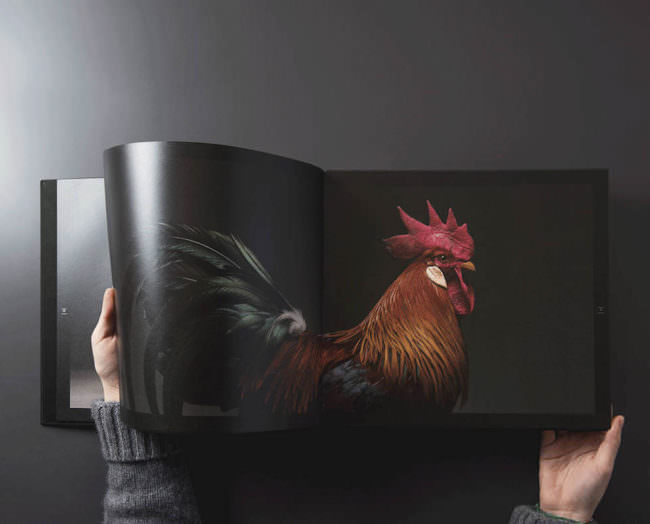
Ein geöffnetes Buch, in dem ein Huhn abgebildet ist.

CHICKen

Die Kampagne mit dem Titel „The Most Stunning High Quality Chicken Book Photos Ever Made“ hat mich gleichzeitig amüsiert und etwas stutzig gemacht. Ich habe mir das Projekt genauer angesehen und wurde nicht enttäuscht. Wie der Name schon vermuten lässt, handelt es sich beim Buch mit dem Titel „CHICKen“ um ein Fotobuch mit Hühnern.

Allerdings keine Hühner, die man beim Sonntagsspaziergang in Hinterhöfen sehen kann, sondern um ganz besonders majestätische Exemplare, die man so vermutlich noch nie zuvor zu Gesicht bekommen hat und die professionell in einem Fotostudio portraitiert wurden. Insgesamt haben die Fotografen Moreno Monti und Matteo Tranchellini 62 verschiedene Hühner für das Hardcoverbuch, das komplett in Italien hergestellt wird, fotografiert.

Die Kampagne und das dazugehörige Video nehmen sich trotz der offensichtlich hohen Qualität der Bilder und des Buches nicht allzu ernst und das dafür produzierte Video ist durchaus zum Schmunzeln.

Egal ob Ihr Euch für Hühner interessiert oder einfach eine kleine Aufheiterung auf dem Wohnzimmertisch liegen haben möchtet, das Buch „CHICKen“ könnt Ihr auf Kickstarter für 47 € vorbestellen. Zeit dafür habt Ihr noch bis zum 20. April 2018 und Ihr könnt Euch sicher sein, dass Ihr ein Exemplar bekommt, denn die Kampagne hat bereits weit über das Zehnfache der benötigten Finanzierungssumme eingenommen.


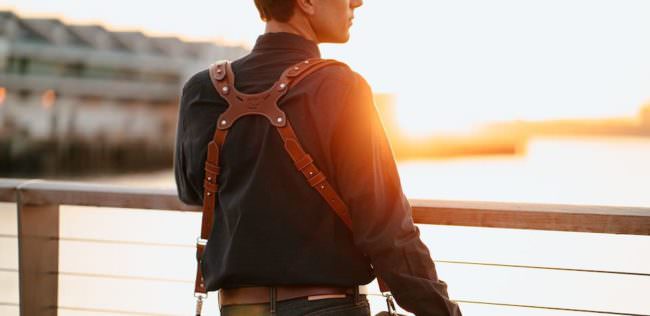
Kameragurte von RL Handcrafts

Die Firma RL Handcrafts hat sich auf Kameragurte für Fotograf*innen spezialisiert und stellt in ihrer aktuellen Kampagne auf Kickstarter gleich zwei neue Modelle vor.

Das Besondere: Beide Gurte sind modular aufgebaut. Der „Falco Switch“ ist ein typischer Kameragurt, mit dem die Kamera an zwei Punkten fixiert um den Hals gehängt werden kann. Bei Bedarf lässt sich der Gurt mittels schnell zugänglichen Knöpfen so verändern, dass die Kamera an der Stativplatte befestigt und über den Oberkörper gehängt wird.

Etwas interessanter finde ich allerdings den zweiten vorgestellten Gurt, der auf den Namen „Derringer“ hört. Hierbei handelt es sich um einen typischen Doppelgurt, über den Ihr zwei Kameras links und rechts an Eurem Körper befestigen könnt. Bei Bedarf kann aber statt einer Kamera zu Beispiel auch eine Kameratasche angebracht oder eine der beiden Seiten komplett „stillgelegt“ werden und das Gewicht der verbleibenden Kamera wird immer noch optimal auf dem Rücken verteilt.

Für den Falco Switch müsst Ihr auf Kickstarter umgerechnet etwa 60 € investieren, beim Derringer sind es stolze 210 €. Beide Produkte werden ab Juni 2018 ausgeliefert, sofern die Kampagne, die am 30. März 2018 endet, Ihr Finanzierungsziel erreicht. Momentan wurden leider erst gut 15 % der benötigten Summe eingenommen.


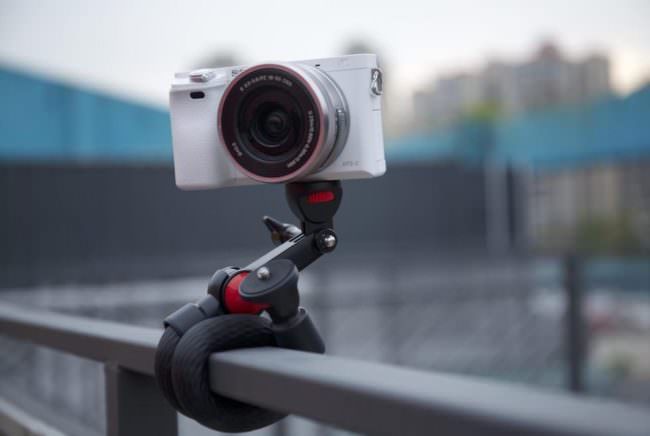
Fotopro Mogo

Bei „Mogo“ handelt es sich um ein flexibles Einbeinstativ für kleinere Kameras, das durch die Größe und das Gewicht besonders für Fotograf*innen interessant sein soll, die viel unterwegs sind.

Durch die Flexibilität des Fußes lässt sich Mogo nahezu überall anbringen. Ein Geländer, Fahrradlenker oder eine Parkbank werden so in kurzer Zeit zu einem Stativ. Laut Kickstarter-Kampagne lassen sich Kameras bis zu einer Größe von typischen Spiegellosen problemlos an Mogo anbringen.

Zusätzlich bekommt man ein kleines Dreibein-Stativ mit dazu, an dem sich Mogo befestigen lässt, sodass man auf diesem Dreibein-Stativ beispielsweise die Kamera anbringt, während auf dem flexiblen Arm ein Dauerlicht, Blitz oder Mikrofon befestigt werden können. Investiert man etwas mehr Geld in die Kampagne, so erhält man auf Wunsch eine Version, in der selbst das Dreibein-Stativ mit flexiblen Beinen ausgestattet ist.

Für umgerechnet etwa 32 € lässt sich bereits das kleinste Mogo-Set auf Indiegogo bestellen. Die Kampagne hat Ihr Finanzierungsziel bereits überschritten und läuft noch bis zum 25. April 2018.


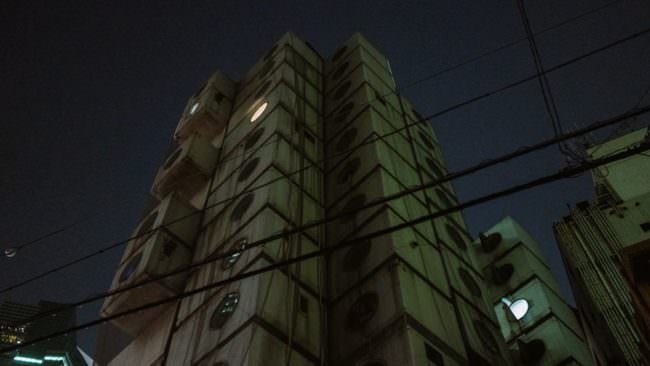
Dark Cities

Das Promovideo der Kickstarter-Kampagne zur Buch-Trilogie „Dark Cities“ ist verrauscht, abstrakt, dunkel und etwas beklemmend. Genau die Eigenschaften, die auch die entsprechenden Bücher haben sollen.

In der Trilogie werden Bilder aus den Städten Singapur, Tokio und Seoul gezeigt, die jeweils Schwerpunkte auf verschiedene Dinge wie etwa ein Parkhaus, einen futuristischen, in den 70er Jahren erbauten Turm oder einen langsam aussterbenden Stadtbezirk legen. Alle Bücher haben gemeinsam, dass die darin enthaltenen Bilder bei Nacht und/oder Neonlicht aufgenommen wurden und auf ihnen eine düstere und beklemmende Atmosphäre herrscht.

Für umgerechnet etwa 46 € könnt Ihr Euch die komplette Trilogie sichern. Die Kampagne hat bisher etwas weniger als die Hälfte der nötigen Summe eingenommen und endet am 20. April 2018.


Fotos für die Pressefreiheit 2018

Bereits seit 1994 wird jährlich am 3. Mai, dem internationalen Tag der Pressefreiheit, der Bildband „Fotos für die Pressefreiheit“ von den Reportern ohne Grenzen veröffentlicht. Die Bücher aus den Jahren 2014 und 2015 wurden sogar für den deutschen Fotobuchpreis nominiert. Die Version für das Jahr 2018 kann derzeit auf Startnext unterstützt und vorbestellt werden.

Im Buch werden aktuelle Brennpunkte und Verstöße gegen die Pressefreiheit dokumentiert. Die darin enthaltenen Fotograf*innen und Journalist*innen stellen ihre Arbeit dabei unentgeltlich zur Verfügung. Der gesamte Erlös des Buches fließt in die Menschenrechtsarbeit von Reporter ohne Grenzen. Mit der Startnext-Kampagne sollen vor allem die Druckkosten gedeckt werden.

Wenn Ihr 17 € investiert, könnt Ihr Euch bereits ein Buch sichern. Die Kampagne hat weit über die Hälfte ihrer nötigen Finanzierungssumme erreicht und endet am 19. April 2018.

Habt Ihr selbst noch spannende, aktuelle Projekte gefunden, die hier nicht erwähnt wurden? Dann erzählt uns gern in den Kommentaren davon.


kwerfeldein – Magazin für Fotografie https://ift.tt/2J8fuOn

Sourced by Time Trap Photography sharing the best photography tips, news and tricks throughout the industry. Time Trap Photography is dedicated to freezing those special moments in life that can be revisited and admired for generations to come. - Shannon Bourque
Please visit our main site for booking availability and rates.


"Time


Receive valuable industry knowledge delivered free to your email each day.

"Time

Friday, March 30, 2018

3 Highly Effective Exercises for Creative Photography

4:52:00 AM

The most difficult aspect about photography is how to achieve unique images with your own individualized style. As a beginner, it may be necessary to capture it all so that you can figure out what it is you really like to photograph. Once you figure out what you like to photograph, developing an individualized style using creative photography may be the next step. Even seasoned photographers may find themselves wishing to expand on their style due to changing technologies, lifestyles, or just a newfound passion for something different.

Here are three exercises that may help you explore different styles.

Minimalism

Minimalism allows for a fresh break from the constant flow of chaos and visual information that we are subjected to all day. In photography, it is the practice of capturing simplicity and using a minimal number of objects and elements when creating a composition. Look for bright blocks of color, interesting geometric patterns or lines, a lone subject in a large environment.

  • Minimalism in this photograph gives a sense of the enormity of the storm in a barren landscape.

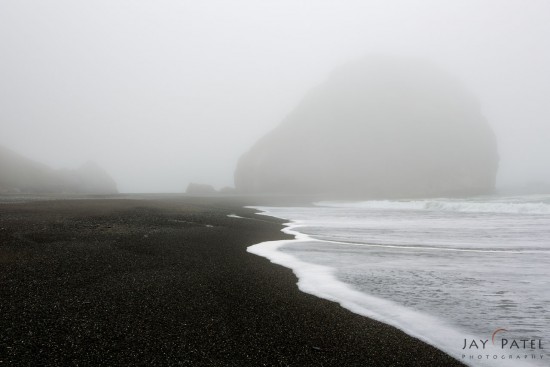
  • Minimalism under foggy conditions @Redwood Forest National Park, California

  • Minimalism with a single dominant color, Big Island, Hawaii

Long Exposure

In my opinion, long exposures are just fun! They can result in beautiful artistic images. It is important to have a tripod if you plan to keep your subject sharp while you capture the movement of other elements. If you do not have a tripod, create camera movements during the exposure.

  • Long Exposure: This six minute exposure captures the movement of the clouds while the main subject stays sharp.

  • 50+ Second Exposure @ Bahia Honda, Florida

Panoramics

Don’t have a wide angle lens? Do not fret! With the amazing capabilities of photo-merge in Photoshop and Lightroom, you too can get great results even with hand held images. Panoramic images allow you to capture the landscape’s vastness. Photograph left to right, in manual mode, with a normal or telephoto lens and with manual focusing.

  • Viti Crater, Iceland

  • Vestrahorn, Iceland

Utilizing multiple capture to create a panoramic using photo merge in Photoshop or Lightroom results in a large file that can be printed much larger than taking just one photograph and cropping for a panoramic.

Whatever direction you choose to go, go out, have fun and experiment with creative photography. And feel free to share your own ideas in the comments below.

About Author Christine Hauber

The current that underlies Christine Hauber's work is the concept of serenity in a world of chaos. With 25 years of professional photography experience, she continues to be attracted to the simplicity of the minimal and thus makes every effort to be a faithful visual recorder of the world around her. She wishes for her images to distill scenes ranging from the ephemeral to the eternal, from the abstruse to the symbolic. As a dedicated artist, she strives constantly to explore and expand her definition of the splendor and mysterious in life and nature. Her images have an ethereal and enduring quality.

Christine's work is published in various books, magazines and websites and has been printed and hangs in homes and offices worldwide. She teaches private photography workshops worldwide focusing on the needs of each unique client.

Let's block ads! (Why?)


Visual Wilderness https://ift.tt/2Gr9P4g

Sourced by Time Trap Photography sharing the best photography tips, news and tricks throughout the industry. Time Trap Photography is dedicated to freezing those special moments in life that can be revisited and admired for generations to come. - Shannon Bourque
Please visit our main site for booking availability and rates.


"Time


Receive valuable industry knowledge delivered free to your email each day.

"Time

30. März 2018

4:04:00 AM

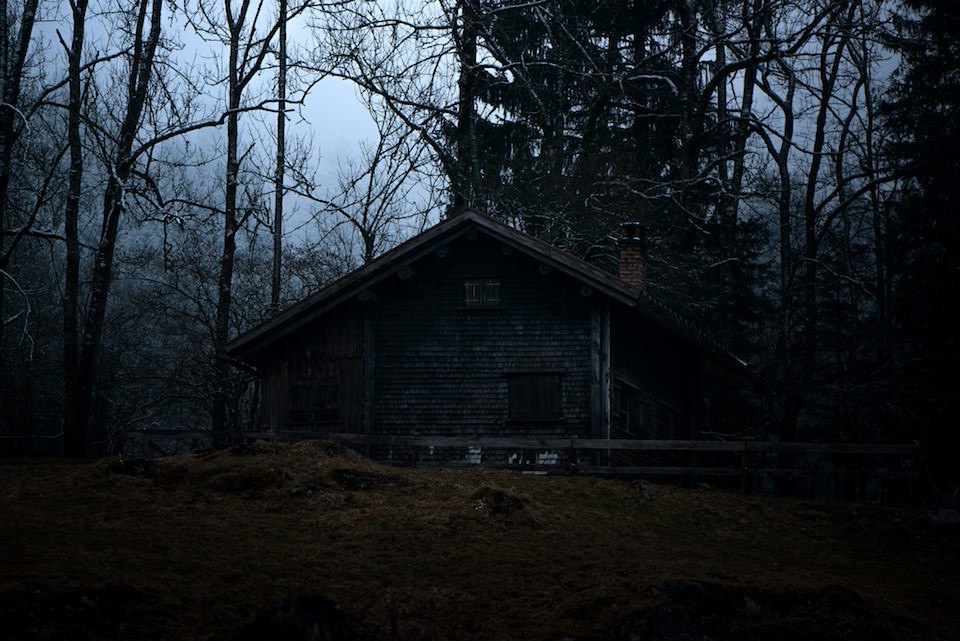
Das Bild des Tages von: Christian Kaiser


kwerfeldein – Magazin für Fotografie https://ift.tt/2E7ssYK

Sourced by Time Trap Photography sharing the best photography tips, news and tricks throughout the industry. Time Trap Photography is dedicated to freezing those special moments in life that can be revisited and admired for generations to come. - Shannon Bourque
Please visit our main site for booking availability and rates.


"Time


Receive valuable industry knowledge delivered free to your email each day.

"Time

Thursday, March 29, 2018

29. März 2018

4:09:00 AM

Das Bild des Tages von: Kevin Ramolla


kwerfeldein – Magazin für Fotografie https://ift.tt/2GiQpSO

Sourced by Time Trap Photography sharing the best photography tips, news and tricks throughout the industry. Time Trap Photography is dedicated to freezing those special moments in life that can be revisited and admired for generations to come. - Shannon Bourque
Please visit our main site for booking availability and rates.


"Time


Receive valuable industry knowledge delivered free to your email each day.

"Time

Wednesday, March 28, 2018

SLC-OE-01: DIY Portable Doorway

9:22:00 AM

Pictured above is Moishe Appelbaum, of Midwest Photo fame, whom you may remember from Lighting 103.

Moishe is lit with a single small flash. But the gentle wrap of the light—and the soft glow of the suppressed specular highlights—should cue you in to the fact that the light modifier itself is huge.

Today, we'll learn how to make a door-sized modifier DIY style, for about $20 and in a form factor that is super easy to transport. (It collapses down to about the size of a folded light stand.)
__________

For the ten years before I joined the staff of The Baltimore Sun in 1998, I worked for a chain of papers that competed with them. And that sometimes meant competing with a Sun photographer named Jed Kirschbaum.

This was not always an easy thing to do. Jed didn't carry around a lot of lighting gear, because he was great at scrounging light from his environment. Later, when we were staffers together at The Sun, he told me that he always considered doorways to be his own personal giant soft box that he did not have to buy or carry around.

This was very smart. Most every location had a doorway, and it usually separated brighter from darker zones of light. Presto, your own personal giant soft box.

As a light source, a doorway was doubly great for a headshot. Because if you opened the doorway 45 degrees you had not only a soft, giant light source at a 45-degree angle, but also a ready-made background in the door panel itself.

And unlike a window, a doorway created a broad and tall light source big enough for a full-length portrait.

But doors aren't everywere. So eventually I figured out how to cobble together my own substitute for the giant, soft light of a non-existent doorway. And do so in a way that did not excessively impede my wallet or my gear bag.

Off to Home Depot and WalMart

So what we'll be making is a friction-fit "T" frame, supported by a light stand, and using that to support the white twin sheet that serve as our diffusion panel.

For the frame you'll need two items, both super cheap: a 5- or 6-foot section (however they sell them) of 3/4" PVC pipe, and a 3/4" friction-fit "T" connector. We'll be disassembling it for easy transport, so you won't even need any PVC glue.

For the diffuser, you'll need a white twin sheet. I suggest WalMart because the sheets are thin and cheap, both admirable qualities for our purposes.

Making Your Diffuser Panel

It really couldn't be easier. First, let's cut the PVC pipe.

Using pretty much any kind of saw (but hacksaws work great) cut 2- to 3-inch section off of one end of the PVC pipe. Next, cut the remaining long length into two equal pieces. (You don't have to be super exact. Just get it close.) That's all of the PVC cutting we'll be doing today.

Next, we'll prep the sheet.

We are going to cut a slit that will let you mount the sheet to the PVC frame without clamps. In the thickly folded hem that usually signals the head end of your sheet, cut a centered T-shaped slit as shown:

If your PVC is not too long for your sheet you won't even have to cut the ends of the hem, as you can assemble the PCV frame and diffuser sheet right from that center slit.

Putting it All Together

First, slide the small section of PVC into the bottom of the "T" joint. This will make for a better fit to mount the frame to the top of a standard 3/8" light stand fitting.

Second, slide the long PVC pipes into the hem from the center and assemble the frame as shown.

Finally, mount it to a light stand and you're good to go.

Using Your Diffuser Panel

So this thing is great for taking the light from a harsh speedlight and making it absolutely gorgeous. That is because it is so big that each square inch of the sheet is transmitting very little light energy, and that makes for a beautiful wrap and nice speculars.

Generally you'll use this indoors both for the low power of the speedlight and for the suceptibility to wind. But you can totally use it outdoors at dusk on a calm evening as well.

This is an open diffuser, so you have to account for your raw light overspray. Long story short, if you have a background lit by this light source, you'll want to position your flash and diffusor so that the raw light does not land within the frame.

That said, remember to back the flash up enough to get an even spill on the sheet. The the angles and distance will be a balancing act.

You may even want to widen your zoom setting to 24mm, and orient the flash head vertically to help the beam pattern match the shape of the sheet.

(You can make these diffusers more contained with respect to raw spill light, but that is a little more complex and we'll get to it in a future post.)

If you are outdoors at dusk and the post sunset sky is your backdrop, no worries, Just mind your angles to ensure that raw overspray from your flash does not encroach if you are using a backdrop.

For Moishe, above, I am using the backdrop my friend Sara painted for me. Which brings up a good point: If you have a backdrop (or a nice wall, but a backdrop is better) you can use a single speedlight in just about any disused room and create beautiful portrait light in no time flat.

This was exactly the case above, as Moishe dropped by a lighting class we were having in a meeting space at Midwest Photo, and I pulled him in for a quick dozen frames. With a light source this big (bigger, even, than a 60" octa) it's hard to go wrong.

A Couple of Tips

First, get the source as close as possible to your subject. This will help in several ways:

• It'll look fantastic. The wrap and apparent size will create very flattering light.

• It'll be more efficient when used up close. This is always a factor when lighting with speedlights.

• It'll help you control your angles as far as oversprayed raw light hitting the background.

Second, I like to shoot right at the trailing (shadow side) edge of the sheet. Or even to cut a slit nearish to the trailing edge, and shoot through that as shown:

This helps my single light to wrap into the shadow side better—almost like a bit of on-axis fill against my key light.

Third, this light makes an ideal on-axis fill for taming (or cooling) the shadow areas of a multi-light portrait. Because of its size, you can place it right behind you and shoot from in front of it. Gorgeous. (This can also be a nice on-axis key light setup, especially in black and white against a white wall and overexposed.)

Finally, for transport, take one long section apart. Just leave the T-connector and bottom pigtail pipe attached to the other piece. Then use the sheet to wrap it all up together. It transports super easy, wherever you are carrying your light stands.
__________

These things are super easy to buy, make, carry and use. They give you a versatility and look that you simply cannot get with your normal-sized umbrellas and/or softboxes. We'll definitely be using them further along in the Lighting Cookbook.

As far as DIY light mods go, this is as close to a no-brainer as it gets.

FROM: Strobist Lighting Cookbook, Odds and Ends

Let's block ads! (Why?)


Strobist https://ift.tt/2J3Z0qu

Sourced by Time Trap Photography sharing the best photography tips, news and tricks throughout the industry. Time Trap Photography is dedicated to freezing those special moments in life that can be revisited and admired for generations to come. - Shannon Bourque
Please visit our main site for booking availability and rates.


"Time


Receive valuable industry knowledge delivered free to your email each day.

"Time

$10 Ebay Find is Actually a Picture Worth $2 Million of Jesse James

7:02:00 AM

You always read about the occasional story where someone buys an antique only to discover it is worth way more than originally thought or even the occasional purchase of a home with a hidden treasure in the attic.

Luck comes in all forms, and for one Ebay shopper looking for vintage photographs, Lady Fortune delivered a once in a lifetime gift.

The photo in question was a 19th century tintype of the famous western US outlaw Jesse James though no one knew it at the time. After purchasing it, the buyer discovered the photo was not only of Jesse James, but an extremely rare one at that – hence, the huge valuation.

Image via Pixabay from Pexels.com.

Justin Whiting, a resident of Spalding in the United Kingdom, landed upon the photo in 2017 when he was browsing Ebay. He noticed the picture looked very similar to one he found in a book. Feeding his passion for everything about American western outlaws, Justin went on ahead and clicked the buy-it-now button, securing the photograph for $USD 10.

“I noticed the picture for sale — it was $10. It was a bit blurry on the site but when I got it, it was a lot clearer,” Whiting said, “I thought to myself: ‘Gee wizz, this could be a real photo!’ I’ve been obsessed with American outlaws for years and read lots of books and study their faces.”

California-based 19th-century photo expert Will Dunniway confirmed the photo’s authenticity, noting it was a picture of Jesse James at the age of 14.

Dunniway said to Fox News, “It was an easy match since it was compared to a longtime known image of the young Jesse James at 14…Justin’s image, however, was the same pose taken the same day by the same photographer […] [It’s a] one-of-a-kind original that most likely was handled by the teenaged Jesse James himself.”

Jesse James is an extremely famous outlaw known for robbing banks, trains, and stagecoaches throughout the American West.

Let's block ads! (Why?)


Light Stalking https://ift.tt/2GlTzBy

Sourced by Time Trap Photography sharing the best photography tips, news and tricks throughout the industry. Time Trap Photography is dedicated to freezing those special moments in life that can be revisited and admired for generations to come. - Shannon Bourque
Please visit our main site for booking availability and rates.


"Time


Receive valuable industry knowledge delivered free to your email each day.

"Time

How to Start Building Your Photography Filter Kit

5:32:00 AM

At its very heart, landscape photography is about capturing light on a sensor (or film, if you’re still shooting the old-fashioned way). Photography filters provide a unique way to control and modify that light to create some stunning images like the one you see below.

But how do I go about building my photography filter kit?

If you are just starting to think about getting filters, the process can be confusing due to the many options that are available. In this article, I attempt to explain what factors to consider when you start to build your filter kit.

Understanding Filters

The first thing you need to learn about filters is what they do and how they affect your images. This helps determine which filters to purchase and how to use them effectively to capture photos like this one from Iceland.

A circular polarizer is the first filter I would purchase. This filter reduces or removes the glare from a reflective surface caused by scattered light. While there are plenty of  circular polarizer effects software presets, there is no way for software to accurately reproduce the effects of a circular polarizer. You can see the effect of a circular polarizer in the image below.

  • Without Circular Polarizer, Haleakala National Park, Maui, Hawaii (HI), USA

  • With Circular Polarizer, Haleakala National Park, Maui, Hawaii (HI), USA

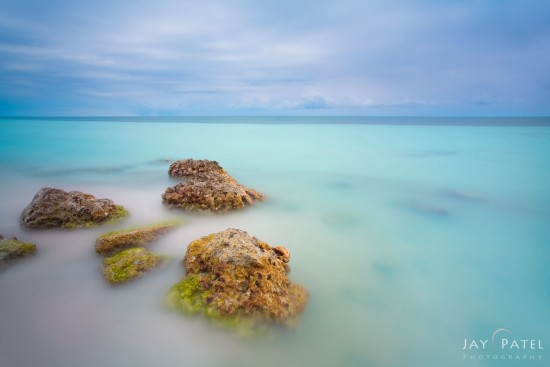
ND filter is my second choice. This filter cuts down the light entering the camera and allows you to slow down your shutter speed. We use this filter to produce the silky smooth effect in the water as seen in the image below.

Iceland

An ND filter allows you more options to explore creativity as seen in this video.

If your Photoshop skills are exceptional, you may be able to manually produce a few ND filter effects. However, this takes a lot of time and effort and is, at best, an approximation of what a real filter can do. An ND filter comes in different strengths. For someone who is just starting out, I suggest one between 4 and 6 stops. If you can afford it, I suggest picking up two ND filters – one between 4 to 6 stops and a 10-stop  filter.

Graduated Neutral Density (GND) filters can be used to reduce the dynamic range of the scene you are photographing. They also allow you to capture proper details in both highlights and shadows. Today, HDR software can very effectively replicate the effects produced by this filter. If you are on a budget, this is one filter that you can skip. If you were going purchase this filter, I suggest purchasing a 3-stop soft GND filter. This is one of our most used filters. Here are couple of images taken using the GND filters…

  • Napili Beach, Maui, Hawaii (HI), USA

  • Vestrahorn, Iceland

Type of Filters

GND and ND filters can be square or rectangular filters or circular filters. We highly recommend that you start building your filter kit using square filters. You must also purchase a filter holder and a carrying case but this allows you to extend your filter kit as needed. A filter holder can also accommodate different size lenses with just a step-up ring. We typically purchase a filter holder to fit the lens with the largest front element and then get step-up rings for smaller lenses.

How to Purchase

If you decide to go this route, you must purchase a circular polarizer that works with your filter holder without producing vignetting on your widest lens. It is best to purchase a filter kit from a single vendor as it is easier to ensure that different parts fit together properly. If you decide to combine filters from different vendors, do your research to ensure that all the elements properly fit together.

If you are in the market for a new filter kit, we have partnered with Benro Filters to design the Visual Wilderness Filter Kit to get you started. You can order it using the link below and get 10% off.

10% Off Visual Wilderness Filter Kit by Benro Filters

About Author Jay Patel

I could startoff like this – “Seeds of Jay Patel’s appreciation for beautiful places were planted early in his childhood….” but it would get boring really fast. I will just sum it up and say that I am a Landscape and Wilderness Photographer who loves to capture dramatic light. My photographs have been published in various magazines, calendars and advertising materials throughout the world.
Patience is a virtue...unless you are chasing your dreams

Let's block ads! (Why?)


Visual Wilderness https://ift.tt/2pJYWEm

Sourced by Time Trap Photography sharing the best photography tips, news and tricks throughout the industry. Time Trap Photography is dedicated to freezing those special moments in life that can be revisited and admired for generations to come. - Shannon Bourque
Please visit our main site for booking availability and rates.


"Time


Receive valuable industry knowledge delivered free to your email each day.


"Time

28. März 2018

4:04:00 AM

Das Bild des Tages von: Rona Keller


kwerfeldein – Magazin für Fotografie https://ift.tt/2pNcKwT

Sourced by Time Trap Photography sharing the best photography tips, news and tricks throughout the industry. Time Trap Photography is dedicated to freezing those special moments in life that can be revisited and admired for generations to come. - Shannon Bourque
Please visit our main site for booking availability and rates.


"Time


Receive valuable industry knowledge delivered free to your email each day.


"Time

Tuesday, March 27, 2018

10 Post-Processing Terms Every Photographer Should Know

12:07:00 PM

Post-processing a photograph can range from basic image adjustments to extensive editing and retouching. Your choice of post-processing workflow really depends on what you want to achieve. If you post-process your photographs often, it helps to have a standard workflow with a set of defined steps irrespective of the photo-editing software you utilize, to save time and get consistent results.

Post-processing can bring out the best in a photograph. Photo by Giuseppe Milo

Here is a list of ten post-processing terms that every serious photographer should have a good understanding of. Not only will it make you more confident in your post-processing, it will also help you have a better control over the process and get creative at the same time. The terms or the tools mentioned in this post are relevant to most of the popular photo-editing programs out there.

If you'd like to get better at post-processing and learn how to use a dedicated workflow to edit your photos, take a look at Kent DuFault's guide on fundamental editing.


1. Curves / Tone Curve

Curves or the tone curve is a powerful tool for adjusting tones – to add contrast, brighten, darken, or adjust colors in an image. It is a visual representation, similar to the histogram, that allows you a whole lot of control and versatility whether you want to brighten a dark scene, enhance contrast and color, check for clipped pixels, or make color corrections to the image. You can learn more about it here.

An S-curve adjustment boosts contrast and saturation. Photo by Bud Ellison

2. Saturation and Vibrance

Enhancing color saturation is a common step in almost every post-processing workflow. While saturation affects the intensity of all colors in your image, the vibrance slider only affects the more muted colors and does not alter the skin tones and already saturated colors, giving you a better control over how you want the colors to appear in the final image. Read more about the difference here.

A comparison of vibrance and saturation adjustment made to an image. Photo by Bodey Marcoccia

3. Sharpening

As the name suggests, sharpening improves the details in the image by boosting sharpness. Almost all photographs, from portraits to landscapes, can benefit from sharpening. The amount of sharpening depends on the end use of the image – whether it's going to be viewed on a digital screen or be printed. You can learn about the different sharpening techniques here.

Image sharpening helps bring out the finer details in a shot, like the details in this cityscape. Photo by Studio Incendo

4. White Balance

The color of the light impacts the way your photographs look. The White Balance setting can help you adjust for the varying light conditions and take care of color casts, if any. It can be adjusted in-camera while capturing the shot, or you can change it in post-processing if you photograph in raw. To know more about white balance and color temperature, do check out the post here.

The White Balance setting can help you color correct an image or create a mood of your choice. Photo by Bruno Girin

5. Highlights, Shadows and Midtones (and the Histogram)

The brightest regions in an image are referred to as highlights, the darkest ones as shadows and everything in between as midtones. A histogram is a representation of the distribution of pixels in an image based on their brightness (or luminosity), the leftmost region representing shadows and the rightmost, highlights. A good understanding of the histogram allows you to get the most out of curves (#1 above), and achieve the desired exposure and contrast. Learn more about it here.

An image with its histogram. The histogram is skewed to the left as there are a lot of dark areas (shadows) in the image. Photo by jpeter2

6. Noise

Noise is the visible, grainy look in your image that can arise out of various factors. Shooting at a high ISO, long exposures and careless editing can all contribute towards image noise, among other reasons. No matter how much you avoid it, noise can still creep into an image. There are different ways you can reduce noise in post-processing to improve the quality of the photograph. Check out the post here to learn more.

Sometimes image noise works towards adding a mood to the photograph like in this one. At other times, you can remove noise in post-processing. Photo by Marketa

7. Blending

Blending, as the name suggests, is a technique to combine two or more versions of the same shot in a post-processing software to create a final image that aims to achieve, among other results, a better exposure (exposure blend), wider depth of field (focal length blend), or perspective (panorama or vertorama). To learn more, take a look at the post here.

Focus stacking allows you to create a wider depth of field than what is possible in a single shot by blending multiple shots with different focus planes, which is especially useful in macro photography. Photo by Gabriel González

8. Masking

Masking is a powerful tool in Photoshop when working with layers. It allows you to selectively make changes to a layer without affecting the other layers, and helps you perform non-destructive editing. Learning how to utilize masks in your photo-editing can help you employ more advanced techniques with ease. Read more about masking here. Also, give luminosity masks a try.

Masking allows you to selectively edit portions of an image in a non-destructive way, like enhancing the foreground and the sky here using two separate adjustment layers. Photo by Robert J Heath

9. Dodging and Burning

Dodging refers to lightening the tones, and burning refers to darkening the tones. This technique has been employed since the darkroom days to increase the tonal range, mostly with B&W images. Dodging and burning allows you to direct the viewer's attention and focus to the subject of the image. Learn more about it here.

Dodging and burning allows you to selectively brighten and darken areas of the image to enhance the tonal range. Photo by Thomas8047

10. HDR (High Dynamic Range)

The dynamic range of an image refers to the amount of light captured in the given scene. A high dynamic range (HDR) would refer to a wider range of lights in the scene, that is, regions of bright parts (highlights) as well as regions of dark areas (shadows). Cameras have a limited dynamic range that they can capture in a photo, but in post-processing you can combine multiple exposures (exposure blending from #7 before) to create an image that shows details in both highlights and shadow regions of the image. Check out the post here to learn more.

An HDR image with details in highlights as well as shadows. Photo by Photographer No.9


Get Better at Post Processing

If you want to get the most out of your photos by utilizing the power of post-processing but do not know where to start and how to proceed, we have a solution for you – The Ultimate Guide to Fundamental Editing. This bestselling guide gives you a step-by-step post-processing workflow to help you create great-looking photos efficiently and consistently, using popular programs like Lightroom, Elements and Photoshop. Click here now to check it out.

Let's block ads! (Why?)


Light Stalking https://ift.tt/2pKk4dD

Sourced by Time Trap Photography sharing the best photography tips, news and tricks throughout the industry. Time Trap Photography is dedicated to freezing those special moments in life that can be revisited and admired for generations to come. - Shannon Bourque
Please visit our main site for booking availability and rates.


"Time


Receive valuable industry knowledge delivered free to your email each day.

"Time

Photographers Banned from Sushi Restaurant For This Faux Pas

7:09:00 AM

When you go to a sushi restaurant, especially in Japan, you’ll often note how clean and sterile the environment can be. Much more so than your average restaurant, sushi restaurants concern themselves with the cleanliness of their surroundings and the product itself. It’s key to the customer experience that the fish be perceived as safe and that the establishment they choose to visit have a reputation for high standards.

In Japan it is common for some sushi restaurants to prepare the sushi beforehand and place it on a moving conveyor belt for customers to choose what they want. Rather than consuming time with individual orders, this assembly line of raw fish keeps customers eating and the sushi restaurant humming along.

Image via Skitterphoto from Pexels.com.

That is, until an American YouTuber places his camera on the conveyor to capture first-person footage of the restaurant. The video was wildly popular and garnered a lot of views before being removed from the platform.

A couple of things are wrong with this scenario. One, his camera is probably less than sanitary and he placed it on a conveyor belt for raw fish products. Second, filming people without their permission is kind of a bad move. The whole thing is awkward and really devoid of consideration.

In response, the sushi restaurant where this occurred has banned photography. Sushiro said: “It is not permissible from the viewpoint of hygiene management and the privacy of visitors who visited us…We will consider strict response including legal measures.”

As Resource Mag Online points out, this is not the first video to do this kind of thing. But it is the first video to feature faces and perhaps violates privacy. A good rule of thumb is to just try to stay to yourself when enjoying a public atmosphere with strangers and just live your life, reserving the twee moments for television and Hollywood.

Let's block ads! (Why?)


Light Stalking https://ift.tt/2pIk9hK

Sourced by Time Trap Photography sharing the best photography tips, news and tricks throughout the industry. Time Trap Photography is dedicated to freezing those special moments in life that can be revisited and admired for generations to come. - Shannon Bourque
Please visit our main site for booking availability and rates.


"Time


Receive valuable industry knowledge delivered free to your email each day.


"Time

27. März 2018

4:02:00 AM

Das Bild des Tages von: David Stones


kwerfeldein – Magazin für Fotografie https://ift.tt/2GzXuOx

Sourced by Time Trap Photography sharing the best photography tips, news and tricks throughout the industry. Time Trap Photography is dedicated to freezing those special moments in life that can be revisited and admired for generations to come. - Shannon Bourque
Please visit our main site for booking availability and rates.


"Time


Receive valuable industry knowledge delivered free to your email each day.


"Time

Monday, March 26, 2018

Grab a Red Wine and get Comfortable to Read The Best Photography Links of the Week

6:04:00 AM

The Toad has been away working on location quite a bit lately and we finally find him back at his desk working on a new weekly list of links to tutorials, special features and great photography. This week's list covers a wide variety of genres and subjects, all posted and shared online by some of the best artists and writers working in the field today. We really hope you enjoy this compendium of links as much as the Toad did himself in bringing it to you.

TUTORIALS

Bite Size Tips: How to Get the Perfect Exposure with a Histogram – this article is a great primer for learning how to fully leverage the built-in histogram feature of our modern digital cameras. Mastering the application of the histogram is a very powerful feature available in contemporary cameras that can help you visualize the quality of the exposure which often results in better images.

Maria Eklind

Maria Eklind

How to enhance colors in sunset photos with a single layer, and get optimal results – in many cases when it comes to photo post-production the simplest methods create great results, as we see here in this short 5 minute video tutorial that shows us how to use a channel mixing technique in Photoshop to accent vibrant colors in the sky in landscape shots. This is definitely a good technique to have available in your own workflow.

7 Ways to Make Your Photos More Interesting – we all strive to capture those images that please our inner artist by expressing a personal style. This short tutorial covers 7 key points that can help you focus in achieving your goals, and it also includes great shots along the way to help you visualize the topic being covered.

甲蟲

甲蟲

Easily Balance Flash With Natural Light – using a single strobe or speedlight in a natural light situation can produce amazing results in terms of portraiture. This short video presentation shows us how to quickly and easily take advantage of these techniques and includes some great sample shots to show you the final images.

How to Isolate a Moving Subject: Panning for Beginners – learning how to fully leverage panning techniques is an important skill for those of us who strive to capture dynamic shots that include a strong sense of motion. This short video tutorial covers the basics of how best to capture this genre of image through an understanding of the various working elements used in this technique.

Coline Buch

Coline Buch

Tips for Creating Stunning Images of Seascapes – capturing compelling seascape shots is a skill all its own that requires different techniques from other types of photography. This video tutorial covers this style of photography in just over 11 minutes and includes some breathtaking sample shots sure to inspire you in your own quest.

SPECIAL FEATURES

Photographer Travels the Globe to Capture ‘The World in Faces – photography has the power to transcend geography in the case of Alexander Khimushin,a Queensland, Australia-based photographer who has traveled to many different countries in a quest to capture as many portraits of the people who live there as possible. This selection of images from his project each tell a story of the person pictured, and for those who love diversity and the art of portraits, this post is a real highlight in this week’s list.

Kevin Gill

Kevin Gill

This Photographer Snuck Into the Wrecked Cruise Ship Costa Concordia – the rusty and dirty remains of the infamous Costa Concordia tell a haunting story of a first-class cruise ship after it was sunk in a terrible accident. These images capture what is left in the ship just before the dismantlement process was undertaken, creating a compelling catalog of shots and a great video presentation of this sad story.

Martin Gonzalez’s Hypnotic Black and White Seascapes – this great interview frames a series of black-and-white seascape shots that possess a deep sense of wonder and magic for the viewer. The insight provided in the interview adds a perfect layer to the overall presentation, sure to inspire you to follow your own passions in the field of photography.

Rolf Dietrich Brecher

Rolf Dietrich Brecher

19 Places to Find Free Stock Images for Commercial Use – this collection of websites is useful for those looking for online resources that provide free stock images for commercial use. Great sample shots are included with the listings, giving you an idea of the quality that is available on these sites.

GREAT PHOTOGRAPHY

Budapest Noir – Jason Row uses black-and-white post-processing to emphasize the inherent drama found observing the Hungarian Parliament in Budapest at night. The spectacular architectural elements of this grand building are underscored in this composition by the smooth reflections of light beaming across the waterway towards the spot where the photograph was taken.

Chairman of the Joint Chiefs of Staff

Chairman of the Joint Chiefs of Staff

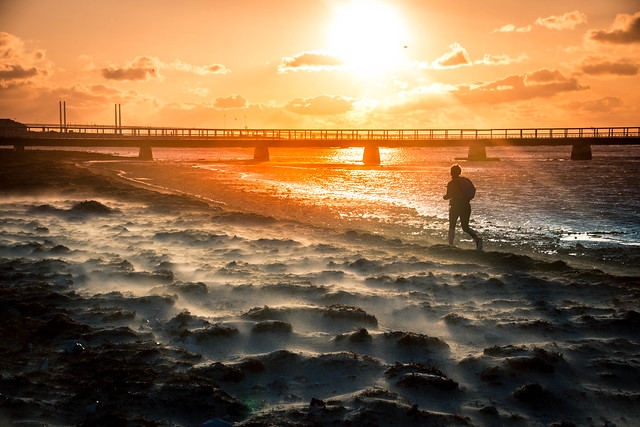
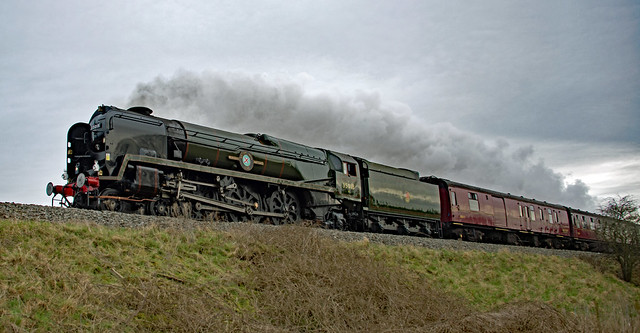
Manarola twilight – soft pastel colors creates swatches across the sky as the day’s light gives way to evening in this wonderful shot from Jim Nix. This tiny community in Italy sits perched on the steep cliffs that overlook the ocean, with wonderful buildings and homes that create the sense of character the region is so well known for.

Purple colors – for those who love and appreciate the vibrancy of the color purple, this is a must-see shot for this week, captured and shared by Lensup. Captured in southern France this wonderful photograph features rows of lavender that form perfect leading lines into the picture where a terrific sky creates a perfect finishing element.

Official U.S. Navy Page

Official U.S. Navy Page

Spanning the Columbia – Astoria, Oregon – Len Saltiel does a great job in capturing a shot of a landmark bridge on the west coast of the US, one that is 4 miles long and is widely considered to be the longest continuous truss bridge in North America. The bright blue skies create a perfect canvas for the architectural wonder to stand out against as it creates a strong leading line that culminates in a vanishing point in the distance.

Rock Tower – there is an intrinsic romance found in pictures with lighthouses as the primary subject, as we see here in this warm shot by Alexander Riek. As the sun hangs low on the horizon for this picture, it casts a golden hue across the scene and the face of the lighthouse itself, creating a strong feeling of hope and joy.

Gabriel González

Gabriel González

Howler Monkey – as Ron Niebrugge visits a place that is on my personal bucket-list, Costa Rica, he comes away with a detailed portrait of a Howler Monkey hanging from a tree as it stares back at the camera. Ron’s shot does a great job of capturing the wonderful personality these creatures are known for as it hangs about in its natural habitat.

Ancestral Roots – Enrico Fossati captures a moody and ethereal shot deep in the forest that focuses on the incredible root structure found at the base of a large moss-covered tree. A thin fog lingers over the scene, muting the colors and enhancing the overall feel of the picture.

Andrew

Andrew

The Trundle hill at Fall – beautiful colors in the trees create a warm set of tones that find harmony with the collection of sheep milling about the countryside in this wonderful bucolic shot from Barry Turner. This shot exhibits great detail along with various layers that help to create the overall mood.

Golden sunset over pacific ocean – a stunning sunburst peers through an opening in a natural rock formation that leans out towards the open ocean on the shore in this great picture from David Dai. David drags the shutter a bit in taking this shot which smooths out the energetic waters as they lap against the beach to complete this wonderful composition.

Bob Tilden

Bob Tilden

Barnstorm – my personal penchant for old and weathered barns finds ultimate satisfaction in this terrific shot from Michael Criswell. The patina on the old wood that comprises the structure of this well-loved barn reveals the years of harsh climate and use that has gone into the making of the character found here.

End of the Day – there is just something mysterious and magical about the sun as it sits just above the horizon at the end of day, creating warmer color tones and adding a great feel to a scene. This shot from Ricardo Mateus looks out over the open waters as a lone sailboat and its occupants ready for the coming nightfall, taking advantage of the perfect conditions.

Metropolitan Transportation Authority of the State of New York

Metropolitan Transportation Authority of the State of New York

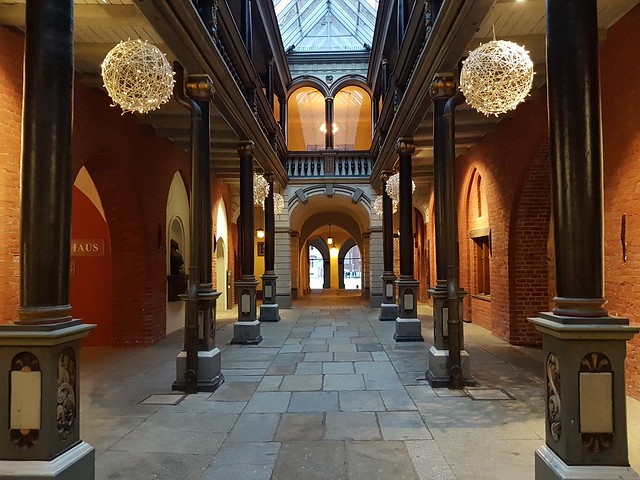
the soaring ceiling – intricate architectural details come to life in this tack sharp shot of the interior of an incredible cathedral located on Prince Edward Island in the eastern region of Canada. Frank King’s shot takes advantage of the incredible scale of the space to capture all the delicate features of the design for all to view and enjoy.

november fog – Kai Ziehl creates a composition that exudes the eerie feeling of a fog-shrouded scene found at a bridgeway as a lone person walks away in the distance. The finishing of this shot as a black-and-white enhances the overall moodiness of the scene, highlighting the sense of drama and artistic tension.

David Santaolalla

David Santaolalla

Fill Er Up – CJ Schmit delivers a great monochromatic shot that features the front facade of what looks to be a very old gas station. Regardless of whether or not this is an authentic gas station, the nostalgia captured in the frame whisks the viewer back in time to a point where things old and weathered had true character.

Upper Antelope Canyon – I just love the abstract swirls and shapes created by this natural rock phenomenon found in the world-famous Antelope Canyons as captured by Evan Gearing. The natural geometrical shapes and openings that allow in the light create amazing color artifacts that play with light and shadow, drawing you in as your eye wanders through the image.

Marco Verch

Marco Verch

A Strange, Soggy Beauty – many photographs find beauty and allure in things that are not widely considered to be such, and close-up studies of these things can be a compelling artform for those interested in taking a deeper look. In this pair of shots from Laurie MacBride we see the remnants of autumn and the decaying effect time has on all things eventually.

Gluggafoss Iceland – the island of Iceland is on my bucket-list of must-see places with all of it’s incredible landscapes and waterfalls. Urs Schmidli captures a stunning long-exposure piece to share here that features one of these majestic waterfalls, with the exposure time smoothing out the fast moving waters set against the lush greens of the surroundings.

Fushimi Inari Shrine – repeating shapes and colors dominate the frame in this great shot from Barbara Youngleson that uses the lines of the red posts of an old shrine in Kyoto, Japan as a main compositional element. Barbara’s unique composition with this image blends in natural elements of the surrounding trees with the vibrant colors of the shrine to create this strong picture.

Fouquier ॐ

Fouquier ॐ

The Dark Side – talk about crushing the blacks here, this dramatic photograph by Ricardo Mateus is a pure exploration of contrast against subtle light that peers out through a thick cloud cover. The bridge that forms the prime subject in this shot also creates a strong leading line, and the long-exposure time smooths out the waters in this epic black-and-white piece.

Drop stories – all the magic and wonder found in the convex surface of a water drop creates a wondrous lens into our local universe as explored and shared here in this selection of shots shared by Mathias Lucas. This is a great set of this genre of photography with each picture capturing a unique essence of this phenomenon in the context of a single still frame.

Let's block ads! (Why?)


Light Stalking https://ift.tt/2IRa7D7

Sourced by Time Trap Photography sharing the best photography tips, news and tricks throughout the industry. Time Trap Photography is dedicated to freezing those special moments in life that can be revisited and admired for generations to come. - Shannon Bourque
Please visit our main site for booking availability and rates.


"Time


Receive valuable industry knowledge delivered free to your email each day.

"Time

About Us

Time Trap Photography is dedicated to freezing those special moments in life that can be revisited and admired for generations to come. - Shannon Bourque

The lens in focus

“Life is like a camera. Just focus on what’s important and capture the good times, develop from the negatives and if things don’t work out, just take another shot.” — Unknown

TIME TRAP PHOTOGRAPHY COPYRIGHT 2016