Wednesday, March 31, 2021

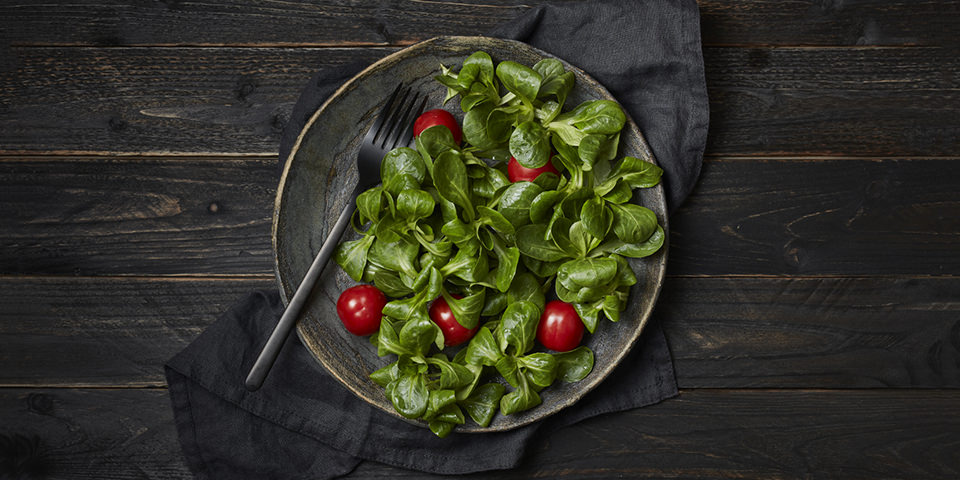
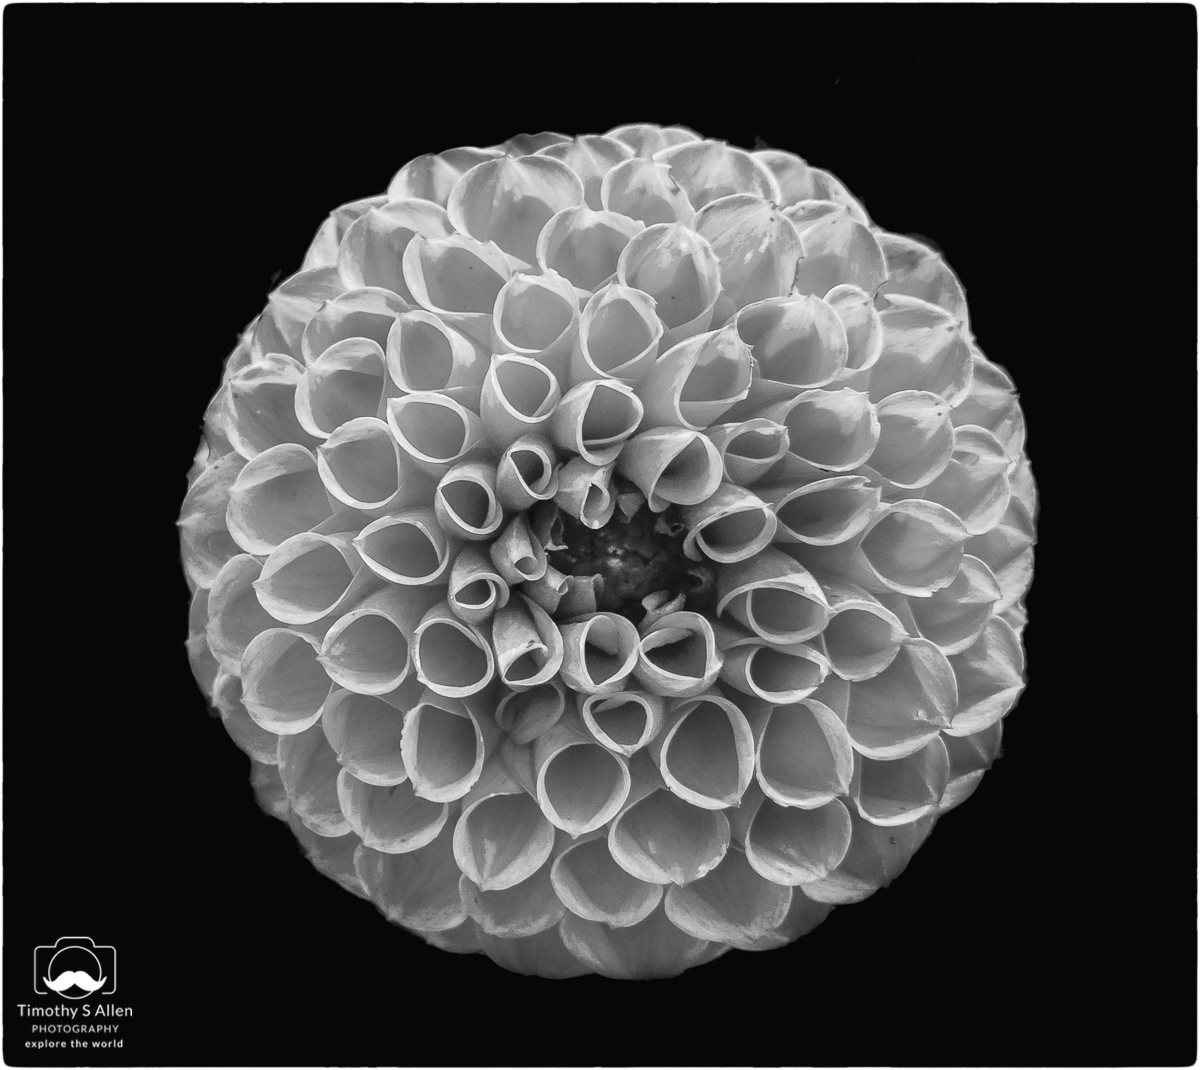
Ein Jahr Food-Fotografie

10:18:00 PM

Feldsalat mit Tomaten

Ein Beitrag von: Wolfgang Heyder

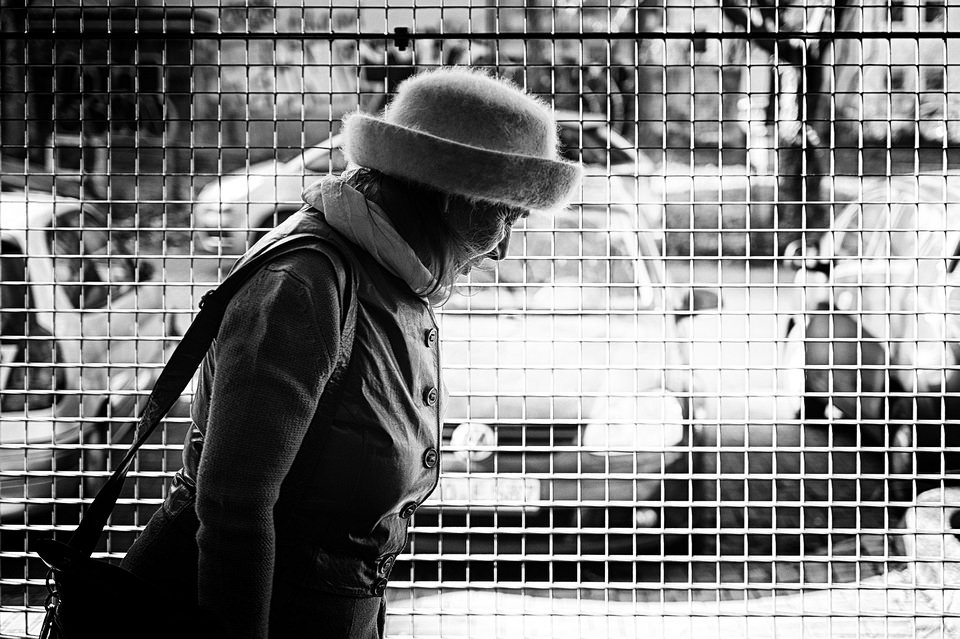
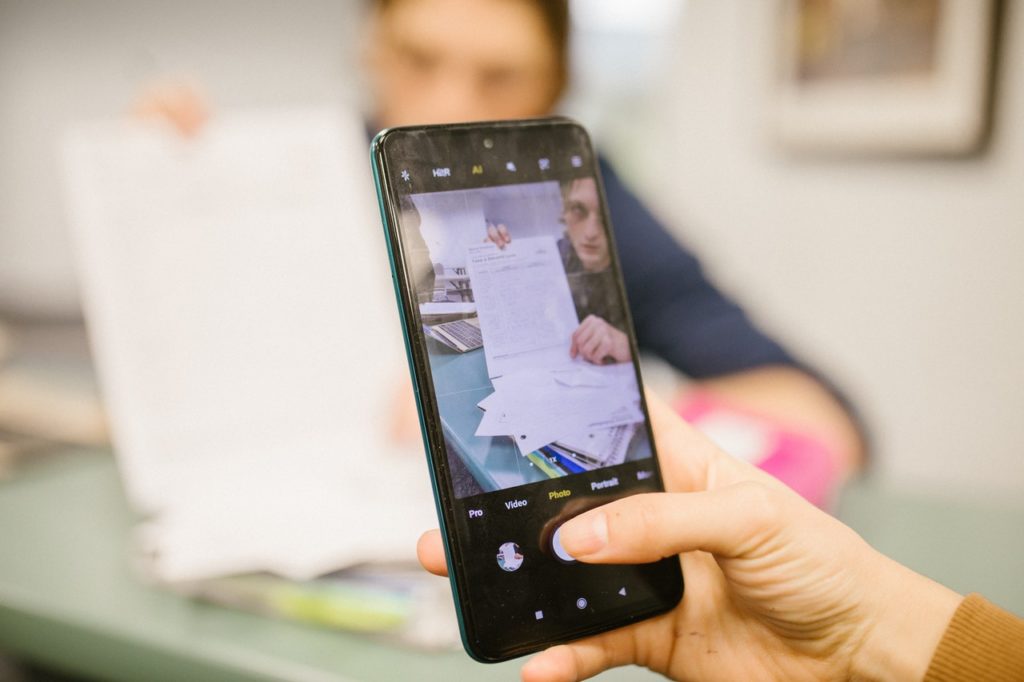
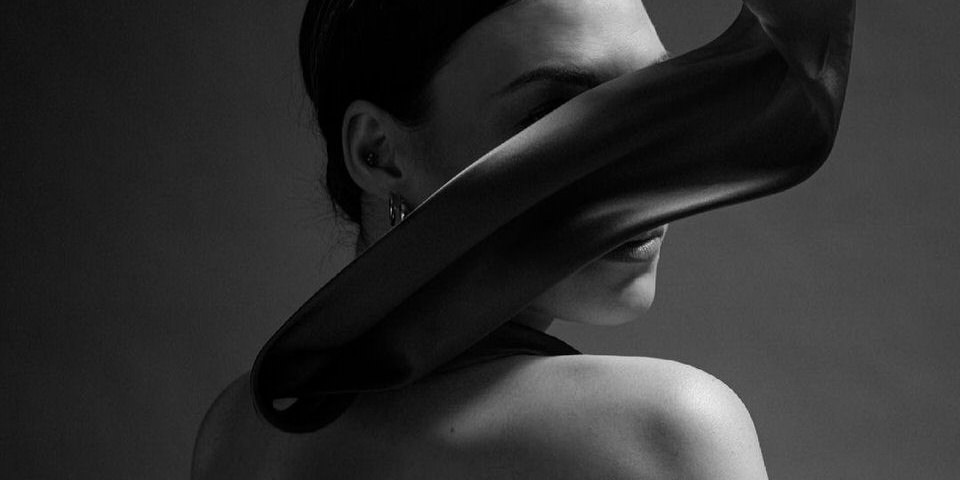
Ich fotografiere seit über 15 Jahren Menschen – am liebsten Schwarzweißportraits. Dann begann die Corona-Pandemie und es war kaum noch möglich, mit Modellen zu arbeiten. Doch ich wollte die Kamera nicht einfach in den Schrank legen. „Also was tun?“, war die Frage. Vor ein paar Jahren hatte ich an der Lette-Akademie in Berlin an einem Tagesworkshop zum Thema Food-Fotografie teilgenommen, das Thema dann aber nicht weiterverfolgt.
kwerfeldein – Magazin für Fotografie https://ift.tt/3u5L066

Sourced by Time Trap Photography sharing the best photography tips, news and tricks throughout the industry. Time Trap Photography is dedicated to freezing those special moments in life that can be revisited and admired for generations to come. - Shannon Bourque
Please visit our main site for booking availability and rates.


"Time


Receive valuable industry knowledge delivered free to your email each day.


"Time

Say Goodbye to a Bunch of Canon DSLR Lenses

9:49:00 PM

Rumors indicate that Canon will add more DSLR lenses to its discontinued products list.

Photo by 60mm f/2.8 Macro USM from Canon.

The latest news from Canon Rumors reports that Canon will now add 60mm f/2.8 Macro USM, 70-200mm f/4 L IS USM II, 85mm f/1.2L USM II, and 200mm f/2L I USM to the previously announced EF 40mm f/2.8 STM cancellation. 

Even though these products will no longer be available, there’s still some stock in many retailers so, if you’ve been on the fence about buying one of these lenses, you might want to take the leap and buy one before they’re gone for good. 

Even with these products being canceled, Canon is plunging ahead with some interesting concepts on the lens front. In fact, we reported on one just the other day. Apparently, Canon is looking into a version of the camera lens that replaces the focus ring with a touchpad. 

As we reported then, “the patent filing describes a lens with a touchpad that is sensitive to clockwise and counterclockwise. The patent further specifies the speed at which the lens operates being linked to the speed at which the user moves their fingers on the touchpad.”

In other news, Canon is also bringing out an AI-powered device called the PowerShot PICK. None of this is really surprising given the company’s predictions for the future and its outlook on the digital camera market. As we reported earlier this year, Canon will increasingly focus on services as a growth division going forward and an AI camera device, among other products, fits in with that strategy. 

What do you think of Canon’s retraction in the DSLR lens market? Let us know your thoughts on Canon’s decisions in the comments below.

Be sure to check out our other photography news on Light Stalking at this link right here.

[PetaPixel]

What We Recommend to Improve Your Photography Fast

It's possible to get some pretty large improvements in your photography skills very fast be learning some fundamentals. Consider this the 80:20 rule of photography where 80% of the improvements will come from 20% of the learnable skills. Those fundamentals include camera craft, composition, understanding light and mastering post-production. Here are the premium guides we recommend.

  1. html cleaner  Easy DSLR –  Friend of Light Stalking, Ken Schultz has developed this course over several years and it still remains the single best source for mastering your camera by identifying the main things that are holding you back.
  2. Word to html  Understanding Composition – As one of the core elements of a good photograph, getting your head around composition is essential. Photzy's guide to the subject is an excellent introduction. Their follow-up on Advanced Composition is also well worth a read.
  3. Word to html  Understanding Light – Also by Photzy, the other essential part of photography is covered in this epic guide and followed up in Understanding Light, Part 2. This is fundamental stuff that every photographer should aim to master.
  4. Word to html  5 Minute Magic Lightroom Workflow – Understanding post production is one of the keys to photographs that you will be proud of. This short course by one of the best in the business will show you how an award-winning photographer does it.

Let's block ads! (Why?)


Light Stalking https://ift.tt/31zW935

Sourced by Time Trap Photography sharing the best photography tips, news and tricks throughout the industry. Time Trap Photography is dedicated to freezing those special moments in life that can be revisited and admired for generations to come. - Shannon Bourque
Please visit our main site for booking availability and rates.


"Time


Receive valuable industry knowledge delivered free to your email each day.


"Time

31. März 2021

4:18:00 AM

Das Bild des Tages von: Peter Grossmann

Frau vor Gitter, dahinter Autos

Im Ausblick treffen wir die Dame mit dem weißen Hut.
kwerfeldein – Magazin für Fotografie https://ift.tt/3m8azAJ

Sourced by Time Trap Photography sharing the best photography tips, news and tricks throughout the industry. Time Trap Photography is dedicated to freezing those special moments in life that can be revisited and admired for generations to come. - Shannon Bourque
Please visit our main site for booking availability and rates.


"Time


Receive valuable industry knowledge delivered free to your email each day.


"Time

Tuesday, March 30, 2021

Wie viele Bilder braucht ein guter Bildband?

10:18:00 PM

Auf kwerfeldein schauen wir uns regelmäßig Bildbände an und ich persönlich berate bei Bildauswahl und Bildstrategien, weshalb ich heute mal wieder an der Reihe bin, die wöchentliche Frage aus der Community zu beantworten.
kwerfeldein – Magazin für Fotografie https://ift.tt/3dlHeyP

Sourced by Time Trap Photography sharing the best photography tips, news and tricks throughout the industry. Time Trap Photography is dedicated to freezing those special moments in life that can be revisited and admired for generations to come. - Shannon Bourque
Please visit our main site for booking availability and rates.


"Time


Receive valuable industry knowledge delivered free to your email each day.


"Time

Snap Allegedly Developing Next-Gen Version of the Spectacles and a Selfie Drone

7:49:00 PM

Snap’s loud venture into wearable devices probably didn’t go as well as the company had hoped given that Spectacles aren’t really a thing even though they are now in their third generation.

Photo by Rodnae Productions from Pexels.

Nonetheless, it looks like the Instagram competitor is willing to give it another go.

PetaPixel picked up a report from Engadget and The Information that indicates the company formerly known as Snapchat is not only working on a next-gen version of the Spectacles aimed at creators and developers but also is looking to potentially get into the UAV business with a selfie drone.

This is all slated to be announced in May according to these reports. The alleged selfie drone is tied to Snap’s acquisition of Ctrl Me Robotics as well as what The Information reported was a funding interest in Chinese company Zero Zero Robotics though the chief exec of that company is now saying that Snap didn’t provide them with any funding. PetaPixel further reports that the burden of developing a selfie drone is largely being shouldered by in-house engineering.

All of this makes us recall that time that action camera company GoPro decided to make its own line of drones – only to unceremoniously withdraw from the market after losses piled up.

Of course, if we take the Spectacles as an example of the kind of scale of device that Snap could be developing, we doubt the company will commit a huge amount of development funds to a selfie drone. But crazier things have happened.

Did you own or use Snap’s Spectacles? What’s your opinion of a version that could incorporate AR? What about a selfie drone? Let us know your opinion on Snap’s rumored slate of new products in the comments below.

Don’t forget to check out our other photography news articles on Light Stalking at this link right here.

[PetaPixel]

What We Recommend to Improve Your Photography Fast

It's possible to get some pretty large improvements in your photography skills very fast be learning some fundamentals. Consider this the 80:20 rule of photography where 80% of the improvements will come from 20% of the learnable skills. Those fundamentals include camera craft, composition, understanding light and mastering post-production. Here are the premium guides we recommend.

  1. html cleaner  Easy DSLR –  Friend of Light Stalking, Ken Schultz has developed this course over several years and it still remains the single best source for mastering your camera by identifying the main things that are holding you back.
  2. Word to html  Understanding Composition – As one of the core elements of a good photograph, getting your head around composition is essential. Photzy's guide to the subject is an excellent introduction. Their follow-up on Advanced Composition is also well worth a read.
  3. Word to html  Understanding Light – Also by Photzy, the other essential part of photography is covered in this epic guide and followed up in Understanding Light, Part 2. This is fundamental stuff that every photographer should aim to master.
  4. Word to html  5 Minute Magic Lightroom Workflow – Understanding post production is one of the keys to photographs that you will be proud of. This short course by one of the best in the business will show you how an award-winning photographer does it.

Let's block ads! (Why?)


Light Stalking https://ift.tt/3wfhY5N

Sourced by Time Trap Photography sharing the best photography tips, news and tricks throughout the industry. Time Trap Photography is dedicated to freezing those special moments in life that can be revisited and admired for generations to come. - Shannon Bourque
Please visit our main site for booking availability and rates.


"Time


Receive valuable industry knowledge delivered free to your email each day.


"Time

How To Retouch Photos Using The Power Of Frequency Separation

7:49:00 AM

The goal of this article is to give the reader, that’s you, a clear understanding of what frequency separation is. Now you may think that FS is the anxiety a photographer feels when he or she is repeatedly separated from their camera gear, or better yet, maybe FS is the extreme anxiety audiophiles experience after too much time away from their stereos, but happily, for you and me, neither of these “one-liners” is true. In reality, frequency separation is the commercial retoucher’s secret weapon, and now you can learn to use it as well.

Let's pretend for a moment – what if the separate detail and color information of a digital image, your photograph, could be easily separated for retouching, and what if by separating these colors and details into two layers, you could work on one aspect without affecting the other; or Is that even possible? And how about this – what if you could make all sorts of corrections in a portrait, for example, could you still retain the natural textures of the skin?

Well you already know the answer, it’s called “frequency separation”. By dividing your image into two separate layers, one layer being the high frequency information, which contains all the detail in your photograph, and the other being the low frequency layer which contains all the tonal and color information. Sure, some people will prefer the usual retouching tools and methods, including airbrushing, clone stamp tool, Gaussian blur, healing brush, and so on, but frequency separation retouching will give you another option for enhancing not only your portraits but landscapes/cityscapes and inanimate objects as well. Whether you’re working with RAW images or JPEGs, you can learn to utilize the power of FS to improve your photos.

A: Combines the high and low frequency layers; B: Contains no detail but all the color (low frequency layer); C: Contains no color but all the detail (high frequency layer)

Lesson #1 – Basics

There are many frequencies in every photo, and each of these frequencies contains information based on the size of the image. Every image can be broken into low and high frequencies. Much like music that can be represented by sine waves, you can break up a photographic image into high frequency and low frequency layers.

High frequencies that contain fine details, like skin imperfections, hair, skin pores, grains of sand, and stone textures, whereas the low frequencies carry information about an image's colors, lights, shadows color, and tone – think sky, soft clouds, and marshmallows.

Imagery encoded digital information 

The high frequency layer in your photographs includes fine details like skin texture, hair, wrinkles, pimples, pores, or even the stitching in fabric, all of which easily shows up on today’s high-resolution cameras. Everything you see when you look at an image closeup. The low frequencies carry information about an image's colors, tonal transitions, lights, and shadows – everything you see in the image when you look at it from further away.

Why FS uses only two frequencies 

The reason for this is because when you digitally analyze any image, it’s made up of only two kinds of information: color (low frequency layer), and details (high frequency layer). 

Color

Color is the uniform area that contains very little variation within the image. If you imagine a picture of lemon against a white background, you can coarsely describe it as the color and shape of a lemon or as vague and soft information, (see the image below). Now when you add variations in color and luminosity the lemon begins to look real. 

Detail

If we focus again on our low frequency information, you will notice that the one thing missing to achieve a high quality representation of a lemon is the detail. And so by adding detail or texture information to our imaginary lemon, it now resembles a real object. This detailed information is what makes up the high frequency layer. 

Side note

As an analogy, if you imagine acoustic waves, such as music, they are composed of many different frequencies. If you listen to only the low frequencies, (the bass) they will have a very broad and uniform sound that changes slowly with time, while the higher frequencies will have a narrower spectrum, and will change more quickly and precisely in space and time. Continuing this analogy, if the sound frequency is something that describes how quickly a given event happens over a certain amount of time, then it is the “spatial frequency” that describes how swiftly something changes in a certain amount of space, such as a photographic still image. It is this spatial information that also describes the periodic distributions of light and dark in a photograph. Now if you add time to a spatial image, you have a picture with motion, or what we call a motion picture.

Lesson #2 – Portraiture And Landscapes

A high frequency layer is made with the high pass filter. It holds the sharp details of your photo. A low frequency layer is made with the Gaussian blur filter and holds the tones and colors of your photo.

When combined, these two layers form a normal-looking image. By adjusting the balance of these two layers, you can choose how much softening to apply in the low-pass layer and how much detail to restore in the high-pass layer. You don’t really need to know how the whole FS process works but understanding the basics will allow you to tweak the process and achieve your own interesting effects. 

FS in portrait photography

When you think about it when your subject has a wrinkle, and you remove it with maybe the clone tool or one of the healing tools, it can look artificial, which can make your subject look like they’re made out of plastic, but if you want to make your subject to look real, frequency separation is a perfect way to tone down the wrinkles and remove temporary imperfections so that they don’t distract the viewer. 

Photo by Jessica Felicio

Misconceptions about portrait retouching

Many people believe that skin retouching should focus on getting rid of the texture and making the skin smooth. This is misleading because it is the skin texture that actually brings a photo to life and makes it appear realistic. The goal in retouching any photo is to repair any temporary skin imperfections, such as skin redness or blotchiness, as well as fix or enhance the shadows. The frequency separation method is much preferred to the Gaussian blur method. The FS method preserves all the detail you want. It is the preferred method of professional retouchers for magazines and print advertisements.

Skillfully using FS can help with problem areas like dark shadows, uneven highlights, smooth out areas of light and dark, as well as soften a subject’s skin without degrading the skin texture. Our visual system is very sensitive to the slightest variations in texture, and if not careful, a poorly retouched photo will be painfully evident. 

The bottom line is; if you want your photos to look realistic, and keep all the fine details, it’s better to use a non-destructive retouching method rather than blur your photo, by randomly using the healing brush tool, clone stamp tool, or perhaps Gaussian blur.

FS and landscape photography

Frequency separation is also an extremely useful tool for editing landscape/cityscape photos, and if used tastefully, can dramatically improve a composition.

To reiterate, FS works by automatically separating the color/tone and textures of an image into two separate high and low frequency layers that allow a person to retouch each layer independently without affecting the other. 

A: Combines the high and low frequency layers; B: Contains no detail but all the color (low frequency layer); C: Contains no color but all the detail (high frequency layer)

16-bit vs 8-bit image retouching

When using FS, always use 16-bit color depth if possible. This rule actually applies to any photo editing case. The higher the color depth of your image – the better. To give you a comparison, 16 bits contain 256 times more numerical values than 8 bits.

If you were to put it on a graph, this is what it would look like:

Limitations 

FS isn’t intended to remove major blemishes; rather, it should be used for less pronounced skin characteristics. This technique should find a place in your workflow after exposure adjustments and major blemish removal but before more stylistic edits such as dodging and burning. Skin retouching with FS is rather subtle.

Often, the most pleasant and sought-after effect in skin retouching is softening the skin tones. The results are often disappointing when working on an image with no FS, the skin texture and fine details can get lost, and you may end up with an unrealistic “porcelain doll” effect. 

Frequency separation can also be used to bring out some details not necessarily related to skin retouching. One example relates to the eyes. When we look at a real face, we’re often led to look at the eyes, and the same thing happens with a portrait image. By focusing on the eyes, we expect them to be perfectly sharp.

Lesson #3 – Common Issues

Every digital image consists of its most fundamental elements; the pixel and each pixel is associated with information that describes the image using a mathematical language. Individually the pixels can’t tell us much. In fact, they’re only colored squares, but when they’re put together and related to each other, not only do they allow us to see our final image, but they allow us to make considerations about how they relate to each other. There are many ways to analyze these mutual relationships, and frequency separation is one of the most used.

In essence, it’s possible to break down a photographic image into spatial frequencies; which is a technical term that implies we can make divisions according to the level of detail contained within different areas of an image, and then work selectively on these zones or layers without affecting the other layer.

Problem areas fixed using frequency separation:

  • Smooth out and color transitions in the skin 
  • Give a facial shape more dimension and shadow and light
  • Remove blemishes while maintaining skin texture 
  • Remove stray facial hairs and distracting flyaway hair
  • Cleanup of dust and scratches on a product
  • Remove the glare off a window     
  • Even out significant differences in skin tone, including fake tan lines
  • Remove sun flares, human/animal tracks, or any out-of-place elements 
  • Create amazing sharpness in sunrise landscape images
  • Retouch architectural, fabric, and automobiles imperfections 
  • Remove wrinkles, bags under the eyes, and blemishes. 

Texture grafting using frequency separation

From a retouching standpoint, there are few things more challenging than dealing with chunks of hair on the face, missing patches of skin texture and large folds of skin. The existing tools in Photoshop such as the healing brush or patch tool often fail in these situations. When all else fails there is a technique called texture grafting which utilizes the power of FS. It works by gradually replacing texture and then blending the tones and brightness to recreate a realistic appearance. This can be a time-consuming technique, depending on your experience in terms of retouching in Photoshop. 

This texture grafting technique involves four stages:

1: Separate the image into high and low frequencies using frequency separation

2: Replace areas of missing or undesirable texture with areas of good texture

3: Blend the underlying tones

4: Add polish with dodging and burning

If this wasn't clear enough, check out this texture grafting video tutorial:

Common Technical Frequency Separation Mistakes

1. Too large brush size – it should be smaller than the contours of the surface you're working on. In areas around the mouth, eyes, nose, chin – there are lots of contours in a tight space. Beginners often use too large of a brush here and end up flattening these areas out. 

2. Not respecting the direction of light change: paint along with the gradations and not perpendicular to them. 

3. Relying on Clone Stamp entirely; some tasks are easier tackled with the help of the Healing Brush tool or even a Paint Brush.

4. Doing too much retouching work with just frequency separation and forgetting about dodge & burn.

5. Not sampling often enough when applying corrections on frequency layers.

6. Making selections on the low frequency layer and blurring them instead of carefully correcting issues with a brush or the Healing Brush tool.

7. When working on the high frequency layer to graft texture from one area to another, not making sure that close attention is paid to how this borrowed texture now appears in its new location. Oftentimes, the appearance of sharpness/softness can vary greatly depending on the information underneath, on the low frequency layer (determined by factors such as the lighting, depth of field etc.) and must be adjusted accordingly. 

8. Remember: high & low frequency layers should always be working in unison.

9. Using an inappropriate radius setting that is either too large (which introduces color and contour into the high layer and makes working close to edges problematic) or too small (which leaves texture on the low frequency layer).

10. Beginners often don't completely understand what texture actually is. Many believe that texture is just the smallest details on the high frequency (top) layer – but that’s not entirely correct. You have to be mindful of the middle frequencies that end up on the low/bottom layer as well. If you don't, the image will look blurred as you zoom out even if it looks fine when you’re zoomed in close.

11. The main problem with this technique is when people use it as a shortcut. For instance, instead of doing the basic skin cleanup by hand. Using it this way usually means it winds up being much more heavy handed than it would be if you just put in the careful work with more traditional techniques.

12. And last, but not least, one of the hardest things for beginners to learn is restraint, keeping the work subtle.

Photo by Apostolos Vamvouras

Conclusion

If you have seen some of the portrait retouching videos on the internet, you have probably stumbled upon the term “frequency separation” at one time or another. FS is perhaps on the more advanced side of image editing, but that doesn’t mean you need to be an expert to learn it.  

We hope this article helped you understand FS better. It can be useful in both landscape and beauty retouching and while it can be rather time consuming technique, FS is definitely worth the effort. Check out our another tutorial on FS which is very detailed and shows you all the steps you need to take in order to master FS in Photoshop. This tutorial focuses on portraiture but you can experiment with it and apply it to landscape photography too.

Good luck!

Valuable Video Resources:

Frequency separation may sound complex but there are mounds of tutorials online that break down the precise how-to and set-up. Those references are listed below:

Further Reading:

Let's block ads! (Why?)


Light Stalking https://ift.tt/31v1loT

Sourced by Time Trap Photography sharing the best photography tips, news and tricks throughout the industry. Time Trap Photography is dedicated to freezing those special moments in life that can be revisited and admired for generations to come. - Shannon Bourque
Please visit our main site for booking availability and rates.


"Time


Receive valuable industry knowledge delivered free to your email each day.


"Time

30. März 2021

4:19:00 AM

Das Bild des Tages von: Nicole Seitz

rote Blume

Der Ausblick: Sich an den feinen Strukturen der Natur erfreuen.
kwerfeldein – Magazin für Fotografie https://ift.tt/31x6Jru

Sourced by Time Trap Photography sharing the best photography tips, news and tricks throughout the industry. Time Trap Photography is dedicated to freezing those special moments in life that can be revisited and admired for generations to come. - Shannon Bourque
Please visit our main site for booking availability and rates.


"Time


Receive valuable industry knowledge delivered free to your email each day.


"Time

Check Out Our Latest Community Update!

3:49:00 AM

Photography has the power of brightening up our lives; and what a great thing it is to start our days by checking out some beautiful images in the comfort of our homes! Here is the weekly wrap-up from Light Stalking – you'll find finely curated photos from the general chit chat, and creative images from Tersha's latest photography challenge on Abstract Nature in Black and White! And as you've already guessed, we'll be mentioning some worth-seeing shots from the Feedback Forum too!

Photo Of The Week – March 29th, 2021

Words by Jasenka Grujin

This week POTW goes to @johnteate and his long exposure shot of a river.

The image feels soothing, soft and gentle – almost therapeutic! It was the right decision to capture this as a long exposure because this approach enhanced the abstract character of the scene.

Congrats, John.

What Are Our Members Up To?

Pour some coffee and enjoy our favourite shots from Challenge 531st!

Photo by Tersha

What an elegant example of how high-key photography should be done! The entire orchid seems to fade against the pure whiteness in the back.

Photo by Kristi

The texture of the shot feels like glass, but the magic becomes evident after spotting the tiny hummingbird in the center of the frame.

Photo by Patrick

Beautiful swirl into the light!

Photo by Charmaine Joubert

Nice and beautifully lit detail; notoriously obvious, but still an abstraction.

Photo by Timothy S. Allen

In general, swirling petal-patterns of dahlias are eye-catching, but this one is particularly clean and almost symmetrical.

Photo by Wendy P

This looks spooky, and has a 1920's cinema look that makes it even more intriguing!

Photo by Pat Garrett

In Pat's words: “Vortex” Intentional Camera Movement created by using tight aperture, long exposure, and rotating my camera. Unlike Patrick’s almost the same image, this is not hay. It is grass and rock and my feet are the bottom of the vortex.

Photo by Seth L

It is hard not to think that this is from another planet!

Photo by Rob Eyers

Just stones, no sticks, and certainly a beautiful array of leading lines!

Photo by Brenda

Quite a muscular tree, if you ask me.

What You Shouldn't Be Missing From The Light Stalking Community

Beaky shared a lovely shot of two grey roos:

Robert shared a nice picture of two horses in the wild.

And an interesting capture from Crazy Woman Canyon:

John shared a really nice street photograph of some musician at the beach:

Rob made a huge crop on a landscape shot, and this is the result; it does look good like this tbh.

And Dahlia brought us closer to Joanne in this interview!

We'd Love To Hear Your Thoughts

Also, our Feedback Forum received some nice photographs and is clear that some of you have started building a solid photography style. This is the right place for all those people that want to grow fast as photographers. This is possible thanks to valuable and positive feedback, which is perhaps the best way in which someone can hack the learning curve in photography.

Here you'll get your work critiqued by plenty of well-intended people, but you'll also have the chance of critiquing your peers. We truly believe in the power of criticism and feedback. Many of our members have nurtured their own photographic knowledge by giving out elaborate critiques that go way beyond simple emoji-based reactions or “nice shot” comments. Here are some of the most interesting shots shared during the last week:

The Shark Tank is a great place to learn and to discuss, so please read the instructions in order to get a better critique experience. Share your comments, opinions and doubts on any or all of the images above. We also will be delighted to see some of your own images. Don't be shy, critiques are given to photographs and not photographers. We'll be more than pleased to help you out; after all, we all are in love with photography. Also, don't forget to participate in our 532nd challenge on Edit any Nature Shot in Balck and White!

Let's block ads! (Why?)


Light Stalking https://ift.tt/3wdQFZG

Sourced by Time Trap Photography sharing the best photography tips, news and tricks throughout the industry. Time Trap Photography is dedicated to freezing those special moments in life that can be revisited and admired for generations to come. - Shannon Bourque
Please visit our main site for booking availability and rates.


"Time


Receive valuable industry knowledge delivered free to your email each day.


"Time

Monday, March 29, 2021

#instakwer #102

10:18:00 PM

Manchmal finden sich die Themen für das #instakwer von allein. Ich öffne Instagram und mich springen die Bilder förmlich an, wie in der heutigen Ausgabe. Ich scrollte mich durch Eure Einreichungen und es gab plötzlich so viele surreale Portraits und Körperdetails zu entdecken. Aufnahmen, die mit dem Verstecken spielen. Das habt Ihr doch abgesprochen, oder?
kwerfeldein – Magazin für Fotografie https://ift.tt/2PiJ4bJ

Sourced by Time Trap Photography sharing the best photography tips, news and tricks throughout the industry. Time Trap Photography is dedicated to freezing those special moments in life that can be revisited and admired for generations to come. - Shannon Bourque
Please visit our main site for booking availability and rates.


"Time


Receive valuable industry knowledge delivered free to your email each day.


"Time

Photographer Wins Court Battle Over Picture of Prince Used As “Inspiration” for Andy Warhol Magazine Art Piece

6:49:00 PM

Back in 1984, the magazine Vanity Fair licensed an image of the musician Prince from photographer Lynn Goldsmith.

Photo by Steve Johnson from Pexels.

This photograph was later used as the inspiration behind an Andy Warhol art piece for the article though Goldsmith was unaware that this was the ultimate purpose behind the license of her image from which the work drew inspiration. 

The piece that Warhol completed accompanied an article in the magazine called “Purple Fame” though, again, Goldsmith did not know about any of this at the time. The Associated Press reports that Warhol created a further 15 pieces of art drawing inspiration from this same licensed photograph.

These pieces are collectively known as the Prince Series in Warhol’s oeuvre. Fast forward to 2016 (and the day after Prince’s death no less) and publisher Conde Nast contacted the Andy Warhol Foundation about using the 1984 piece. The collection was published in May of that year which also brought it to Goldsmith’s attention. She contacted the Andy Warhol Foundation and informed them that the Prince Series infringed her copyrighted image. The AWF then launched a suit against her in April 2017 in what many people think was a legal maneuver to head off a similar action by Goldsmith against the foundation. Goldsmith’s first court action didn’t go her way.

Oddly, the court, in that case, ruled that the work produced by Warhol was transformative because it was clearly identifiable as being in the artist’s iconic style. Aside from being a self-validating argument, it also creates an interesting area where, if you’re famous enough, you can rip off someone else’s art as long as the produced work is clearly identified as being part of your style.

You can view the original image at this link. And the Warhol at this link.

The appeals court agreed, stating

“The district court held that the Prince Series works are transformative because they ‘can reasonably be perceived to have transformed Prince from a vulnerable, uncomfortable person to an iconic, larger-than-life figure.’ Warhol, 382 F. Supp. 3d at 326. That was error.”

The court continues: “Though it may well have been Goldsmith’s subjective intent to portrayPrince as a “vulnerable human being” and Warhol’s to strip Prince of that humanity and instead display him as a popular icon, whether a work is transformative cannot turn merely on the stated or perceived intent of the artist or the meaning or impression that a critic – or for that matter, a judge – draws from the work. Were it otherwise, the law may well “recogniz[e] any alteration as transformative.”

Even with her victory, however, Goldsmith still has a battle ahead of her as the Andy Warhol Foundation plans on appealing. 

What do you think of the court’s ruling this case? Let us know your thoughts on that in the comments below.

Be sure to check out some of our other photography news on Light Stalking at this link right here.

[Associated Press]

What We Recommend to Improve Your Photography Fast

It's possible to get some pretty large improvements in your photography skills very fast be learning some fundamentals. Consider this the 80:20 rule of photography where 80% of the improvements will come from 20% of the learnable skills. Those fundamentals include camera craft, composition, understanding light and mastering post-production. Here are the premium guides we recommend.

  1. html cleaner  Easy DSLR –  Friend of Light Stalking, Ken Schultz has developed this course over several years and it still remains the single best source for mastering your camera by identifying the main things that are holding you back.
  2. Word to html  Understanding Composition – As one of the core elements of a good photograph, getting your head around composition is essential. Photzy's guide to the subject is an excellent introduction. Their follow-up on Advanced Composition is also well worth a read.
  3. Word to html  Understanding Light – Also by Photzy, the other essential part of photography is covered in this epic guide and followed up in Understanding Light, Part 2. This is fundamental stuff that every photographer should aim to master.
  4. Word to html  5 Minute Magic Lightroom Workflow – Understanding post production is one of the keys to photographs that you will be proud of. This short course by one of the best in the business will show you how an award-winning photographer does it.

Let's block ads! (Why?)


Light Stalking https://ift.tt/3fpoNfb

Sourced by Time Trap Photography sharing the best photography tips, news and tricks throughout the industry. Time Trap Photography is dedicated to freezing those special moments in life that can be revisited and admired for generations to come. - Shannon Bourque
Please visit our main site for booking availability and rates.


"Time


Receive valuable industry knowledge delivered free to your email each day.


"Time

29. März 2021

4:20:00 AM

Das Bild des Tages von: Sascha Uding

Unschärfe

Im Ausblick: Unschärfe. Was siehst Du?
kwerfeldein – Magazin für Fotografie https://ift.tt/3fm1enF

Sourced by Time Trap Photography sharing the best photography tips, news and tricks throughout the industry. Time Trap Photography is dedicated to freezing those special moments in life that can be revisited and admired for generations to come. - Shannon Bourque
Please visit our main site for booking availability and rates.


"Time


Receive valuable industry knowledge delivered free to your email each day.


"Time

Sunday, March 28, 2021

Wer war Tina Modotti?

10:19:00 PM

Wenn ich mir aussuchen könnte, über wen aus der Fotoszene ein Kinofilm gedreht werden sollte, dann würde ich ohne zu zögern Tina Modotti nennen. Das kurze Leben der Künstlerin war unfassbar turbulent und spannend. Und ihre Geschichte hat alles, was ein Blockbuster wohl so braucht: Liebesdramen, Intrigen, einiges an Prominenz und sogar Mord.
kwerfeldein – Magazin für Fotografie https://ift.tt/3sJBXaZ

Sourced by Time Trap Photography sharing the best photography tips, news and tricks throughout the industry. Time Trap Photography is dedicated to freezing those special moments in life that can be revisited and admired for generations to come. - Shannon Bourque
Please visit our main site for booking availability and rates.


"Time


Receive valuable industry knowledge delivered free to your email each day.


"Time

Class Action Lawsuit Filed Against Sony Alleges a7 III Shutter Defects Totally Breaking the Camera

8:49:00 PM

A class-action lawsuit was just filed against Sony that alleges the company’s a7 III is having significant shutter issues that, when they emerge, end up turning the camera into a very expensive door stopper and results in very, very expensive repairs to get it operational again.

Photo by a7 III from Sony.

Plaintiff John Guerriero filed his suit in the court of the Southern District of New York.

In the text obtained by Law Street Media, Guerriero alleges that: “(w)hen a user removes the lens, the shutter is closed and stuck. In most instances the shutter has become detached.”

Further, “the shutter blade catches on the front edge as it moves down in taking a picture … because the blades are positioned farther forward, so they ‘catch’ and fail to fully clear.”

Guerriero also complains that the shutters are fragile and delicate to use, resulting in operational scenarios that are less than ideal and that compromise the many benefits of the camera’s design. He also says that the camera “is unusually susceptible to disruption by small particles, even dust, which can cause the blades (to be) out of alignment.”

A potential workaround, disabling the electronic front-curtain shutter (EFCS), results in a less effective device, Guerriero argues.

Repairs for such a lens failure can be anywhere from $USD 500 to $USD 600 and the lawsuit notes that, while occurring sporadically, the defect often emerges outside of the camera’s warranty window.

Do you own a Sony a7 III? Have you had any issues with it? Do you know anyone that has? Let us know what you know about the Sony a7 III and its shutter in the comments below if you like.

Don’t forget to check out some of our other photography news at this link right here.

[PetaPixel]

What We Recommend to Improve Your Photography Fast

It's possible to get some pretty large improvements in your photography skills very fast be learning some fundamentals. Consider this the 80:20 rule of photography where 80% of the improvements will come from 20% of the learnable skills. Those fundamentals include camera craft, composition, understanding light and mastering post-production. Here are the premium guides we recommend.

  1. html cleaner  Easy DSLR –  Friend of Light Stalking, Ken Schultz has developed this course over several years and it still remains the single best source for mastering your camera by identifying the main things that are holding you back.
  2. Word to html  Understanding Composition – As one of the core elements of a good photograph, getting your head around composition is essential. Photzy's guide to the subject is an excellent introduction. Their follow-up on Advanced Composition is also well worth a read.
  3. Word to html  Understanding Light – Also by Photzy, the other essential part of photography is covered in this epic guide and followed up in Understanding Light, Part 2. This is fundamental stuff that every photographer should aim to master.
  4. Word to html  5 Minute Magic Lightroom Workflow – Understanding post production is one of the keys to photographs that you will be proud of. This short course by one of the best in the business will show you how an award-winning photographer does it.

Let's block ads! (Why?)


Light Stalking https://ift.tt/3rzeszI

Sourced by Time Trap Photography sharing the best photography tips, news and tricks throughout the industry. Time Trap Photography is dedicated to freezing those special moments in life that can be revisited and admired for generations to come. - Shannon Bourque
Please visit our main site for booking availability and rates.


"Time


Receive valuable industry knowledge delivered free to your email each day.


"Time

About Us

Time Trap Photography is dedicated to freezing those special moments in life that can be revisited and admired for generations to come. - Shannon Bourque

The lens in focus

“Life is like a camera. Just focus on what’s important and capture the good times, develop from the negatives and if things don’t work out, just take another shot.” — Unknown

TIME TRAP PHOTOGRAPHY COPYRIGHT 2016