
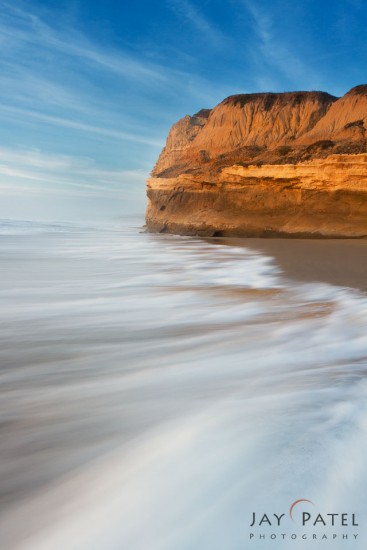
What if I ask you what’s wrong with the unprocessed landscape photo below? And how can you fix it?
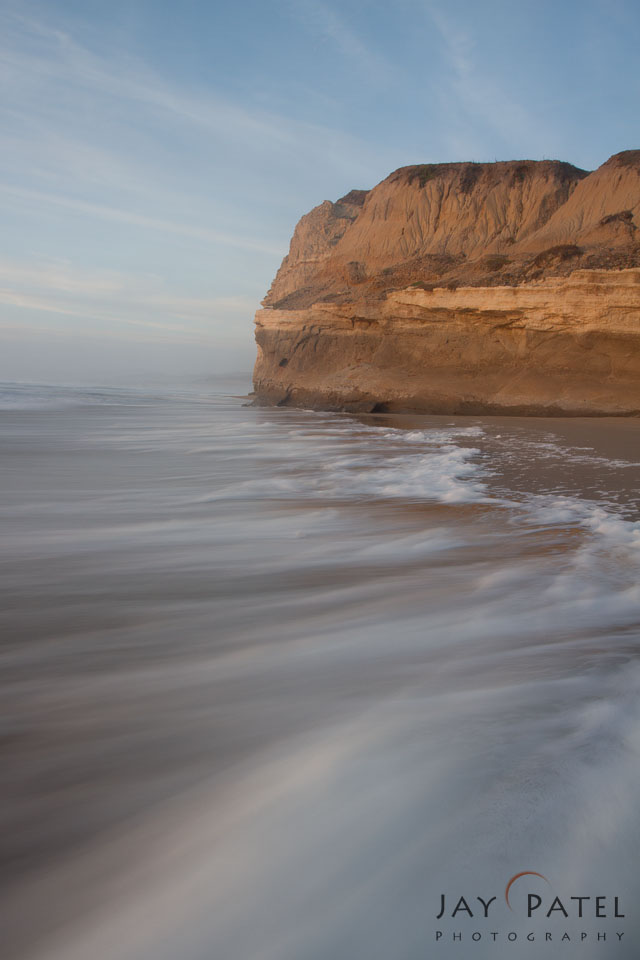
This is a trick question. If you open this image and look at its histogram, you’ll notice that the entire dynamic range is contained within a single shot. In fact, the image uses only part of the dynamic range that can be displayed by the camera. Sometimes, low contrast scenes like this create a problem for us. The scene as I remember it looked something like the one you see in the image 2?
-

Unprocessed: San Gregorio State Park, California (CA), USA
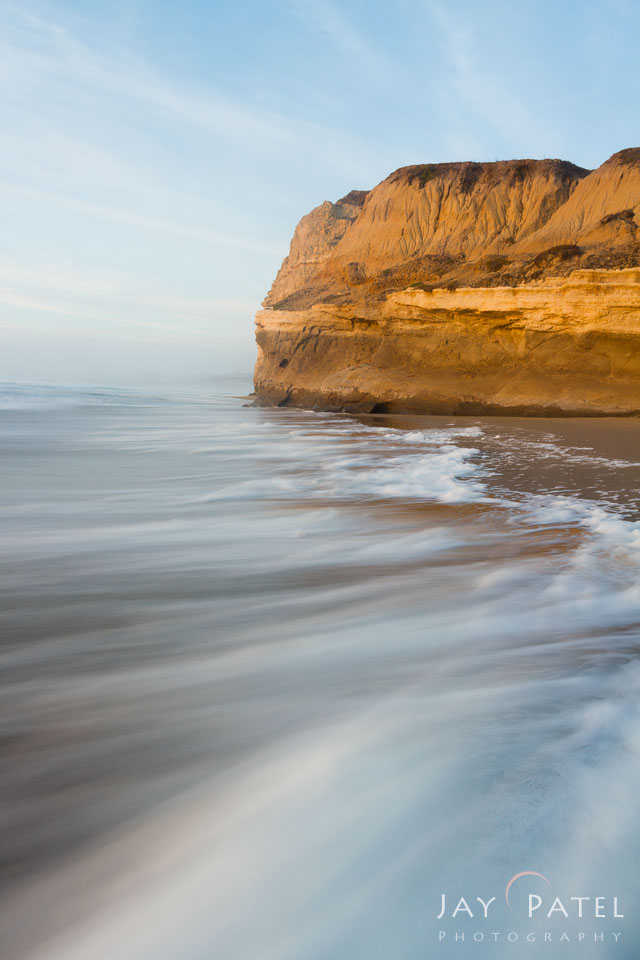
-
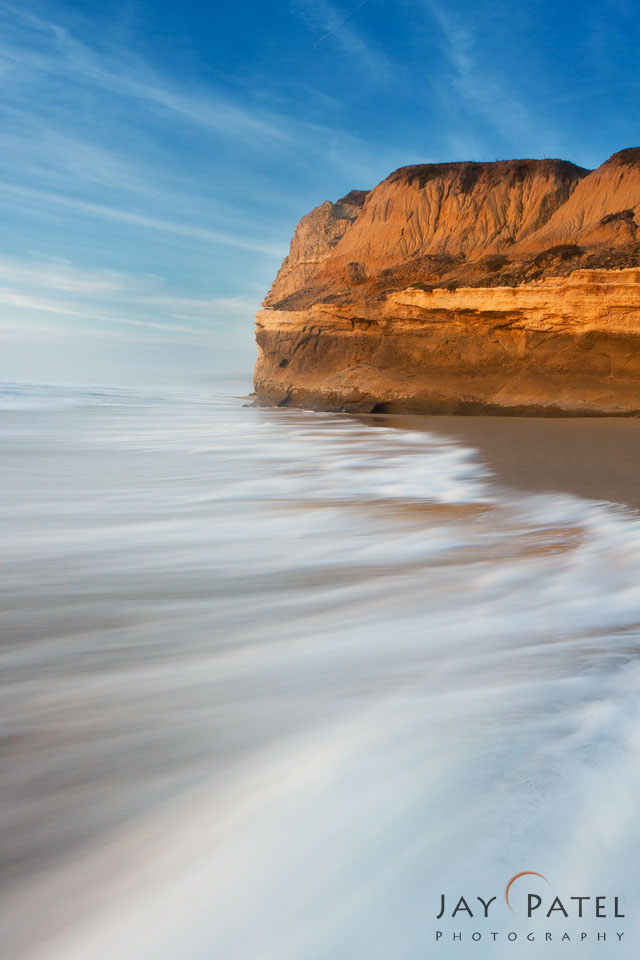
After processing in Photoshop: San Gregorio State Park, California (CA), USA
So what happened? Why did the camera fail to capture the image as I remember it even though it was an easy shot to take? Here is what happened:
- Low Contrast Landscape Photos: Sometimes we find ourselves photographing a scene where the light conditions are perfect. We can capture the entire dynamic range with a single exposure, so no special filters or bracketing is necessary. But when we open up the raw file, it appears to lack the contrast and details that we remember while out in the field. This occurs because, although the contrast and sensitivity of our eyes adjusts based upon the light conditions, the dynamic range of the camera’s sensor remains fixed. So, low contrast scenes end up using only a fraction of the dynamic range of the sensor which creates a flat and unappealing image. Here are some more before and after examples of low contrast landscape photos:
-

Before Processing – Douglas Falls, West Virginia
-

After Processing – Douglas Falls West Virginia
-

Before Processing – Brandyvine Falls, Ohio
-

Brandywine Falls, Ohio
-
- Unbalanced Light: On this particular day, the light in the sky was more intense then the light falling on the foreground. Why? Because a low-lying layer of mist on the horizon was blocking the light from falling on the foreground, while the sky was lit by direct sunlight. When the camera captured the photo, it over-exposed the sky and under-exposed the foreground.


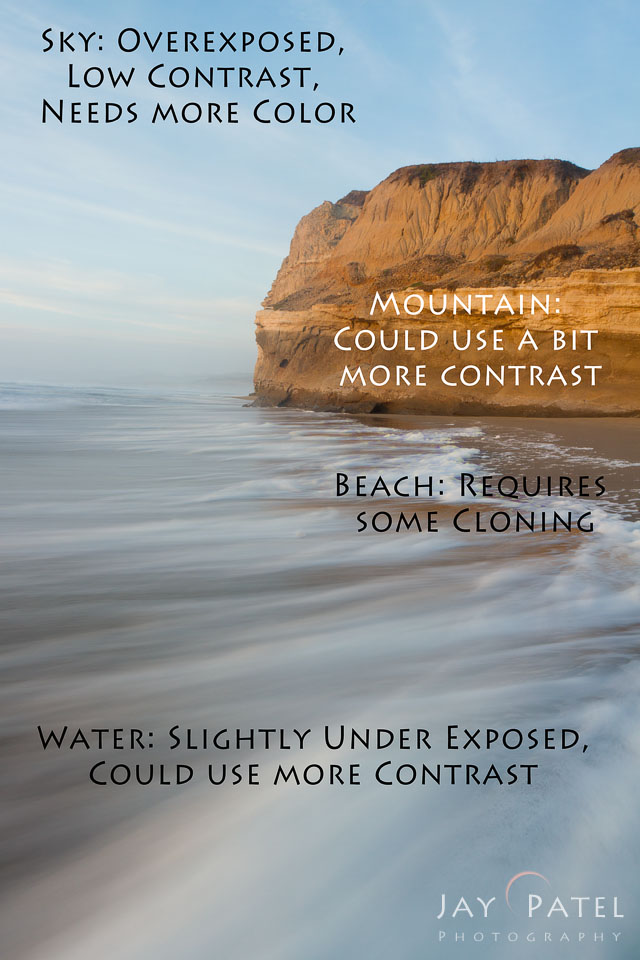
Image 1 below show the changes that were needed for processing this low contrast landscape photos. I used Photoshop layers and masks to make these changes. I processed the image twice – once for the foreground and once for the sky. I used Photoshop layers and mask to blend these two layers together.
- I processed the image twice – once for the foreground and once for the sky. I used Photoshop layers and mask to blend these two layers together.
-

Image 1: Post processing corrections needed in Photoshop
-

Image 2: Post Processing for foreground in Photoshop
-

Image 3: Post Processing for Sky in Photoshop

Then I used the curves tool and targeted adjustments to fine tune the contrast for the foreground, sky, and mountains to bring out the details and colors as I remember them. I used a separate clone layer to clone out the distracting foreground elements.

Final Photoshop Corrections
Our Blending with Light Photoshop Tutorial gives you an in depth look at how we use light create a stunning natural looking HDR images using Photoshop Layers & Masks. Our Blending with Light Photoshop tutorials avoid complicated, long-winded explanations and feature our simple, step-by-step process that we follow every time we blend.

Click for More Info
About Author Jay Patel
I could startoff like this – “Seeds of Jay Patel’s appreciation for beautiful places were planted early in his childhood….” but it would get boring really fast. I will just sum it up and say that I am a Landscape and Wilderness Photographer who loves to capture dramatic light. My photographs have been published in various magazines, calendars and advertising materials throughout the world.
Patience is a virtue...unless you are chasing your dreams
Visual Wilderness https://ift.tt/2mpPtzN
Sourced by Time Trap Photography sharing the best photography tips, news and tricks throughout the industry. Time Trap Photography is dedicated to freezing those special moments in life that can be revisited and admired for generations to come. - Shannon Bourque
Please visit our main site for booking availability and rates.

Receive valuable industry knowledge delivered free to your email each day.


No comments:
Post a Comment
Thank you so much for your comment. A moderator will review and approve all relevant posts. We appreciate your support and encourage you to stay with us by subscribing to our email updates. Where you can easily pick and choose what photography subjects interests you. Subscription link: http://bit.ly/photo-sub